A flat tire can ruin your ride. You need a quick fix to get back on the trail. Here are the 5 best puncture repair kits you can buy right now. This list of the best puncture repair kits helps you find the perfect mountain bike tire patch kit for your needs.
Ready to find your match? 🚲
- SUNSOUL Glueless Patch Kit: Best Glueless Kit for Speed
- Park Tool VP-1 Vulcanizing Patch Kit: Best Overall for Durability
- Lezyne Lever Kit: Best All-in-One with Levers
- Rema Tip Top Touring Patch Kit: Best Pro-Level Vulcanizing Kit
- Park Tool GP-2 Super Patch Kit: Best Budget Option
Detailed Reviews of the Top 5 Patch Kits
You got a flat. Now what? Choosing the right patch kit can turn a ride-ending disaster into a quick pit stop. Let’s dive into the details of our top picks so you can find the perfect one for your saddle bag.
1. SUNSOUL Glueless Patch Kit
When you need to get back on the trail fast, the SUNSOUL Glueless Patch Kit is your best friend. You don’t have to mess with separate tubes of glue or wait for anything to dry. This is the ideal glueless puncture repair kit for riders who value speed and simplicity above all else.
SUNSOUL has a massive global presence for a reason. The company makes over two million patches every month, and cyclists in more than 60 countries trust them. You get a reliable fix every time.
Here’s what makes the SUNSOUL kit stand out:
- Strong Adhesion: The patch uses a special vulcanizing gum that creates an airtight seal without liquid cement.
- Smart Design: Its round shape helps prevent the edges from peeling up over time, a common problem with square patches.
- Simple to Use: Just scuff the tube, peel the backing, and press the patch firmly in place. You are ready to inflate and ride in seconds.
- Works on Anything: You can use these patches on any bike tube, from a beefy mountain bike tire to a skinny road bike tire.
- Super Portable: The case is tiny and fits easily into the smallest pocket or tool roll.
If you want a no-fuss, no-mess solution that works right away, you can’t go wrong with SUNSOUL.
2. Park Tool VP-1 Vulcanizing Patch Kit
For a repair that is as close to permanent as you can get on the trail, you need the Park Tool VP-1. This kit uses a traditional vulcanizing fluid (that’s a fancy word for glue) to chemically bond the patch to your tube. This creates an incredibly strong and durable seal. Many riders consider it the best overall puncture repair kit for its sheer reliability.
The magic is in the patch design. The Park Tool VP-1 patches are thin and flexible. They feature special tapered edges that blend perfectly with the surface of your inner tube. This feathered-edge design creates a super smooth transition from the tube to the patch, which means no bumps and less stress on the repair. It makes the patch feel like part of the tube itself.
Pro Tip 💡: A vulcanizing patch takes a few minutes to set. Apply the glue, wait for it to get tacky, then apply the patch. This patience pays off with a rock-solid repair that will last for years.
This kit is a favorite in bike shops everywhere. It gives you the confidence that your patch will hold, no matter what the trail throws at you.
3. Lezyne Lever Kit
What’s better than a great patch kit? A great patch kit that comes with awesome tire levers! The Lezyne Lever Kit is an all-in-one solution that packs everything you need into one slick case. If you love organized gear, this is one of the best puncture repair kits for you.
The kit includes a scuffer and high-quality glueless patches. The real stars, however, are the integrated tire levers. These aren’t cheap plastic levers that snap when you look at them. The Lezyne levers are made from strong, lightweight aluminum. You can confidently pry off even the tightest-fitting mountain bike tires without worrying about breaking a tool.
This kit is designed for the minimalist rider. Check out these specs:
| Feature | Detail |
|---|---|
| Weight | 46.8g |
| Size | 100mm x 48.2mm x 17.7mm |
| Levers | Integrated, made from aluminum. |
The entire package weighs just 46.8g and measures 100mm x 48.2mm x 17.7mm. It’s so small and light you’ll forget it’s in your pack until you need it. This clever design ensures you always have your levers and patches together. No more digging around for separate tools!
4. Rema Tip Top Touring Patch Kit
If you ask a bike mechanic what they use in their own shop, you’ll hear the name “Rema Tip Top” over and over. This isn’t just a patch kit; it’s a professional-grade repair system. It uses a vulcanizing fluid to create a permanent chemical bond, making it the top choice for riders who refuse to compromise on reliability.
So, what’s the secret? Rema designed its patches and cement to work together as a two-component system. Using one without the other is like trying to make a peanut butter sandwich without the peanut butter. The chemical reaction between the specific Rema fluid and the Rema patch creates a bond that truly fuses the patch to the tube.
Bike mechanics who patch hundreds of tubes a year trust Rema for a few key reasons:
- Superior Bond: They know that cheaper cements just don’t hold up and often lead to patches peeling off later.
- Proven System: The Rema patch and fluid are formulated to work together, ensuring a perfect, permanent seal every time.
- Time-Saving Reliability: A repair done right the first time saves frustration and effort down the road. You won’t have to re-fix a leaky patch.
Heads Up! 💡 The Rema Special Blue Cement has a shelf life of about one year from its manufacturing date. To guarantee a strong bond on the trail, it’s a smart idea to grab a fresh kit at the start of each riding season.
This kit is for the rider who prepares for the worst and demands the best. It takes a few extra minutes to apply, but the peace of mind you get from a permanent, professional-level repair is priceless.
5. Park Tool GP-2 Super Patch Kit
Need a quick, simple, and incredibly affordable fix? The Park Tool GP-2 Super Patch Kit is your answer. This is one of the best puncture repair kits for riders who want a no-fuss solution that just works. It’s a glueless kit, meaning you can patch your tube and get back to riding in under a minute.
The GP-2 kit is brilliantly simple. You just rough up the puncture area with the included sandpaper, peel a patch off the sheet, and press it on firmly. That’s it. No waiting for glue to dry, no messy fingers. The patches themselves are specially developed to be flexible and strong, so they stretch and move with your tube as it inflates and rolls over terrain.
Here’s the best part: this kit is a fantastic bargain.
| Feature | Detail |
|---|---|
| Type | Pre-Glued (Glueless) |
| Contents | 6 Patches, 1 Sandpaper |
| Price | Around $6.95 |
For less than $7, you get a reliable kit from one of the most trusted names in cycling tools. At that price, you can easily stash one in every saddle bag, backpack, and car you own. You’ll never be caught without a patch again. Its tiny, waterproof case fits anywhere, making it the perfect companion for minimalist riders and racers.
How to Choose the Best Mountain Bike Tire Patch Kit
Picking the right kit can feel tricky, but it really comes down to your riding style and what you value most in a repair. Let’s break down the key things you need to consider to find the perfect mountain bike tire patch kit for your pack.
Glue vs. Glueless: Which is Right for You?
Your biggest choice is between a traditional glue-on kit and a modern glueless one. Each has its place on the trail.
Glueless patches are all about speed. They work like super-strong stickers with a pressure-sensitive adhesive. You just peel the backing and press it on. This makes for a very fast repair, getting you back on your bike in minutes without any messy glue. They are a fantastic fix to get you home safely.
Glue-on patches offer a permanent solution. These kits use a vulcanizing fluid to create a chemical bond between the patch and the tube. This process takes a few extra minutes but creates a repair that is as strong and durable as the tube itself. For a fix you can trust for hundreds of miles, a glue-on kit is more reliable.
What Patch Shape and Size Do You Need?
Patches come in different shapes and sizes for a reason.
- Round patches are perfect for simple, small punctures. Their shape has no corners, which helps prevent the edges from peeling up over time.
- Oval or rectangular patches are better for fixing long tears or a “snake bite,” where you have two holes close together.
A versatile mountain bike tire patch kit will often include a few different sizes so you are prepared for any type of flat.
What Should a Good Kit Include?
When you open a patch kit, you should find a few essential items. A complete kit ensures you have everything you need for a successful trailside repair. Look for these four things:
| Item | Purpose |
|---|---|
| Patches | The main event! You need these to cover the hole. |
| Adhesive | Either pre-applied on glueless patches or in a tube of cement. |
| Scuffer | A small piece of sandpaper or a metal grater to rough up the tube. |
| Case | A small, sturdy container to keep everything clean and together. |
Some kits even include tire levers, which is a huge plus. Having all your tools in one spot makes a stressful situation much easier to handle.
How to Patch a Bike Tube on the Trail
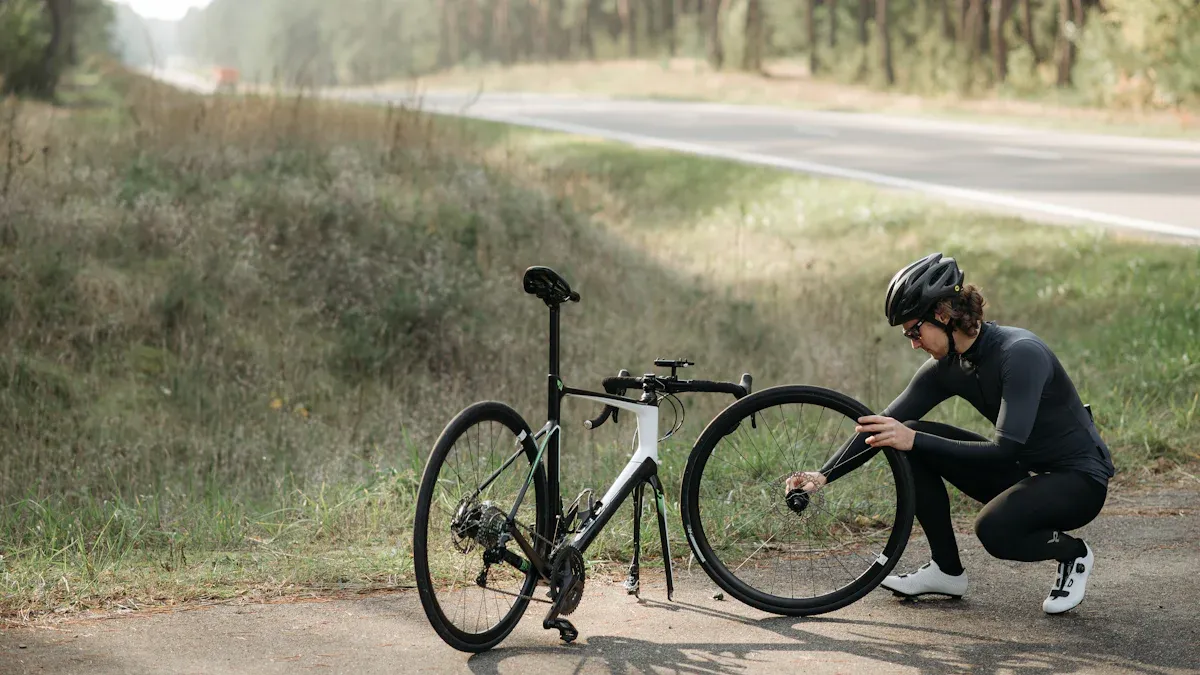
Knowing how to fix a puncture is a core skill for any mountain biker. A flat tire doesn’t have to end your ride. Follow these simple steps to get your tube patched and get back to the fun.
Step 1: Find the Puncture
First, you need to find that sneaky hole. Remove the tube from your tire and pump some air into it.
- Pump the tube until it is firm, about twice its normal size inside the tire. This makes the hole bigger and easier to find.
- Listen closely for the hissing sound of escaping air.
- Run the tube past your cheek or lips, as your skin is very sensitive and can feel the leak.
Can’t find the leak? Try this! 🕵️ If you have a tiny, slow leak, it can be tough to locate. If you carry a small spray bottle with soapy water, you can use this pro trick:
- Make sure the tube is well-inflated.
- Spray the soapy solution all over the tube.
- Watch carefully for bubbles to form. The bubbles will pinpoint the exact location of your puncture!
Once you find the hole, mark it with a piece of chalk or by scratching a small “X” nearby so you don’t lose it.
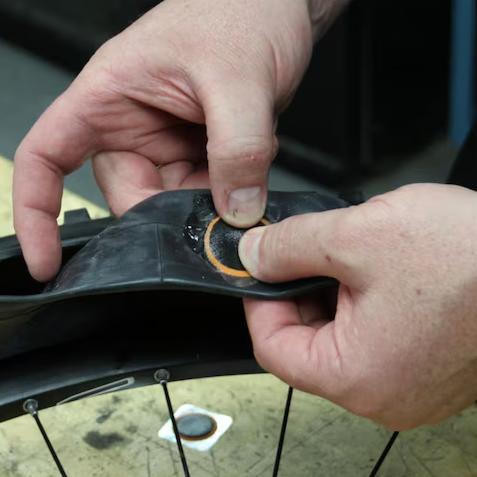
Step 2: Prep the Tube Surface
A clean surface is essential for a strong patch. Use the scuffer from your kit—it might be a small piece of sandpaper or a metal grater.
Gently rough up the area around the puncture. You want to create a textured surface that is slightly larger than the patch you will use. This helps the adhesive grip the rubber. Wipe away any rubber dust with a clean finger or cloth. This step is critical for both glueless and glue-on patches.
Step 3: Apply the Patch
Now it’s time to seal the deal. The method changes slightly depending on your kit.
- For Glue-On Patches: Squeeze a thin layer of your puncture repair solution (the cement) onto the prepped area. Spread it evenly and wait a few minutes for it to become tacky. Then, press the patch on firmly.
- For Glueless Patches: Simply peel the backing off the patch and press it firmly over the hole.
For either type, applying strong pressure is key. Use a tire lever or the bottom of a CO2 cartridge to rub the patch on, especially around the edges. For a glueless patch, hold it tight for about 10 seconds to ensure a solid bond.
Step 4: Reinstall and Inflate
You did it! The patch is on, and your tube is ready for action. Now, let’s get it back in the tire correctly so you don’t cause a new flat. This part is just as important as applying the patch itself. A little care here goes a long way.
Your patch and puncture repair solution have created a solid bond. It’s time to put everything back together. Follow these steps carefully to avoid a dreaded “pinch flat.”
- First, pump just a little air into your patched tube. You want it to hold a round shape, but not be firm. This helps it sit correctly inside the tire without twisting.
- Put the tube back inside the tire. Find the valve and line it up with the pressure info printed on the tire’s sidewall.
- Push the tire valve straight through the hole in your wheel’s rim.
- Now, use your hands to pop one side (bead) of the tire onto the rim.
- Tuck the inner tube completely inside the rim cavity, all the way around the wheel.
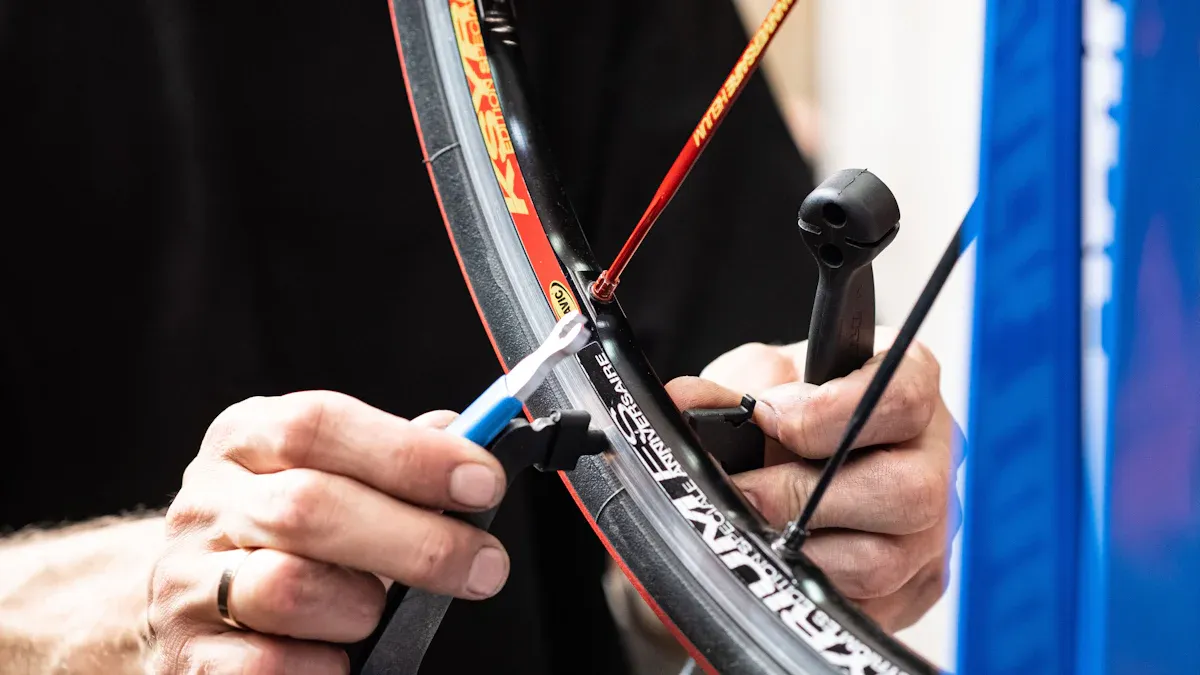
- Start working the second tire bead onto the rim with your hands. This part can be tough! If you need a tire lever, be very gentle so you don’t pinch the tube.
- Before you inflate, check both sides of the tire. Make sure no part of the tube is sticking out between the tire and the rim.
Final Check! ✅ Pump the tire up to a low pressure (about 20 PSI). Look at the molding line on the tire, just above the rim. It should be an even distance from the rim all the way around. If it dips down in one spot, the bead isn’t seated right. Let the air out and adjust it.
Once everything looks good, inflate your tire to your desired pressure. You are officially ready to hit the trail again!
Comparing the Best Puncture Repair Kits
So, how do you pick from the top contenders? The right mountain bike tire patch kit for you depends on what you value most: speed, permanence, or portability. Let’s break down the key differences to help you decide.
Speed vs. Permanence
When you get a flat, your first thought is probably, “How fast can I fix this?” This is where the biggest trade-off comes into play.
- Glueless patches are the champions of speed. You just scuff, peel, and stick. You can be back on your bike in a couple of minutes.
- Vulcanizing (glue-on) patches create a permanent, chemical bond. This repair is super strong but takes a few extra minutes for the glue to set properly.
Which One Lasts Longer? 🤔 A glueless patch is a fantastic trailside fix to get you home. However, a vulcanizing patch is a truly permanent repair. Check out how they compare for long-term use.
| Patch Type | Durability | When It Might Fail |
|---|---|---|
| Vulcanizing | Lasts for years; as strong as the tube. | Rarely, but bad glue can be an issue. |
| Glueless | A temporary or “limp-home” solution. | Can fail under high pressure or in cold weather. |
Kit Size and Portability
You have to carry your kit with you, so size and weight matter. Luckily, modern kits are tiny! A glueless kit from a brand like Park Tool or Lezyne can be as small as 4.25 x 4.02 x 0.71 inches. These kits are so light and compact you’ll forget they are in your pack. Vulcanizing kits are also small, but you have the added bulk of a small glue tube. For minimalist riders, every gram counts, making glueless kits a popular choice.
Included Tools and Value
Some of the best puncture repair kits offer more than just patches. Getting a kit with included tools can be a great value.
For example, you can buy a set of high-quality Pedro’s tire levers for about $6 to $8. However, some all-in-one kits, like the Lezyne Lever Kit, bundle strong levers right into the case. You can even find kits that include levers and patches for around $5. This not only saves you a few bucks but also ensures you have everything you need in one tidy package. An integrated mountain bike tire patch kit means less time digging through your bag and more time riding.
Choosing from the best puncture repair kits comes down to your needs. For fast and reliable trailside fixes, we recommend the SUNSOUL Glueless Patch Kit. It offers a great balance of speed and strong adhesion. Ultimately, the best kit is the one you feel confident using quickly when you get a flat.
Practice Makes Perfect! 🛠️ Don’t wait for a real flat to learn. Try patching an old tube at home. This ensures you are prepared and can fix a puncture without stress on the trail.
FAQ
Got a few more questions? We have answers! Here are some common things riders ask about patching a flat.
### Can I use a mountain bike patch kit on a road bike?
Yes, you absolutely can! Most patch kits are designed to be versatile. For example, a quality kit like the SUNSOUL Glueless Patch Kit works perfectly on any type of inner tube, from a wide mountain bike tire to a skinny road tire.
### How long does a glueless patch really last?
Think of a glueless patch as your get-home-safe card. It’s a strong temporary fix that will last for your ride. For a permanent repair that lasts for years, you should use a vulcanizing (glue-on) patch or replace the tube when you get home.
### Is it better to patch a tube or just replace it?
Patching is a great skill! It saves you money and is perfect for quick trailside repairs. Many riders patch a tube on the trail and then decide later if they want to replace it. Carrying a patch kit is much lighter than carrying multiple spare tubes.
### Why did my patch fail?
A patch usually fails for one of two reasons. You need to make sure the tube surface is properly prepped and that you apply enough pressure.
Troubleshooting Your Patch 🧐
- Did you scuff the area well? The tube needs a rough, clean surface.
- Did you press down hard enough? The patch needs firm pressure for about 30 seconds to create a strong bond.