
TRAINING BLOG
All tire patches look the same—but are they really
If you’ve ever repaired a punctured tire only to find it leaking again a few days later, you’re not alone.



If you’ve ever repaired a punctured tire only to find it leaking again a few days later, you’re not alone.

A flat tire never happens at a convenient time. It might occur during a late-night highway trip, on a remote

A flat tire is one of the most common problems drivers face. Whether caused by a nail, screw, or other
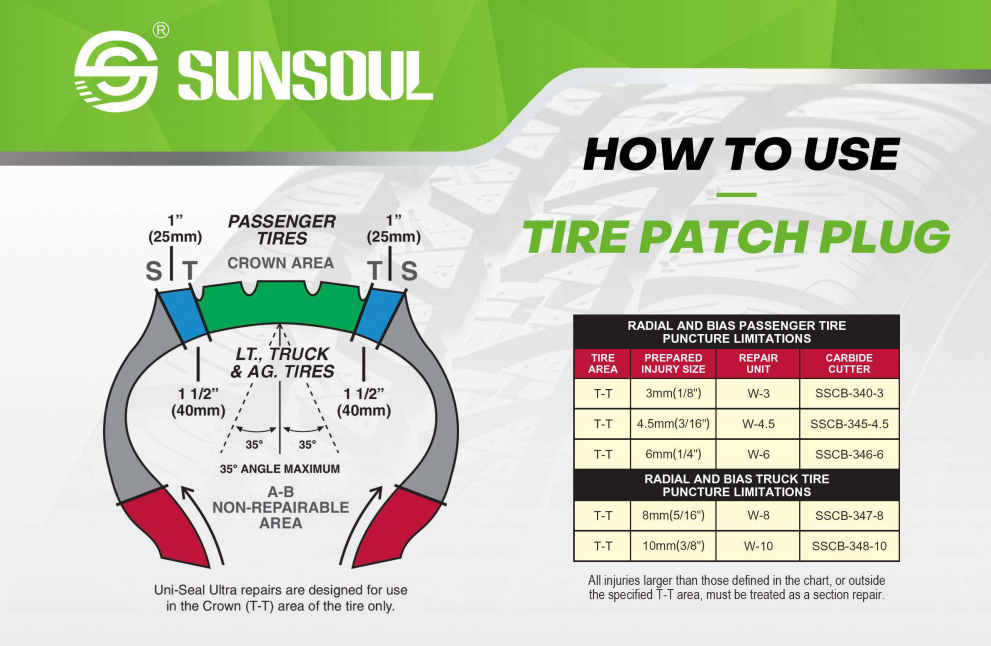
Step 1: Damage marking Locate and use Crayon to mark all damage on the inside and outside of the tire

Step 1: Mark the Damage Locate and use Crayon to mark all damage on the inside and outside of the

Step 1: Clean the Tire Surface Pre-clean the inner liner with Pre-Buff Cleaner rubber cleaner. Use a lint-free cloth to
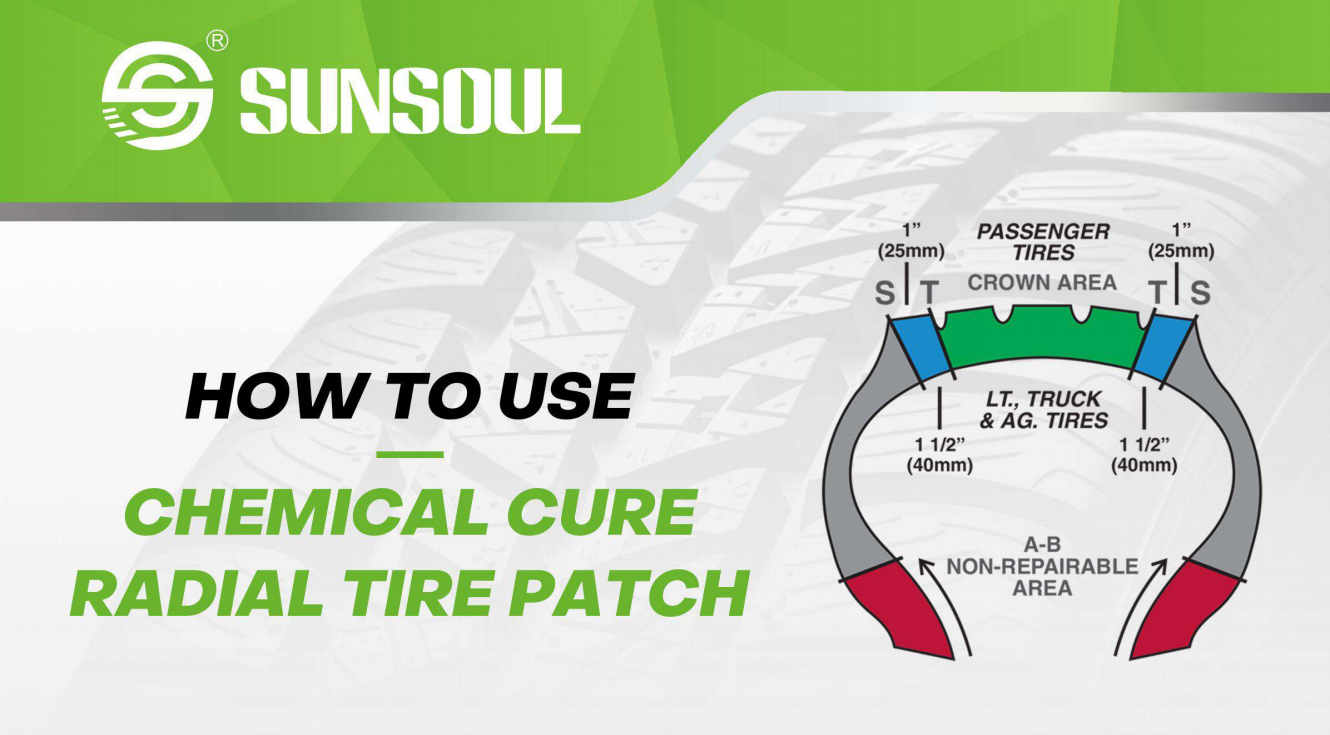
Step 1: Damage location & patch area marking Locate and use Crayon to mark all damage on the inside and
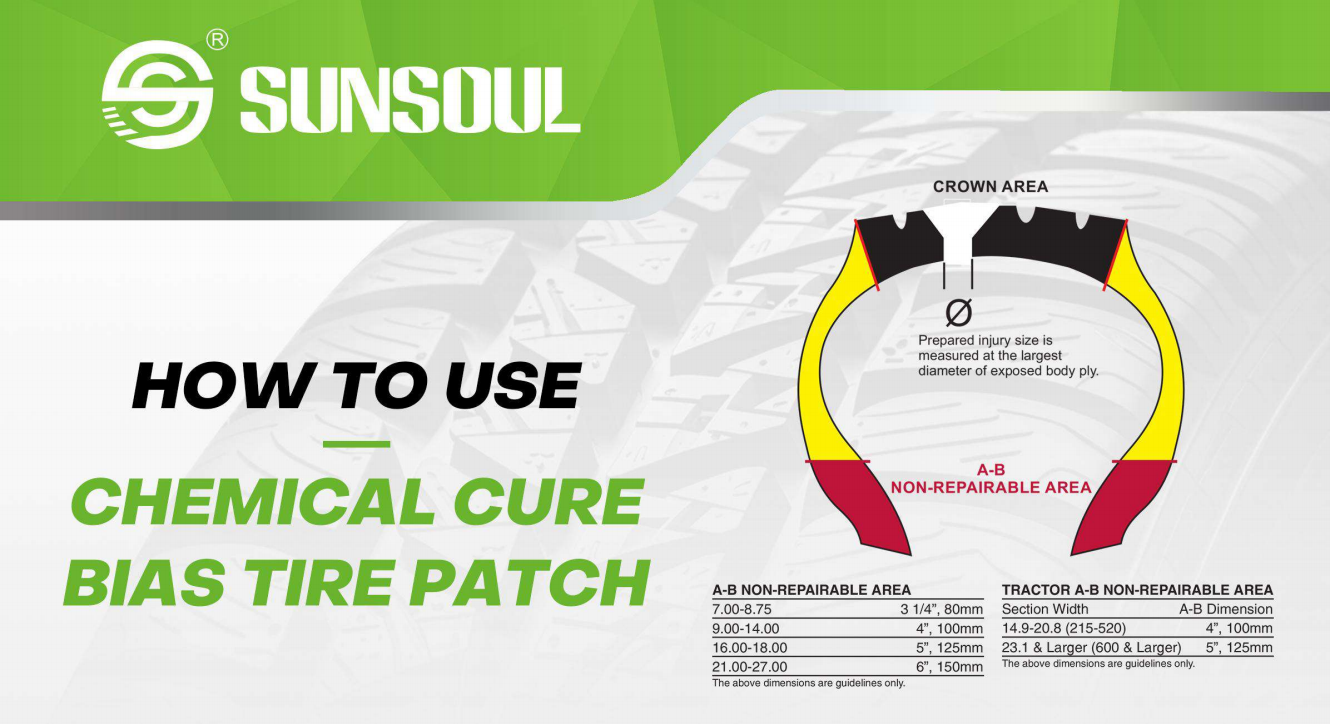
Step 1: Damage location & patch area marking Locate and use Crayon to mark all damage on the inside and
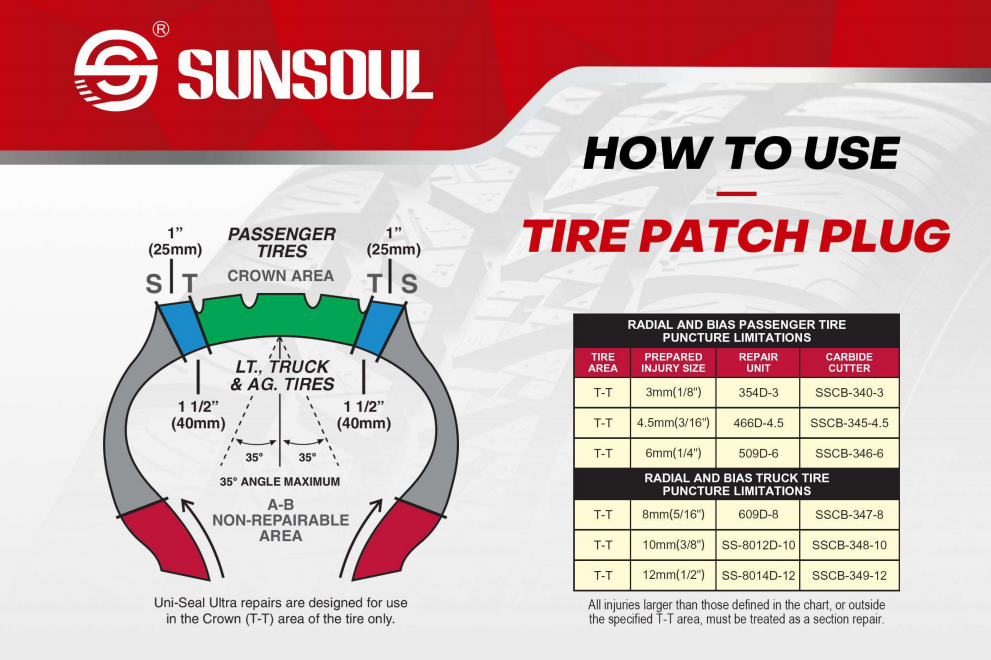
Step 1: Damage location & nail removal Step 2: Injury inspection & angle verification Step 3: Channel drilling & patch
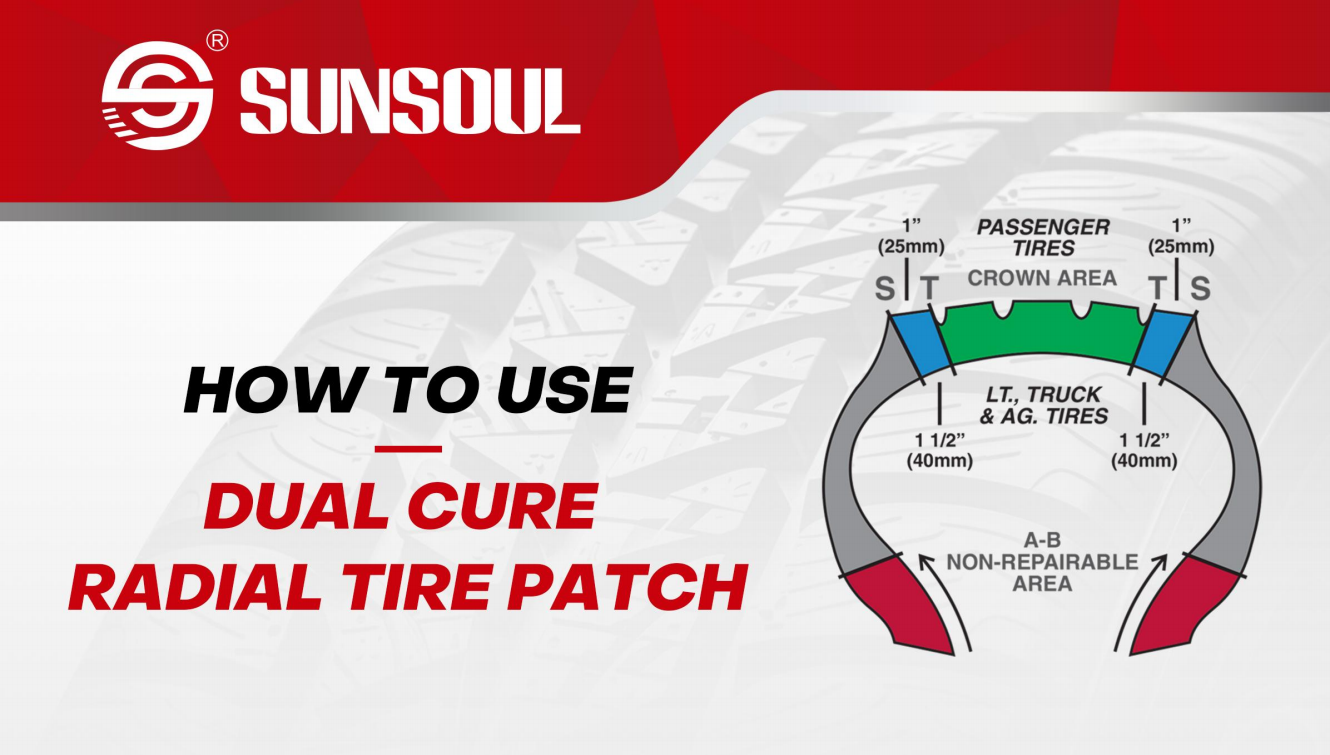
Step 1: Damage marking & area sizing Step 2: Chemical cleaning & scraping Step 3: Mechanical buffing & debris removal

Step 1: Injury Inspection & Buttonholing Step 2: Chemical Pre-Cleaning Step 3: Area Marking Step 4: Mechanical Buffing & Debris
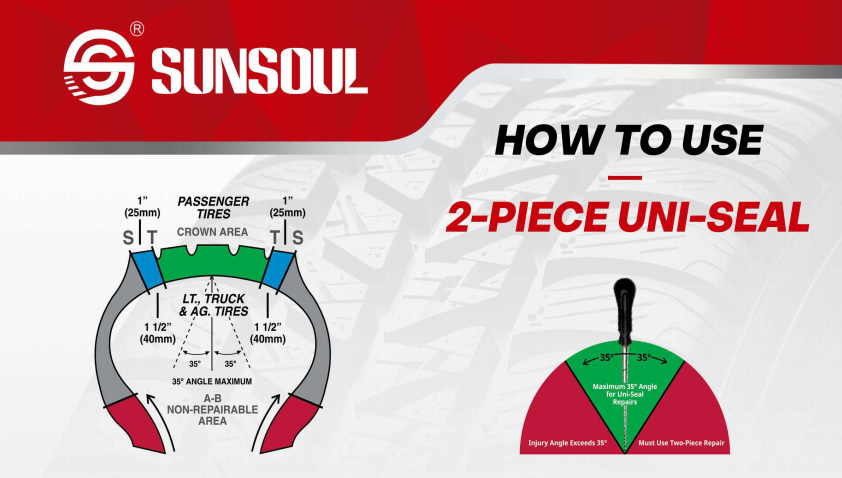
Assessment & Preparation (Steps 1–3) Sizing & Channel Cementing (Steps 4–6) Cleaning & Buffing (Steps 7–9) Patch Application & Rolling