You know a flat tire can ruin a great mountain ride. An average mountain biker gets about 3.82 punctures over three years. With tubeless systems projected to be 46.5% of the bicycle tire market by 2025, a good repair kit is essential. Your choice of mtb tire patch kit depends on your specific needs. Here are our top picks to get you back on the trail.
- Best Overall Puncture Repair Kit: SUNSOUL Tubeless Tire Repair Kit
- Fastest Trailside Plug: Dynaplug Racer Pro
- Gold Standard for Tubes: Park Tool VP-1 Vulcanizing Patch Kit
- Best Compact Option: Lezyne Tubeless Insert Kit
- Best Glueless Solution: Park Tool GP-2 Super Patch Kit
In-Depth Reviews of the Best Puncture Repair Kits
Choosing the right kit can feel overwhelming. You need to know what works best for your setup and riding style. We broke down our top picks to show you exactly what makes each one stand out. This will help you find the perfect match for your mountain bike adventures.
SUNSOUL Tubeless Tire Repair Kit: Best Overall
The SUNSOUL Tubeless Tire Repair Kit earns our top spot for its incredible value and comprehensive design. SUNSOUL is a major global supplier, producing over two million tire patches each month. This massive scale allows them to deliver a reliable, feature-packed kit at a competitive price. You get a complete solution trusted in over 60 countries.
This kit prepares you for almost any tire issue on the trail. Its design focuses on efficiency and durability. This versatility makes it one of the best puncture repair kits available.
- Complete Set: The 40-piece kit includes everything you need.
- Ergonomic Tools: A T-handle design gives you excellent grip for quick repairs.
- Strong Patches: The patches provide powerful adhesion for a secure seal.
- Durable Case: A sturdy case protects your tools and supplies.
- Wide Compatibility: It works on both tubeless and tube-type tires for maximum flexibility.
This kit is not just for your mountain bike. You can also use it for cars, ATVs, and motorcycles. It is a fantastic all-in-one investment for anyone with multiple vehicles.
Dynaplug Racer Pro: Fastest Trailside Plug
A puncture can happen fast. You need a repair that is just as quick. The Dynaplug Racer Pro is built for pure speed. In our tests, we found you can plug a 2.5mm hole in about 28 seconds. This time starts from the moment you begin the repair. You can get your tire sealed before it loses too much air.
The tool’s high-quality construction makes it both lightweight and incredibly strong. It weighs only 26 grams, so you will barely notice it in your pack.
Tech Breakdown: What Makes It So Good? ⚙️ The Dynaplug Racer Pro uses premium materials for top performance. The tool body is machined from Billet 6061 Aluminum for strength. Its insertion tube is made of hardened 304 Stainless Steel. The plugs themselves use Viscoelastic Impregnated Rubber to create a powerful seal. Finally, the soft brass plug tips protect your wheel rims during insertion.
This combination of speed and quality makes the Dynaplug Racer Pro a favorite for racers and riders who value every second.
Park Tool VP-1: The Gold Standard for Tubes
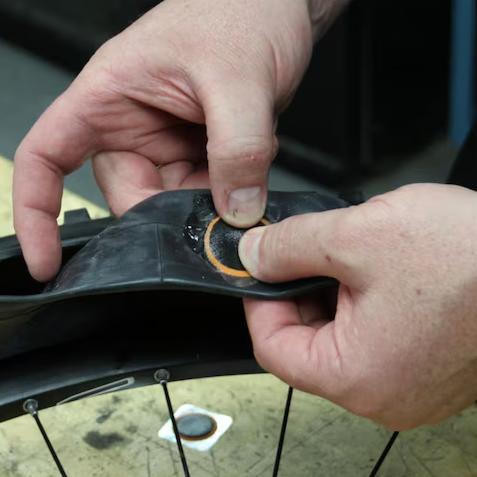
Many riders still use inner tubes. For them, the Park Tool VP-1 Vulcanizing Patch Kit is the undisputed champion. This kit is a classic for a reason. It creates a permanent repair, not just a temporary fix. This is one of the best puncture repair kits for traditionalists.
The magic is in the self-vulcanizing fluid. This fluid creates a permanent molecular bond between the patch and your tube. The patch essentially becomes part of the tube itself, ensuring an airtight seal that will not peel or leak over time. Using these types of puncture repair kits gives you confidence for any mountain ride.
Note on Safety: This product contains chemicals like Di(2-ethylhexyl)phthalate (DEHP), as indicated by a California Proposition 65 warning. Always use it in a well-ventilated area and follow the safety instructions.
A proper repair with the VP-1 is simple:
- Scuff the area around the puncture with the included sandpaper.
- Clean the scuffed surface thoroughly.
- Apply a thin layer of the vulcanizing fluid.
- Wait for the fluid to dry, then firmly press the patch onto the tire tube.
This proven method ensures your repair will last the life of the tube.
Lezyne Tubeless Insert Kit: Stealthy and Compact
If you value a clean cockpit and hate carrying extra gear, the Lezyne Tubeless Insert Kit is for you. This tool is the best compact option because it disappears inside your handlebars. You get a full-function tubeless repair tool without adding any bulk to your pack or bike frame. It is always there when you need it and completely out of sight when you do not.
The kit is machined from lightweight, durable aluminum. It includes a combined tire reamer and insertion tool, plus five high-quality tire plugs. You simply replace your standard bar-end plugs with the Lezyne kit. This clever design makes it one of the best puncture repair kits for minimalist riders.
- Weight: 35g
- Dimensions: 88.8mm, 24mm, 24mm
- Storage: Fits securely and discreetly into most mountain bike handlebar openings.
This setup ensures you never leave home without a way to fix your tire. You can ride with confidence, knowing a repair solution is always within reach.
Park Tool GP-2: Easiest Glueless Patches
For riders using inner tubes, speed and simplicity are key. The Park Tool GP-2 Super Patch Kit delivers on both fronts. These glueless patches eliminate the need for messy vulcanizing fluid and long drying times. This makes them one of the best puncture repair kits for fast fixes on the trail. You can repair a punctured tube and get your tire reinflated in just a few minutes.
The process is incredibly simple. You just use the included sandpaper to rough up the area around the hole, peel a patch from its backing, and press it firmly over the puncture. The specially developed 3M adhesive creates a strong, reliable seal. These are excellent puncture repair kits for any mountain adventure.
Many riders question if glueless patches can handle high pressure. While traditional glued patches are known for long-term durability, users report great success with the GP-2. Some have kept a tire sealed for years at 200 PSI on a mountain bike, while others have had zero issues on road tubes at 100-120 PSI.
This real-world performance shows that the GP-2 patches are more than just a temporary fix. They offer a dependable repair that gets you home safely. For this reason, they are considered among the best puncture repair kits for their convenience and reliability.
How to Choose the Right MTB Tire Patch Kit for You
Selecting the right mtb tire patch kit can feel complex. Your choice depends on your bike’s setup, your riding style, and what you value most in a repair. Understanding the main differences will help you find the perfect tool to keep you rolling.
Tubeless Plugs vs. Traditional Patches
Your first decision is based on your tire system. Do you run tubeless tires or use inner tubes?
- Tubeless Plugs: These are for tubeless tires. You use a special tool to insert a sticky, rubbery strip directly into the puncture from the outside of the tire. The sealant inside your tire helps create an airtight seal around the plug.
- Traditional Patches: These are for inner tubes. You must remove the tire to access the punctured tube. You then apply a patch directly onto the tube itself to cover the hole.
Key Features: Portability, Tools, and Plug Type
Once you know your system, look at the features of different puncture repair kits. The best puncture repair kits for mountain biking are both effective and easy to carry. Consider how you will use the tool on the trail. For repairs in wet or muddy conditions, certain features provide a huge advantage.
Key Tool Features for All-Weather Use 🌧️
- A waterproof alloy capsule keeps your plugs and tools dry. It often doubles as a handle, giving you a solid grip when your hands are wet or muddy.
- Waterproof construction for items like tire boots ensures your emergency fix holds up, even in a downpour.
Portability is also crucial. Some kits pack into a small case, while others hide inside your handlebars. The type of plug or patch also matters for your specific tire.
Glued vs. Glueless Patches: A Reliability Test
If you use inner tubes, you have another choice: glued or glueless patches. A glued patch, or vulcanizing patch, uses a chemical cement to create a permanent bond. The patch essentially melts into the tube, making a very strong repair. This process takes more time. A glueless patch uses a powerful adhesive for a quick peel-and-stick fix. This is much faster on the trail. While some riders worry about their long-term strength, many find glueless patches reliable enough for any mountain ride. Your ideal mtb tire patch kit balances speed with durability.
Mastering the Trail Repair: How to Use Tubeless Tire Repair Kits
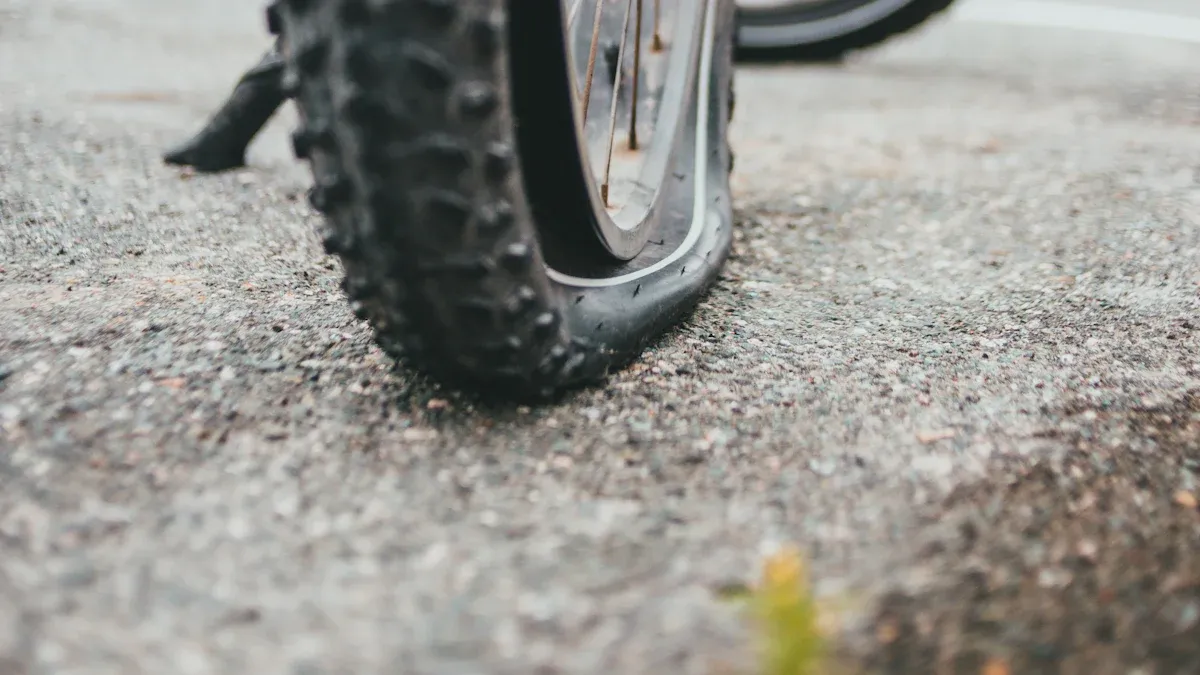
A flat tire can stop your ride, but it does not have to end it. Using tubeless tire repair kits is a fast and effective way to get moving again. You can master this essential trail skill with a few simple steps. This guide will walk you through the process, turning a frustrating delay into a quick fix.
Step 1: Locate the Puncture
First, you must find the hole in your tire. Stop riding immediately to prevent further damage or sealant loss.
- Listen: You can often hear the hiss of air escaping.
- Look: Slowly rotate the tire and inspect the tread for any sharp objects like thorns, glass, or rocks.
- Feel: Carefully run your hand over the tire surface. Be cautious to avoid cutting yourself on the object that caused the puncture.
Pro Tip: The Bubble Test 💧 If the hole is small and hard to find, pour some water from your bottle over the tire. Look for bubbles forming where the air is leaking out. This method pinpoints the exact location of the puncture.
Once you find the hole, leave the object in place for now. It helps you keep track of the spot and plugs the hole temporarily.
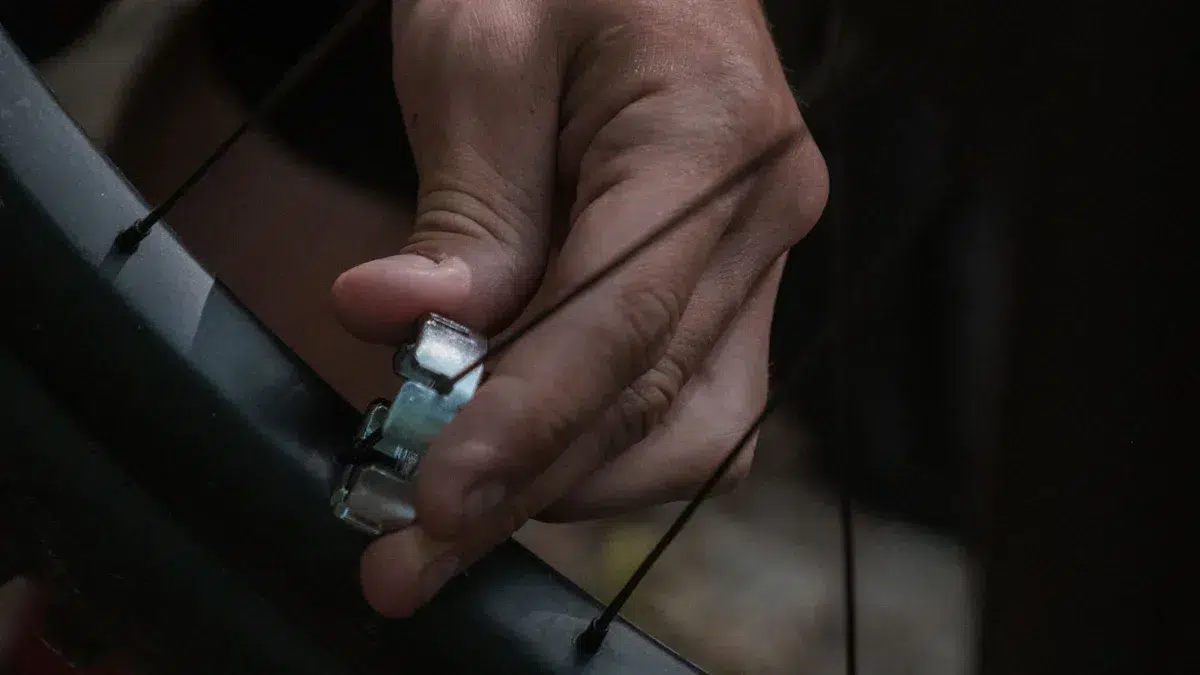
Step 2: Prepare the Hole with the Reamer
Next, you need to prepare the puncture site. Most kits include a reamer, which looks like a small, rough file with a handle. This tool cleans the hole and slightly enlarges it, creating a perfect surface for the plug to bond with.
- Remove the object that caused the puncture.
- Firmly push the reamer tool into the hole.
- Move the reamer in and out a few times. This action cleans away debris and roughs up the rubber inside the tire.
This step is crucial for a strong, lasting seal. A clean, uniform hole helps the plug and sealant work together effectively.
Step 3: Insert the Tire Plug
Now you are ready to plug the tire. Take a sticky plug from your kit and thread it through the eye of the insertion tool. You want an equal amount of the plug on each side, like threading a large needle.
| Action | Description |
|---|---|
| Push | Firmly push the insertion tool with the plug straight into the hole. |
| Stop | Leave about half an inch (1-2 cm) of the plug ends sticking out of the tire. |
| Pull | Quickly pull the tool straight out. The tool will slide off, leaving the plug behind. |
The two ends of the plug will remain outside the tire, and the sealant inside will immediately start to seal around it.
Step 4: Trim, Inflate, and Ride On
You have now plugged the hole. The final steps will get you moving again. Your goal is to secure the plug and get air back into your tire.
First, you need to trim the excess plug material. Most repair kits include a small blade for this purpose. Carefully cut the ends of the plug sticking out of the tire. You should leave about 5mm (or 1/4 inch) of the plug remaining. This small amount prevents the plug from being pulled out, but it is short enough to avoid catching on rocks or roots. Some riders skip trimming, but it is a good safety measure.
Next, it is time to add air. You can use a CO2 inflator for a quick blast of air or a mini-pump for more control.
- Inflate the tire to a lower pressure than you normally ride, around 15-20 PSI.
- This lower pressure helps the sealant form a strong bond around the plug without too much force pushing it out.
- Spin the wheel for about 30 seconds. This action spreads the liquid sealant evenly inside. The sealant will coat the plug and permanently seal any remaining gaps.
Final Check Before You Go ✅ Before you start riding hard, listen for any hissing sounds. You can also apply a little water to see if any bubbles form. If the seal is holding, you are ready to get back on the trail. Ride gently for the first few minutes to ensure the repair is solid.
Building Your Ultimate Trailside Flat Repair Kit
A great mtb tire patch kit is your first line of defense. You need a complete system to handle any flat tire situation. Building a comprehensive kit ensures you can fix almost any problem and get back to your ride.
The Essentials: Beyond Just the Patch Kit
Your repair strategy should go beyond just plugs or patches. You need a few more items to be truly prepared for any issue on the trail. These essentials complement your main puncture repair kits.
- Spare Tube: This is your ultimate backup, especially a lightweight one.
- Tire Levers: You need these to remove a tire if you must install a tube.
- Tire Boot: A simple boot, or even a foil wrapper, can cover large gashes from the inside.
- Spare Tubeless Valve: A bent or clogged valve can end your day without a spare.
- Inflation: You must have a way to get air back into your tire.
CO2 Inflators vs. Mini-Pumps
Choosing how to inflate your tire is a key decision. Both CO2 inflators and mini-pumps have their place. Your choice depends on what you value most: speed or reusability.
| Feature | CO2 Inflators | Mini-Pumps |
|---|---|---|
| Pros | Fast, compact, and lightweight. | Reusable, precise pressure control. |
| Cons | Single-use, no pressure control. | Slower, larger, and heavier. |
CO2 is great for a quick fix, but be careful. The rapid release of gas can sometimes freeze the sealant inside your tire. A pump offers endless air and more control for your mountain adventures.
Why You Still Need a Tube
You might wonder why you need a tube with a tubeless setup. A tube is your final safety net. Some damage is too severe for plugs and sealant alone.
A spare tube is non-negotiable for remote mountain rides. A large sidewall cut or a catastrophic rip in the tire carcass will stop sealant and plugs from working. In these moments, removing the tubeless valve and installing a tube is the only way to get home. It turns a ride-ending disaster into a manageable repair.
Our Testing Process for the Best Tubeless Repair Kit
We want you to have confidence in our recommendations. We developed a detailed testing process to find the most reliable kits. Our method combines controlled tests with real-world riding. This ensures our picks perform when you need them most.
How We Test for Speed and Ease of Use
A fast repair gets you riding again quickly. We test this in a controlled setting.
- We use a standard 2.5mm nail to create a consistent puncture in a tubeless tire.
- A stopwatch starts the moment we begin the repair.
- We time how long it takes to insert the plug and stop the air leak.
This process helps us identify the most efficient and easy-to-use kits. We look for clear instructions and tools that work well under pressure. A good kit should not require a lot of force or complicated steps.
Durability Testing on the Trail
A quick fix is useless if it fails minutes later. We take every repaired tire out for real-world testing. Our team rides these tires on the same local trail. This route includes a mix of challenging terrain.
Our Test Track Conditions 🚵 We test repairs over rocky gardens, root-filled sections, and fast-flowing singletrack. This variety of impacts puts maximum stress on the plug. We check for any air loss or plug failure after each ride.
This demanding test shows us which repairs hold up under actual mountain biking conditions. A durable plug must survive repeated hits and vibrations.
Why You Can Trust Our Recommendations
You can trust our reviews because we combine lab data with practical experience. We are passionate mountain bikers, just like you. Our process finds the best tubeless repair kit by measuring its performance in two key areas: speed in the workshop and strength on the mountain. This balanced approach means our top picks are not just fast—they are also tough enough for your next adventure.
A reliable repair kit is a non-negotiable piece of gear. It ensures a puncture does not end your ride. The SUNSOUL Tubeless Repair Kit is our top choice for its complete features and proven performance. Investing in a quality kit is a small price for peace of mind on the trail.
| Product Name | Price |
|---|---|
| Lezyne Classic Tubeless Kit | $12.99 |
| KOM Cycling Tubeless Tire Plug Kit | $16.99 |
| Stan’s NoTubes Dart Tool | $25.00 |
| Dynaplug Air Tubeless Tire Repair Kit | $74.99 |
You should assess your needs to select the perfect mtb tire patch kit. This choice helps you fix your tire and ride on safely.
FAQ
Can I reuse a tubeless tire plug?
No, you should not reuse a tubeless tire plug. Each plug creates a permanent seal by bonding with your tire. Removing an old plug would damage the tire casing and ruin the airtight seal, making a new repair much more difficult.
How often should I replace my tubeless sealant?
You should check your tire sealant every 2 to 6 months. The liquid sealant dries out over time. Hot, dry climates can cause it to dry faster. Topping it off ensures it is ready to seal a puncture when you need it.
Are glueless patches a permanent fix for tubes?
Glueless patches offer a fast and very reliable repair. Many riders use them for years without issues. However, a traditional glued (vulcanizing) patch creates a stronger chemical bond with the tube. It is considered the most permanent type of repair available.
Does CO2 damage tubeless tire sealant? ❄️
Using a CO2 inflator can be tricky. The sudden blast of cold gas can sometimes freeze a small ball of sealant around the valve. While it often works fine, a mini-pump is a safer choice to protect your sealant’s performance.