Your tubeless tire setup is quickly becoming the standard, with experts predicting tubeless will claim 46.5% of the market by 2025. Their superior performance and reliability make them a favorite for off-road and adventure cycling. Knowing the correct tubeless tire repair method is essential for every rider.
The right fix depends on two things: the size of the hole and where it is. For small tread punctures, tire plugs offer a fast fix to get you riding again. For larger gashes or any sidewall damage, a permanent tire patch tubeless is the only safe and reliable repair.
First Step: Assess Your Tire Damage
Before you reach for any tool, you must stop and inspect the damage. A quick look tells you everything you need to know about the right fix. Your safety and the success of the repair depend on this first step.
Small Tread Punctures (Under 6mm)
You will most often find small punctures in the main tread of your tire. These are usually smaller than 6mm (about 1/4 inch). A sharp object on the trail or road typically causes this damage.
Common culprits include:
- Glass bits
- Hawthorn thorns
- Sharp rocks or nails
This is the best-case scenario for a flat. You can fix these small holes quickly with a tire plug and get back to your ride in minutes.
Large Tread Slices or Gashes (Over 6mm)
Sometimes, a sharp rock or piece of debris creates a long slice in your tire’s tread. If the hole is larger than 6mm, a standard plug will not work. The gash has lost too much rubber, and the tire cords may be damaged. Sealant and plugs cannot create a permanent seal in such a large opening. Instead, the sealant will slowly bleed through the hole, causing a slow leak instead of a solid repair. These larger injuries require a more permanent internal patch applied from inside the tire.
Critical Sidewall Damage
Safety Tip: Any damage to the sidewall is critical. The sidewall is much thinner and flexes constantly while you ride. This area lacks the thick rubber and steel belts found in the tread, making a safe tubeless tire repair impossible.
You must replace your tire if you see any of the following issues:
- A gash, cut, or bulge on the sidewall, even if it holds air.
- A puncture located on the shoulder, where the tread meets the sidewall.
- Visible dry rot or cracking rubber.
Attempting to plug a sidewall creates a major safety risk. The plug will not hold under the constant flexing, which can lead to a sudden blowout and loss of control. Always replace a tire with sidewall damage.
The Main Methods for Tubeless Tire Repair
Understanding the main repair methods helps you choose the right one for your situation. Each technique has a specific purpose, from a quick fix on the trail to a permanent solution in your workshop.
Tire Plugs: The Quick Trail-Side Fix
Think of tire plugs as the first aid for your tire. These sticky, rubbery strips are your go-to solution for small punctures in the tread. You carry them in a compact tubeless tire repair kit. The process is fast. You find the hole, ream it to clean the opening, and insert a plug using an installation tool. The sealant inside your tire helps seal any small gaps around the plug.
Note: A DIY repair with tire plugs is a fantastic way to finish your ride. However, its long-term reliability can vary. While a professionally installed plug can last for years, a trail-side fix may only last a day or a few rides. Always inspect your plug repair after your ride.
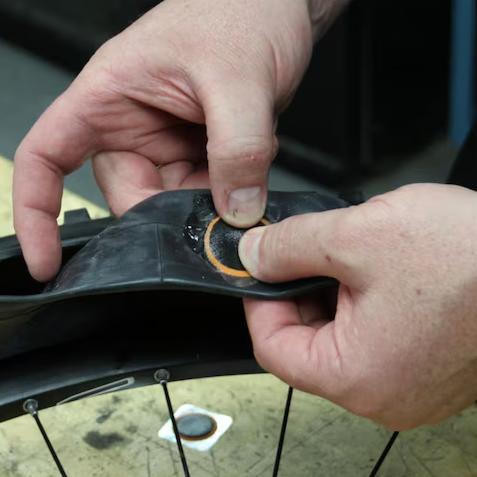
Internal Patches: The Permanent Workshop Solution
For a truly permanent fix, you need an internal tire patch tubeless. This is a workshop job you perform once you get home. Unlike a plug that fills the hole from the outside, a patch seals it from the inside. The process involves a chemical reaction called vulcanization.
This method creates a permanent, airtight bond that is as strong as the tire itself. Vulcanization:
- Uses a special rubber cement to create chemical cross-links between the patch and tire.
- Forms a complete, leak-proof seal that keeps moisture out.
- Restores the tire’s structural integrity by sealing the inner liner and filling the injury path.
This robust tubeless tire repair ensures the tire is safe and reliable for the rest of its lifespan.
Emergency Fixes: Using a Tire Boot to Get Home
Sometimes you face a gash too large for any tubeless tire repair. In this emergency, a tire boot can get you home. A boot is a small piece of thick, durable fabric. You place it on the inside of your tire to cover the large hole. Then, you must install an inner tube to hold air. The boot simply acts as a barrier to prevent the inner tube from pushing through the gash. This is not a permanent fix. It is a last-resort method to help you limp back safely.
Choosing the Best Tubeless Tire Repair Kit
Having the right tools makes all the difference between a frustrating delay and a quick fix. Your choice of a tubeless tire repair kit depends on whether you need a fast trail-side solution or a permanent workshop repair. You should prepare for both situations.
What to Look for in a Plug Kit
A good plug kit is your first line of defense on the trail. When you shop for a tubeless tire repair kit, you should look for a few key items. A complete kit gives you everything needed for a fast repair.
- Tire Plugs: Look for plugs made from durable rubber that can seal punctures up to 6mm.
- Insertion Tool: The tool is just as important as the plugs. A quality tool helps you make a successful repair without causing more damage.
- Reamer/Cleaner: This tool cleans the puncture site and prepares it for the plug.
- A Compact Case: A small, durable case keeps your tools clean and organized in your pack.
Pro Tip: Choose an insertion tool with a non-sharp tip. This design prevents you from accidentally puncturing your rim tape during the repair. A well-designed tool makes the process much easier and more reliable.
Selecting a Quality Tire Patch Tubeless System
For large gashes or a permanent fix, you need an internal tire patch tubeless system. These patches create a stronger, more durable seal from inside the tire. When you select a patch, look for professional-grade features. A high-quality patch has a feather-edge design. This thin edge prevents the patch from creating a bump inside your tire. The patch material itself is also crucial. Many top-tier patches use natural rubber for its excellent flexibility and strong adhesion.
Why SUNSOUL Patches Offer Superior Reliability
SUNSOUL patches are a great example of a high-quality repair system. They are designed for superior reliability and a permanent tubeless tire repair. SUNSOUL uses natural rubber, which helps the patch bond securely to your tire. Their design includes several key features:
- Strong Vulcanizing Gum: This special gum creates a powerful, leak-proof chemical bond between the patch and the tire.
- Durable Construction: The patches are thick and offer high tear resistance, ensuring the repair lasts.
- Round Shape: The round design helps prevent the edges from peeling or lifting over time.
When you build your home workshop, including SUNSOUL patches in your tubeless tire repair kit ensures you have a dependable solution for any major tire injury.
A Quick Guide: Which Repair Do You Need?
Let’s break down the damage and match it to the right solution. This simple guide helps you make the correct choice every time, ensuring a safe and effective repair.
Damage: Small Tread Puncture (<6mm)
You found a small hole from a thorn or nail in your tire’s main tread. This is the most common type of flat.
- Your Solution: A tire plug.
- Why: This is the fastest way to seal the hole and continue your ride. The plug, combined with your tire’s sealant, creates a reliable seal for small punctures.
Pro Tip: For a professional-level plug repair back at your workshop, you can make the seal even stronger. This process ensures the best possible bond.
- Drill the injury. You use a reamer or carbide cutter tool to clean out any damaged rubber or cords from the puncture.
- Clean the inner liner. You then buff the area around the hole on the inside of the tire to create a rough surface.
- Apply vulcanizing fluid. You apply this special cement to the buffed area and through the hole itself.
- Let it dry. You must allow the fluid to air dry for about 5-10 minutes before you insert the plug. This creates a permanent chemical bond.
Damage: Large Tread Puncture (>6mm)
You hit a sharp rock and now have a long slice or gash in your tread. A standard plug will just push through or fail to seal the large opening.
- Your Solution: An internal tire patch tubeless.
- Why: A large gash compromises the tire’s structure. You need to reinforce it from the inside. An internal patch creates a permanent, airtight bond that restores the tire’s strength and integrity. This is a workshop job that requires specific tools and patience.
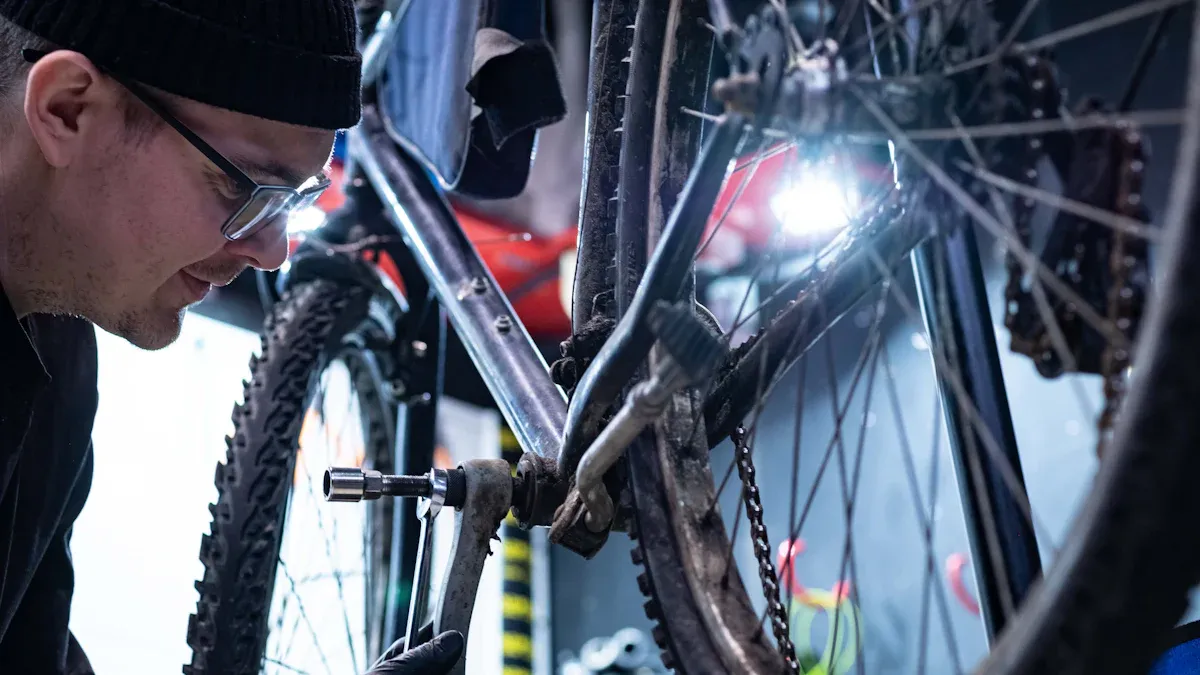
To do the job right, you need a full set of tools. This shows why it is a task for home, not the trail. Your toolkit would include:
- A tire spreader and an incandescent work light to find and inspect the damage
- Solvent and a low-speed tire buffer to prepare the inner surface
- A tire hole reamer to clean the injury path
- Vulcanizing cement and a quality patch
- A tire stitcher tool to press the patch firmly and remove air bubbles
- Pliers and dikes to remove the object that caused the flat
Damage: Any Sidewall Puncture
You see any cut, puncture, or bulge on the thin sidewall of your tire. This is the most dangerous type of tire damage.
- Your Solution: Replace the tire.
- Why: The sidewall is not designed for repairs. It is thin and flexes constantly as you ride. No plug or patch can safely hold under this stress. Attempting any tubeless tire repair on a sidewall creates a serious risk of a sudden blowout, which can cause you to lose control of your bike. Your safety is the top priority.
Emergency Action: If you are stuck on the trail, you can place a tire boot on the inside of the tire to cover the hole. Then, install an inner tube to hold air. This is a temporary fix only to get you home safely. You must replace the tire afterward.
Beyond the Patch: Tips for a Successful Tubeless Tire Setup
A successful repair is only one part of the equation. You can prevent many flats by maintaining a healthy tubeless system. Proper setup and regular checks keep your tires sealed and ready for the trail.
The Role of Sealant in Preventing Flats
Your tire sealant is your first line of defense against punctures. This liquid works inside your tire to plug small holes automatically.
Tubeless tire sealant is a liquid mixture. It contains materials like natural latex or carbon fiber. These particles float in the liquid and act like an adhesive. When a puncture happens, escaping air pushes the sealant to the hole. The particles clog the opening, allowing the latex to harden and form a plug.
However, this tire sealant dries out over time. You must check and refresh it to ensure it works. The lifespan of your sealant depends on the climate and how often you ride.
| Sealant Type | General Lifespan | Climate/Usage Impact |
|---|---|---|
| Latex-based | 2-4 months | Check more often in hot, dry weather |
| Non-latex | 6-12 months | Needs less frequent topping off |
| Stan’s Race Sealant | 30-60 days | Dries out very quickly |
| Muc-Off No Puncture | 2-3 months | Has a shorter lifespan |

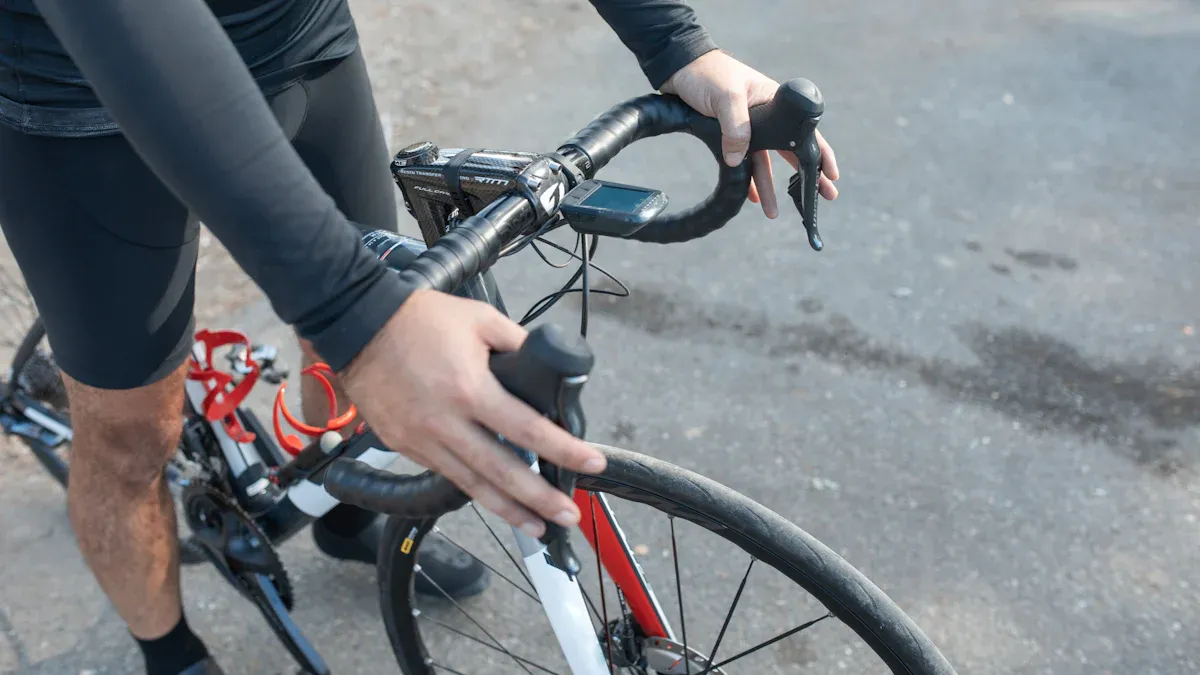
Proper Tire Installation and Seating
A great tubeless tire setup starts with a perfect installation. A poor seal at the rim will cause constant air loss. You can avoid most issues by paying attention to a few key steps during your tubeless tire installation.
To ensure a strong bead seal, you should:
- Prepare the Rim Correctly: Always clean the rim surface before applying tape. You should start the tape one or two spoke holes before the valve and end it past the valve. Make sure the tape is smooth, without any gaps or wrinkles.
- Use Proper Tire Mounting Technique: You can make the job easier by starting your tire installation opposite the valve. Keep both tire beads in the deep center channel of the rim as you work your way around.
- Inflate for a Strong Seat: You need a fast burst of air to snap the tire beads into place. Removing the Presta valve core allows for maximum airflow during this initial inflation.
Finally, you should inspect your tires regularly. Check your tire pressure monthly or before a long ride. Always check the pressure when the tires are cold for an accurate reading.
Your first step in any tubeless tire repair is to assess the damage. You can fix small tread punctures with tire plugs. Larger gashes or sidewall damage require a permanent tire patch tubeless.
Be Prepared for Anything:
- On the Trail: Carry a tubeless tire repair kit for quick, on-the-go fixes.
- At Home: Keep quality patches from a trusted brand like SUNSOUL for a workshop-quality repair.
A successful tubeless tire setup means being ready for any situation. This preparation ensures you can ride with confidence.
FAQ
Can I reuse a tire plug?
No. Tire plugs are designed for a single use. Reusing a plug compromises the seal and creates a significant safety risk. You must always use a fresh plug for every repair to ensure a dependable, airtight fix on the trail.
How long does a tire patch last?
A properly installed internal patch creates a permanent bond. The vulcanizing process makes the patch part of the tire itself. This professional-grade repair, like one done with SUNSOUL patches, will last for the remaining lifespan of your tire.
Why did my tire plug fail?
A plug can fail for a few common reasons.
- The hole was too large (over 6mm).
- The puncture was not cleaned properly before insertion.
- Your tire sealant level was too low to help seal the plug.
Do I still need sealant after patching a tire?
Yes. An internal patch repairs a specific, large injury. Your tire sealant remains your first line of defense, automatically sealing the new, tiny punctures you get on every ride. You need both for a complete and reliable tubeless system.