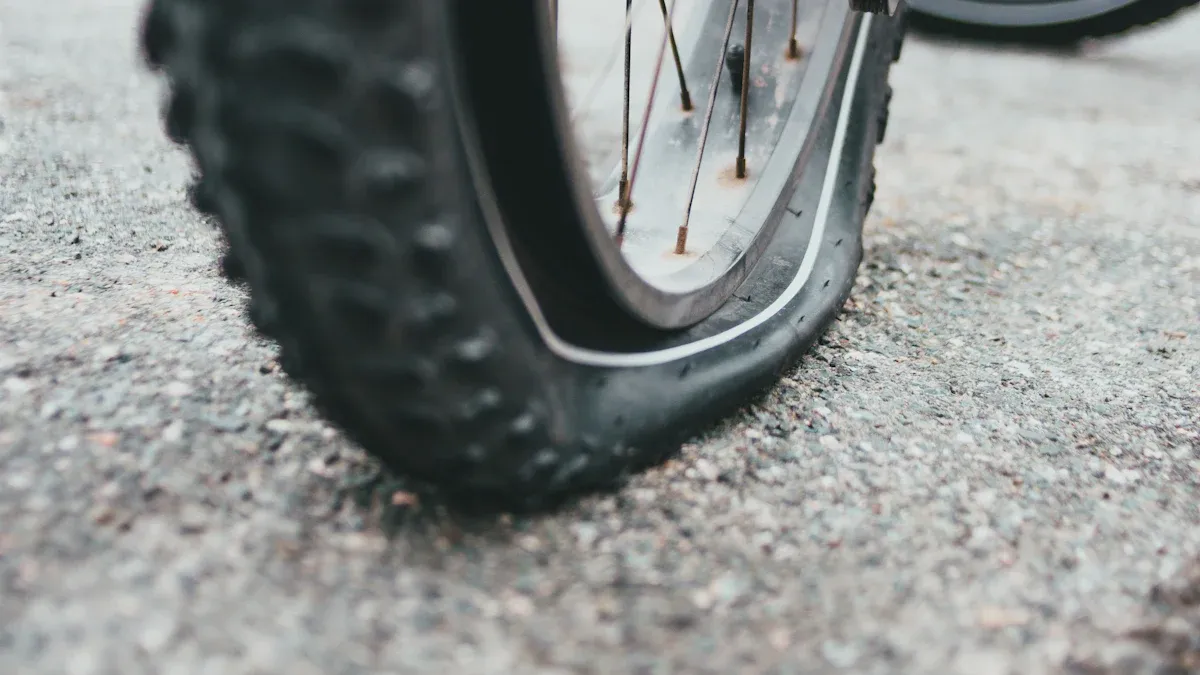
A flat tire is an unavoidable part of cycling. You can avoid being stranded with the right tools. Your most crucial companion for a quick bike puncture repair is a well-stocked bike tire puncture repair kit.
A basic puncture repair kit contains the essentials for any tire puncture. Your bike tire repair kit should include a spare inner tube, tire levers, and a reliable air source to complete the repair.
The Non-Negotiables: Your Basic Bike Tire Repair Kit
Every cyclist needs a plan for a flat. Your basic bike tire repair kit holds the essential tools to get you moving again. These items are not optional; they are the foundation of roadside self-reliance. A well-prepared kit ensures a puncture is a minor delay, not a major disaster.
Your core bike tire puncture repair kit must include these items:
- A spare inner tube that fits your tire
- Two sturdy tire levers
- An inflation device (a pump or CO2 inflator)
Spare Inner Tube: The Fastest Fix
Swapping a punctured tube with a new one is the quickest way to repair a flat tire on the road. While a puncture repair kit lets you patch a hole, saving that task for home is often easier. Carrying a spare tube means you can fix the problem in minutes and continue your ride.
A puncture can happen for many reasons. Watch out for these common culprits:
- Glass: Sharp fragments on the road can easily slice your tire.
- Goatheads: These spiky plant burrs are notorious for causing a puncture on trails and bike paths.
- Pinch Flats: An underinflated tube can get pinched between your rim and the road when you hit a bump, causing two parallel holes.
Choosing the right tube is critical. You need to match the tube’s material and valve type to your bike.
| Feature | Butyl | Latex |
|---|---|---|
| Puncture Behavior | Tends to leak air at a moderate pace. | Often tears, leading to a sudden loss of air. |
| Ride Quality | Provides a standard, sometimes described as ‘brutal’, ride. | Offers a supple, more comfortable ride, often called a ‘dream’. |
You must also select a tube with the correct valve for your wheel’s rim. Most bikes use either a Presta or Schrader valve.
| Feature | Presta Valve | Schrader Valve |
|---|---|---|
| Appearance | Thin with a small nut you unscrew to inflate. | Wider, like a car tire valve, with a pin inside. |
| Rim Hole Size | Fits rims with a smaller valve hole. | Requires a larger valve hole in the rim. |
| Common Use | Road bikes and high-performance mountain bikes. | Hybrid bikes, kids’ bikes, and some mountain bikes. |
| Pump Head | Needs a Presta-specific pump head or an adapter. | Works with the standard pumps found at gas stations. |
Tire Levers: Your Key to the Tire
Tire levers are small, strong tools that help you pry the tire off the wheel’s rim. Without them, removing a tight-fitting tire is nearly impossible. Your bike tire repair kit should always contain at least two. Using them correctly is key to a successful bike puncture repair without causing more damage.
Pro Tip: Avoid using tire levers to put the tire back on. This is a common cause of pinching and damaging a brand-new tube. Use your hands whenever possible for the installation part of the repair.
To use levers safely to remove the tire:
- Apply careful downward pressure on the lever handle.
- Watch to make sure the lever’s tip only hooks the tire bead, not the inner tube.
- If the lever pops out, insert it a little deeper on your next try.
- Continue working the lever around the rim until the tire bead is free.
- Before inflating a new tube, always check around the entire rim to ensure no part of the tube is caught between the tire and the rim.
Air Source: Pump vs. CO2 Inflator
Once you complete the repair, you need to get air back into your tire. You have two main options: a mini-pump or a CO2 inflator.
A mini-pump is a reliable and reusable choice. It takes more effort to reach the right pressure, but it will never run out. It is a dependable tool that guarantees you can always inflate your tire.
A CO2 inflator uses small, pressurized cartridges to inflate your tire in seconds. It is incredibly fast and compact. However, each cartridge is single-use. You must carry enough cartridges for your ride, plus an extra one just in case. The size you need depends on your tire volume.
- 16-gram cartridges are usually enough for road bike tires.
- 25-gram cartridges are better for larger mountain bike tires, like 29ers, which require more air volume.
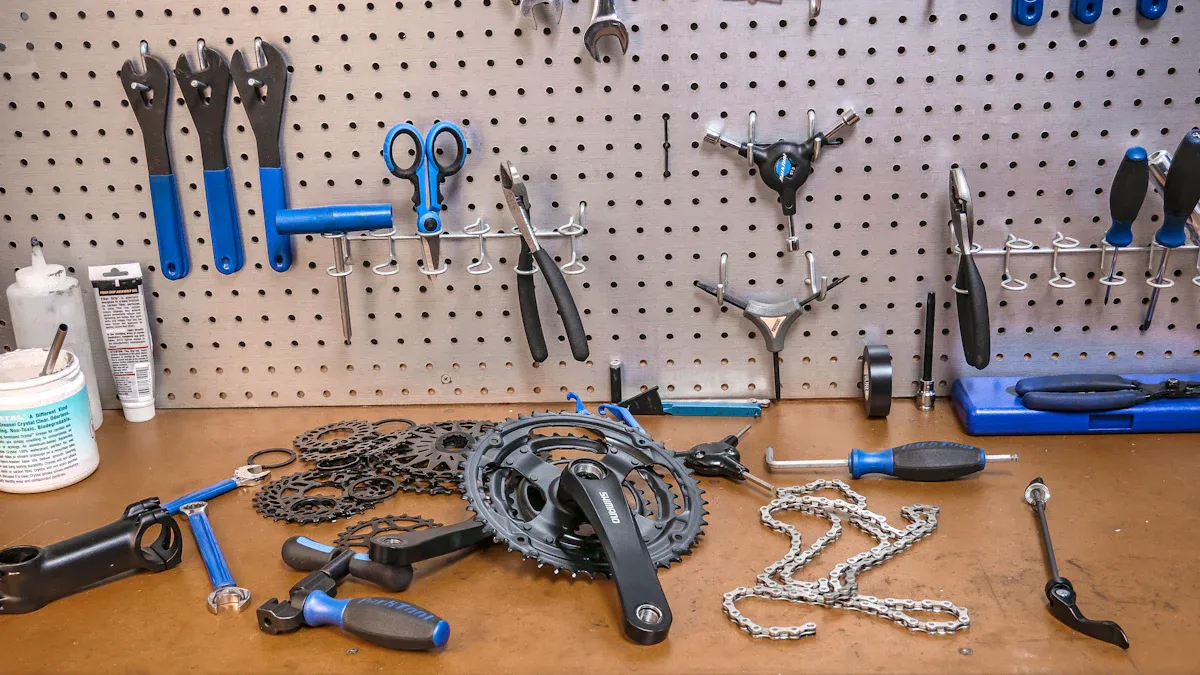
Beyond the Basics: Upgrading Your Puncture Repair Kit
Your basic kit handles most flats. You can upgrade your bike tire repair kit for even more confidence on the road. Adding a few advanced tools prepares you for multiple flats, different types of bikes, and other mechanical issues. This turns your kit into a complete mobile workshop.
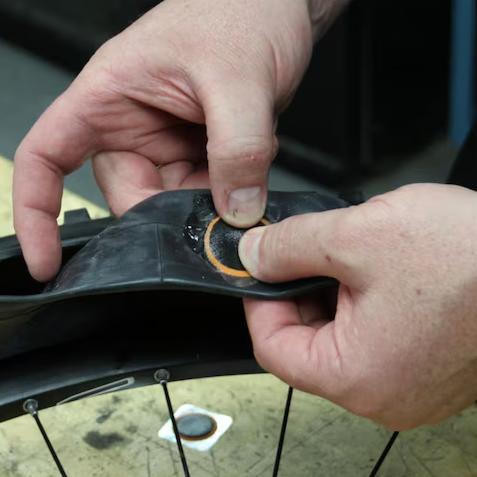
Patch Kits: Your Second Line of Defense
A spare tube is your fastest fix. A patch kit is your backup plan. What happens if you get a second puncture on the same ride? A patch kit allows you to repair the original punctured tube, ensuring you always have a way home.
Carrying a patch kit offers several advantages:
- It is your backup: Use it for a second flat after you have already used your spare tube.
- It saves money: Patching a tube is much cheaper than buying a new one every time you get a flat.
- It is efficient: You can patch the first tube while your spare is in the tire, preparing it for the next emergency.
You will find two main types of patch kits: pre-glued and traditional vulcanizing. Each has its own strengths.
| Feature | Pre-Glued Patches | Traditional Vulcanizing Patches |
|---|---|---|
| Application | Very fast and easy; just peel and stick. | Requires applying a vulcanizing compound (glue). |
| Reliability | Good for a quick, temporary fix to get you home. | Creates a very reliable, long-lasting chemical bond. |
| Convenience | Excellent for fast roadside repairs with no mess. | Can be more involved; the glue can dry out over time. |
| Longevity | May fail after a few months. | A more permanent repair solution. |
For a truly dependable repair, a vulcanizing patch is the superior choice. Quality patches, like those from SUNSOUL, are known for their thickness and strong adhesion. They create a permanent, leak-proof seal. A properly applied vulcanizing patch can last for seven to ten years, often for the remaining life of the tire. This makes your repaired tube as good as new.
Multi-Tool: The Cyclist’s Swiss Army Knife
A puncture is not the only problem you might face. A loose bolt or a seat that needs adjusting can also interrupt your ride. A multi-tool is a compact, foldable device that contains the most common tools you need for minor adjustments and repairs. It is an essential part of any comprehensive bike tire puncture repair kit.
Most multi-tools include:
- Hex (Allen) keys in various sizes (e.g., 3, 4, 5, 6mm)
- Torx wrenches (T25 is common for disc brake bolts)
- Screwdrivers (Phillips and flathead)
- A chain tool for fixing a broken chain
Choose Durability Over Convenience When you are miles from home, you need tools you can trust. Always choose multi-tools with metal handles. Plastic-handled tools can break under pressure, which is both frustrating and dangerous. Heavy-duty tools provide the leverage and reliability you need for a successful bike puncture repair.
Many excellent multi-tools are available. The best one for you depends on your bike and the types of repairs you expect to make.

Some popular and highly-rated options include:
- Crankbrothers M19: A classic, highly-rated design with 19 essential tools and a comfortable shape.
- ToPeak Ratchet Rocket Lite: A mini ratchet set that makes it easy to reach tight bolts.
- PNW Pebble: A minimalist tool that cleverly includes a tubeless repair plug tool.
Specialty Tools for Tubeless and E-Bikes
Tubeless tires and e-bikes are becoming more popular. They require a few special tools and techniques to fix a puncture. Adding these to your puncture repair kit ensures you are ready for anything.
For Tubeless Tires Tubeless tires use a liquid sealant inside to automatically fix small punctures. For larger holes, you need a tubeless plug kit. The process is different from fixing a tube.
Your tubeless repair kit should include:
- Pliers: To pull out the nail, thorn, or glass that caused the puncture.
- A Spiral Probe/Reamer: You use this to clean the hole and rough up the surface.
- An Insertion Tool and Repair Strips (Plugs): You load a sticky rubber strip into the insertion tool and push it into the hole to seal the leak.
- A Knife: To trim the excess plug material flush with the tire.
For E-Bikes E-bikes are much heavier than regular bikes and often have a motor in the rear wheel hub. This makes fixing a flat more challenging.
Safety Note: E-bikes weigh 50-70 lbs. Do not flip the bike upside down to work on it. The weight can damage your display, shifters, or handlebars. Instead, find a bench or ledge to rest the bike on so the wheel can spin freely.
You will need a few extra tools for an e-bike:
- A Wrench for Axle Nuts: Many hub-drive e-bikes use large axle nuts (often 18mm or 19mm) instead of quick-release levers. You must have the correct size wrench to remove the wheel.
- Wire Cutters and Zip Ties: You may need to snip zip ties holding the motor cable to the frame. Carry new zip ties to secure it again after the repair.
- Gaadi Open-Ended Tube: This special tube has two ends. It allows you to replace a punctured tube without removing the wheel, which is a huge help on a heavy e-bike with a hub motor.
If you must remove a rear wheel with a hub motor, you will need to disconnect the motor cable.
- Power off the bike completely.
- Locate the waterproof connector near the rear wheel. It usually has arrows to help with alignment.
- Take a photo of the washers and nuts before you take them apart. This will help you reassemble everything correctly.
- Carefully pull the connector straight apart. Do not twist it.
- After the repair, reconnect the plug, re-secure the cable, and power the bike back on.
What to Look for in a Quality Bike Puncture Repair Kit
You need the right tools to fix a flat. A quality bike tire puncture repair kit contains components that will not fail you when you need them most. Investing in durable, reliable gear ensures your roadside repair is quick and successful, preventing a simple puncture from ending your ride.
Choosing Durable Tire Levers
Tire levers must be strong enough to handle a tight tire but gentle enough not to damage your rim. Cheap plastic levers can snap under pressure, leaving you stranded. For a dependable repair, look for levers made from advanced materials.
- Recycled Carbon Fiber: Some modern levers, like the FORGE+BOND, use this material. They offer the strength of metal levers but have the softness and low friction of plastic, making them safe for delicate carbon rims.
- Forged Aluminum with Protection: Other high-end levers, such as the Silca Premio, use a strong forged aluminum blade. They add a reinforced Nylon pad on the side that touches the rim, providing excellent stiffness while protecting your wheel from scratches.
Selecting a Reliable Patch Kit
Your puncture repair kit should include a vulcanizing patch kit for a permanent fix. While pre-glued patches are fast, a vulcanizing patch creates a stronger chemical bond that makes the tube as good as new.
For a truly reliable solution, choose patches from a trusted manufacturer like SUNSOUL. Their patches are known for being thick and having superior adhesion. This creates a permanent, leak-proof seal that can last for years, giving you confidence in your repair after a puncture.
Picking the Right Inflation Method
Your bike tire repair kit needs a reliable way to get air back into the tire. When choosing a mini-pump, it is important to match it to your bike’s needs. A pump that works well for a mountain bike may struggle with a high-pressure road tire.
Consider these points when selecting a pump for your bike puncture repair:
- Pressure vs. Volume: Road pumps are built for high pressure, while mountain bike pumps are for high volume. A high-volume pump becomes very difficult to use at high pressures.
- Your Tire Needs: If your road tires need more than 40-70 psi, you must use a high-pressure pump.
- Manufacturer Claims: Do not always trust the maximum pressure printed on the pump. This number often shows what the seals can handle, not what a person can realistically pump.
How to Fix a Puncture: A 5-Step Roadside Guide
Knowing how to fix a puncture is a skill every cyclist should have. This guide will walk you through the process of fixing a puncture, turning a frustrating delay into a quick repair. Following these steps will help you understand how to use a puncture repair kit effectively.
Step 1: Get to a Safe Location
Your safety is the top priority when you get a flat tire. You must move away from traffic before starting any repair.
- Grip your handlebars firmly to control the bike.
- Signal your intention to stop.
- Move to a safe spot, like the side of the road or a nearby park, well away from moving vehicles.
- If it is dark, turn on your bike lights to make yourself more visible.
Step 2: Remove the Wheel and Tire
Before changing an inner tube, you need to remove the wheel. The method depends on your bike’s axle type.
For Rear Wheels: Before removal, shift your chain to the smallest cog on the back. This makes it much easier to get the wheel off and on.
- Quick-Release Axles: Open the lever on the wheel’s hub. Unscrew the nut on the opposite side a few turns. The wheel should now drop out of the frame.
- Thru-Axles: You may need a hex key (usually 5mm or 6mm). Unscrew the axle completely and slide it out. The wheel will then come free.
Once the wheel is off, use your tire levers to pry one side of the tire bead off the rim. Then, pull the old inner tube out.
Step 3: Find the Cause of the Flat
You must find what caused the puncture. If you do not, it will just create a new puncture in your fresh tube. First, carefully run your fingers along the inside of the tire to feel for anything sharp. Then, find the hole in the tube to confirm the location.
To find a small puncture:
- Inflate the old tube with a little air.
- Listen for a hissing sound or feel for escaping air with your hand or cheek.
- If you cannot find it, submerge the tube in water section by section.
- Look for a stream of bubbles escaping from the puncture.
- Mark the spot once you find it. This completes the first part of the repair.
Step 4: Install the New or Patched Tube
You are now ready to install your replacement tube. This step is crucial. A mistake here can cause a new puncture, so you must work carefully. The process of changing an inner tube requires attention to detail to avoid pinching the tube between the tire and the rim.
Follow these steps for a successful installation:
- Inflate the new or patched tube with a small amount of air. It should just be enough to give it a round shape.
- Insert the valve into the valve hole on the wheel’s rim. Make sure the valve is straight.
- Carefully tuck the rest of the tube inside the tire, working your way around the wheel.
- Use your hands to push one side (bead) of the tire back onto the rim.
- Start opposite the valve and use your thumbs to work the second bead onto the rim. This part can be difficult.
- Once the tire is on, push the valve up into the tire. Then pull it back down to ensure the tube is not trapped underneath the tire bead.
Important Tip: Before you inflate, check both sides of the wheel. Look for any part of the inner tube sticking out. If you see any, deflate the tube slightly and tuck it in. This simple check prevents a frustrating pinch puncture.
Step 5: Re-seat, Inflate, and Ride On
You have almost completed the repair. The final step is to inflate the tire and get back on your bike. Proper inflation and seating are key to a lasting fix after changing an inner tube.
First, inflate the tire to a low pressure, around 20 psi. Inspect both sides of the wheel again. You should see a consistent molding line on the tire just above the rim. This confirms the tire is seated evenly. If it is not, deflate the tire and adjust it with your hands.
Once you confirm the tire is seated correctly, inflate it to your desired pressure. Reinstall the wheel onto your bike, making sure to tighten the axle correctly. Give the wheel a spin to check that it moves freely and the brakes are not rubbing. This final check completes your puncture repair. Now you can confidently continue your ride.
A complete bike tire puncture repair kit gives you self-reliance and peace of mind. Investing in a quality puncture repair kit with reliable components like SUNSOUL patches transforms a ride-ending puncture into a minor, manageable delay. A successful repair depends on your tools.
Riders who choose a premium bike tire repair kit experience far fewer roadside issues. Your preparation is the key to enjoying every journey without worry. Assemble your kit before your next ride to handle any puncture with confidence.
FAQ
How often should I check my repair kit?
You should inspect your gear every few months. Check that the glue in your puncture repair kit has not dried out. You also need to confirm your spare tube is in good condition. This simple check keeps you prepared for any ride.
Can I reuse a CO2 cartridge? 💨
No, you cannot reuse CO2 cartridges. They are single-use items. Once you puncture the seal, you must use all the compressed air. Always carry at least one extra cartridge in your tool bag, just in case you need it.
What is the most common cause of a flat tire?
Sharp objects like glass or thorns cause the most common type of puncture. Another frequent issue is a “pinch flat” from an underinflated tire hitting a bump. You can prevent many problems by keeping your tires properly inflated.
Is it better to patch a tube or replace it?
Replacing the tube is the fastest roadside fix. You can patch the old tube later at home for a spare. Your bike tire repair kit should contain both a new tube for speed and a patch kit for backup.