You know how frustrating a flat tire can be during roadside emergencies. Having the right tire plug tools makes emergency tire repair quick and stress-free. Most drivers reach for string plug kits or mushroom plug kits because they seal punctures fast. You might need tire repair tools more often than you think—over half of drivers face at least one roadside event each year, and flat tire repairs are common. SUNSOUL’s tire plug tools stand out for their reliability and ease of use, trusted by drivers worldwide.
- String plug kits
- Mushroom plug kits
- Insertion tools
- Adhesive solutions
SUNSOUL’s reputation for dependable tire plug tools means you can tackle repairs with confidence wherever you go.
Essential Tire Plug Tools for Quick Flat Tire Repairs
Tire Plug Kit
You want a tire repair kit that works fast when you get a flat tire. The best tire plug kits make repairs simple and reliable. You can see the difference in top kits by looking at their features:
| Feature | Description |
|---|---|
| Type of Damage | Some kits fix sidewall damage, while others handle tread punctures. |
| Ease of Use | Clear instructions and easy steps help you finish repairs quickly. |
| Compatibility | Good kits work for cars, trucks, motorcycles, and ATVs. |
| Durability | Strong plugs and patches last under pressure and daily driving. |
| Portability | Compact tire repair tools fit in your trunk or glove box for emergencies. |
A complete tire repair kit should include everything you need for a quick fix. Here’s what you’ll usually find:
- Tire plugs made from tough nylon or leather cords with sticky rubber.
- Rubber cement to help the plug stick and seal the hole.
- T-handle reamer tool for cleaning and prepping the puncture.
- T-handle plug installation tool for pushing the plug into the tire.
- Flush-cut pliers or a razor blade for trimming extra plug material.
You can count on these essential tire repair tools to get you back on the road fast.
Reamer Tool
When you spot a flat tire, you need to prepare the puncture before plugging it. The reamer tool helps you do this. It cleans out loose rubber and makes the hole just the right size for the plug. This step is important, especially for radial tires. Sometimes, the steel belt inside the tire gets damaged. The reamer tool makes sure the opening is big enough for a strong seal. You get a better result and a safer ride.
Insertion Tool
The insertion tool is your go-to tire repair tool for placing the plug inside the tire. The design matters a lot. A good insertion tool helps you push the plug deep into the puncture. You get a tight seal that keeps air and moisture out. If the tool is poorly made, the plug might not seal well, and your tire could fail later. You want a tool that feels sturdy and fits well in your hand. This way, your tire repair kit works every time you need it.
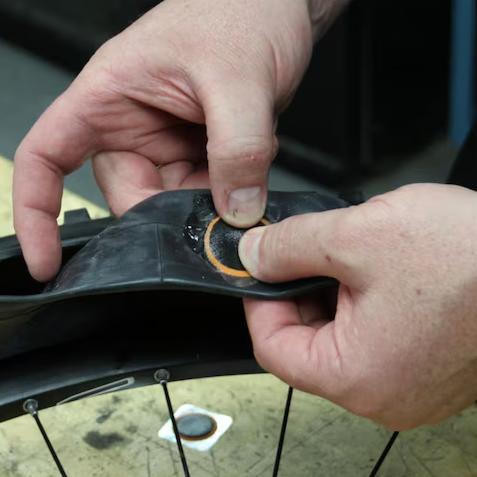
Rubber Cement
Rubber cement helps you seal a flat tire quickly. You use it with your tire repair kit to make sure the plug sticks inside the hole. When you squeeze a little rubber cement onto the plug, it gets sticky and fills tiny gaps. This makes the seal stronger and stops air from leaking out. You want to wait a few seconds after applying the cement. The plug will grab onto the tire better when the cement gets tacky.
Tip: Always keep rubber cement in your kit. It dries out if you leave the cap off, so close it tight after each use.
Rubber cement works with many types of plugs. You can use it for cars, trucks, or bikes. It is one of the essential tire repair tools you should never skip. If you forget this step, your plug might not hold, and you could get another flat tire soon.
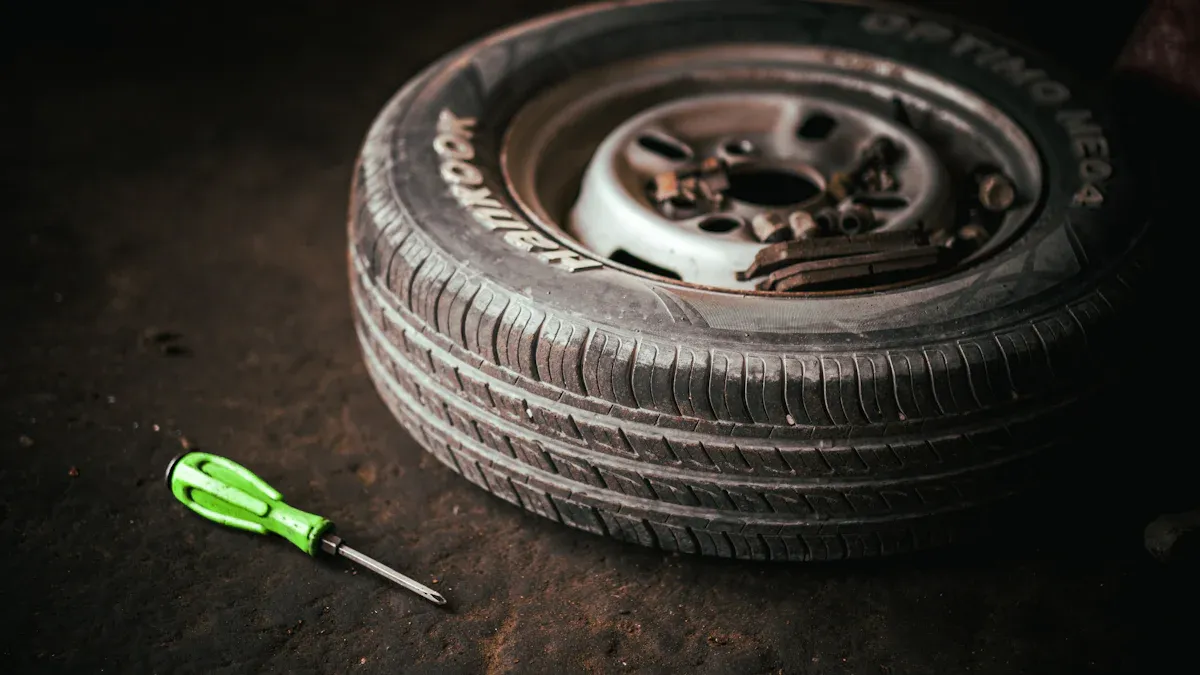
Pliers
Pliers help you pull out nails, screws, or sharp objects from your tire. You need them before you start using your tire repair kit. Sometimes, the object is stuck deep in the tread. Pliers give you a strong grip, so you can remove it without hurting your hands.
Here’s how you use pliers for a flat tire:
- Find the object causing the leak.
- Grab it with the pliers.
- Pull it out slowly and carefully.
You want pliers that fit well in your hand. Compact tire repair tools often include small pliers, so you can store them easily. If you use pliers with a rough grip, you get better control. This helps you avoid slipping and damaging the tire.
Utility Knife
A utility knife lets you trim the extra plug after you fix your tire. You want the plug to sit flush with the tread. If you leave too much sticking out, it can catch on the road and pull out. Use the knife to cut the plug close to the tire surface.
Safety Note: Always cut away from your body. Hold the knife steady and keep your fingers clear.
A sharp utility knife makes the job easy. Dull blades can tear the plug or scratch the tire. You should check your knife before each use. Replace the blade if it feels dull. This simple tool helps you finish your repair and keeps your tire safe for driving.
Air Compressor and Pressure Gauge
When you finish plugging a tire, you need to get it back to the right pressure. You can’t drive safely on a soft tire. That’s where a portable air compressor comes in handy. You can keep one in your trunk or garage. It’s small, easy to carry, and works fast. You just connect it to your tire valve and turn it on. The compressor fills your tire with air so you can get back on the road.
Some drivers use a portable tire inflator instead. It works like a mini air pump. You can use it for cars, bikes, or even lawn equipment. If you don’t have a compressor, a bicycle high pressure floor pump can do the job. It takes a little more effort, but it gets your tire up to the right pressure.
You need to check your tire pressure after every repair. A tire pressure gauge helps you do this. You want your tire to match the recommended PSI. If you use a digital tire pressure gauge, you get a more accurate reading. It shows decimal values, so you know exactly how much air is in your tire. This helps you avoid under-inflation or over-inflation.
Tip: Always keep a tire pressure gauge in your glove box. You never know when you’ll need it.
Here’s a quick checklist for using your air tools:
- Attach the portable air compressor or pump to the valve.
- Inflate the tire to the recommended PSI.
- Use your tire pressure gauge to check the pressure.
- Adjust as needed for a perfect fit.
A good air compressor and tire pressure gauge make your tire repairs safer and easier. You save time and avoid extra trips to the shop. You stay prepared for any flat tire emergency.
How to Use Tire Plug Tools Effectively
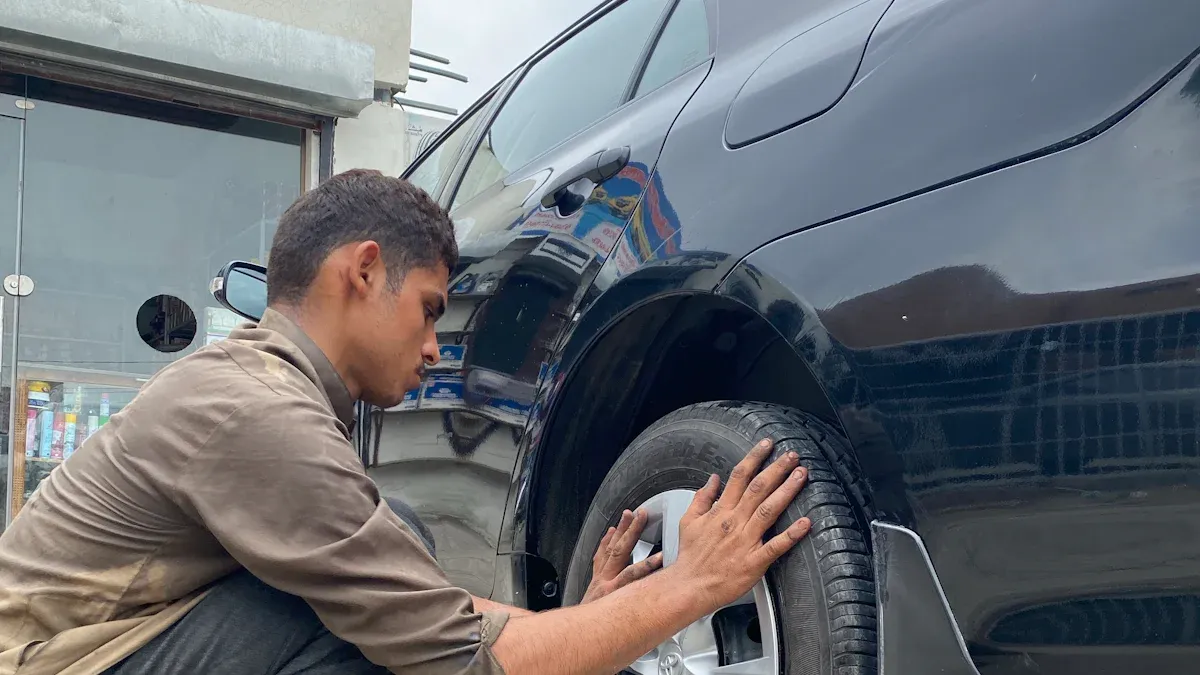
Preparing the Tire and Work Area
You want to start every flat tire repair with a clean and safe work area. First, park your car on a level surface. Turn on your hazard lights so other drivers see you. Grab your tire repair kit and tire plug tools from your trunk. If you have a jack and lug wrench, use them to lift the car and remove the wheel. This step makes it easier to reach the tire puncture.
Look for the spot where the air is leaking. Sometimes you hear a hissing sound or see a nail stuck in the tread. Use pliers or a multitool to pull out any sharp objects. Wipe away dirt and debris around the hole. You want the area clean so your tire repair tools work well. If you skip this step, the plug might not seal right, and you could get another flat tire soon.
Tip: Always keep gloves in your tire repair kit. They protect your hands from sharp objects and sticky rubber cement.
Using the Reamer Tool
Now you need to prepare the puncture for a quick fix. The reamer tool helps you do this. Take the reamer and push it into the hole where the tire puncture happened. Twist the tool back and forth while moving it in and out. This action widens the hole just enough for the plug to fit. You also push the steel strands apart without breaking them. If you do this step well, your plug will seal tight and last longer.
- Remove any leftover debris with pliers.
- Insert the reamer into the hole.
- Twist and move the tool briskly to clean and enlarge the opening.
- Make sure the hole is big enough for the plug, but not too large.
You want to feel the tool moving smoothly. If it gets stuck, pull it out and try again. A clean and even hole helps your tire repair tool work better. You get a safer and stronger repair.
Applying Rubber Cement
Rubber cement makes your repairs stick and seal. Take the plug from your tire repair kit and coat it with a thin layer of rubber cement. You want the plug sticky but not dripping. Thread the plug through the insertion tool. Now you are ready for the next step.
Wait a few seconds after applying the cement. The plug gets tacky and grabs onto the inside of the tire. This helps seal tiny gaps and stops air from leaking out. If you use too much cement, it can get messy. If you use too little, the plug might not hold.
Note: Always close the rubber cement tube tightly after use. This keeps it fresh for your next quick fixes.
Rubber cement works with most tire repair tools. You can use it for cars, trucks, or bikes. It is a key part of every tire repair kit. When you finish, you are ready to insert the plug and get back on the road.
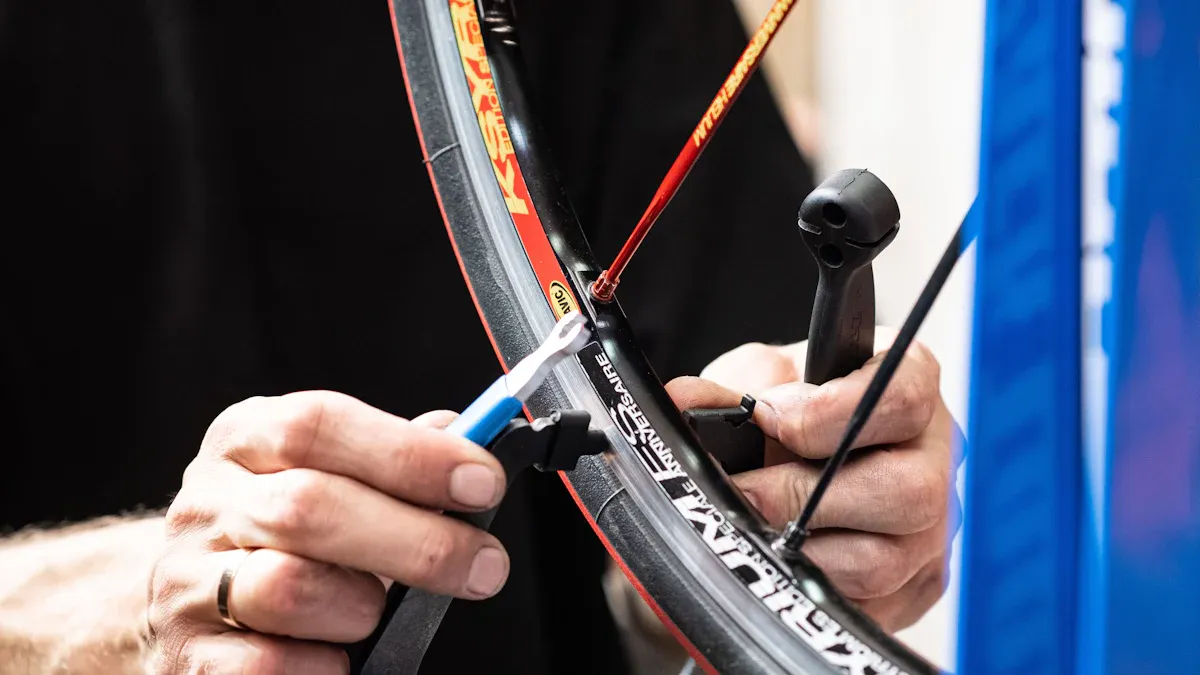
Inserting the Plug with the Insertion Tool
You’ve cleaned the puncture and prepped the area. Now it’s time to use the insertion tool. This step is where you seal the hole and stop the air leak. You want to do it right so your tire stays safe.
Here’s how you get the best results:
- Find the puncture. If you’re not sure, use soapy water and look for bubbles. That’s where the air escapes.
- Take your plug and thread it through the tip of the insertion tool. Make sure the plug sits in the middle.
- Push the tool straight into the hole. You might feel some resistance. That’s normal. Keep steady pressure and don’t rush.
- Twist the tool gently as you push. This helps the plug fill the space and grab onto the tire’s rubber.
- Pull the tool out quickly. The plug should stay inside the tire, sealing the hole.
Tip: If you see the plug sticking out too far, don’t worry. You’ll trim it in the next step.
You want the plug to sit snug in the tread. If it’s loose or uneven, air might leak out. Take your time and check your work. A good seal means you can drive with confidence.
Trimming Excess Plug with a Utility Knife
After you insert the plug, you’ll notice some material sticking out. You don’t want this extra plug hanging off your tire. It can catch on the road or wear down unevenly.
Grab your utility knife. Hold it steady and cut the plug so it sits just below the tread surface. Use short, careful strokes. Always cut away from your body. You want a smooth finish that matches the tire’s shape.
- If the plug is too long, it can pull out while driving.
- If you cut too short, you might weaken the seal.
Take a close look after trimming. The plug should blend in with the tread. If you see any gaps or loose ends, press them down gently. This step keeps your tire repair strong and safe.
Safety Alert: Always keep your fingers clear of the blade. A sharp knife makes the job easier and safer.
Re-inflating the Tire and Checking Pressure
Now your plug is in place and trimmed. It’s time to get your tire back to the right pressure. Grab your portable air compressor and connect it to the tire valve. Turn it on and watch the tire fill up. You want to reach the recommended PSI for your vehicle.
Once the tire looks full, use your tire pressure gauge to check the exact pressure. Don’t guess. The gauge gives you a clear reading. If the pressure is too low, add more air with your portable air compressor. If it’s too high, press the valve to let some air out.
Note: Always check the pressure twice. A tire pressure gauge helps you avoid driving on an under-inflated or over-inflated tire.
When you finish, use soapy water again to check for leaks. Look for bubbles around the plug. If you see none, your repair is solid. You’re ready to hit the road.
- Keep your portable air compressor and tire pressure gauge in your car. You never know when you’ll need them.
- Regular checks help you spot problems early and keep your tires in top shape.
A well-inflated tire means better safety, smoother rides, and less wear. You’ve just fixed your flat like a pro!
Expert Tips for Maximizing Essential Tire Repair Tools Performance
Maintenance and Cleaning of Tire Plug Tools
You want your tire plug tools to last and work well every time. Regular cleaning keeps your tire repair tool in top shape. After each use, wipe off dirt and sticky rubber cement with a clean cloth. If you see any rust or grime, use a little soapy water and dry the tools right away. Check the handles for cracks or loose parts. Replace any worn-out pieces before your next roadside emergencies. A clean tool helps you fix flats faster and keeps your hands safe.
Tip: Store a small brush in your kit. You can use it to clean grooves and hard-to-reach spots on your tire repair tool.
Safe Storage of Tire Repair Tools
You need a safe place for your tire repair tool kit. Choose a sturdy box or pouch that closes tightly. Keep your kit in your trunk or under your seat so you can grab it quickly. Make sure rubber cement and sealants stay upright to prevent leaks. Store sharp items like utility knives and reamer tools with blade covers. This keeps you safe when reaching into your kit. Good storage protects your tire plug tools from moisture and damage. You stay ready for any tire maintenance or roadside emergencies.
| Storage Tip | Why It Matters |
|---|---|
| Use a sealed pouch | Keeps tools dry and clean |
| Cover sharp blades | Prevents cuts and injuries |
| Upright bottles | Stops leaks and spills |
| Easy access spot | Saves time during emergencies |
Safety Precautions During Flat Tire Repairs
You want to stay safe while fixing a flat. Follow these simple steps to protect yourself and your tires:
- Inflate your tire to the correct pressure after repair. This helps you avoid problems from underinflation or overloading.
- Remove the tire from the rim for a close look inside. You can spot hidden damage before using your tire repair tool.
- Only repair tires if you know the right steps. If you feel unsure, visit a tire shop for help from trained experts.
Safety Alert: Always wear gloves and eye protection when working with tire plug tools. You never know when a sharp object or sticky glue might cause trouble.
You keep your tires strong and your rides safe by following these tire safety tips. Good habits make every repair easier and help your tire plug tools last longer.
Troubleshooting Common Tire Plug Kit Issues
You might run into a few problems when you use your tire plug kit. Don’t worry—most issues have simple fixes. Let’s walk through the steps you can take if your repair doesn’t go as planned.
-
Stop and Assess
First, pull over to a safe spot. Take a close look at your tire. Sometimes, dirt or small rocks get stuck in the puncture. Clear away any debris before you start your repair. -
Unveil Your Arsenal
Open your kit and check your tools. You should see a spiral reamer, a heavy-duty needle, rubber plugs, and adhesive. Make sure everything is clean and ready to use. -
Prepare the Puncture
Grab the spiral reamer tool. Push it into the hole and twist. This cleans out the puncture and makes the opening just right for the plug. If the tool feels stuck, pull it out and try again. You want the hole smooth and free of loose bits. -
Insert the Plug
Thread a rubber plug onto the needle. Push it into the hole, leaving a little bit outside the tire. If the plug won’t go in, check if the hole is too small. Use the reamer again to widen it slightly. -
Trim the Excess Plug
Use your utility knife to cut off any extra plug sticking out. Make sure the plug sits flush with the tread. If you leave too much, it could catch on the road. -
Inflate the Tire
Fill your tire to the recommended pressure. If air leaks out, check the plug placement. Sometimes, you need to redo the plug for a better seal. -
Monitor the Repair
Keep an eye on your tire’s pressure and condition. If you notice a slow leak, repeat the steps or visit a tire shop for help.
Tip: Always check your tire plug kit before you travel. Replace any missing or worn-out tools so you’re ready for emergencies.
Common problems like plugs not sealing, tools getting stuck, or air leaks can happen. You can fix most of these by following the steps above. Stay calm and work through each part of the process. You’ll get back on the road in no time.
Mistakes to Avoid When Using Tire Plug Tools
Skipping Steps in the Tire Repair Process
You might feel tempted to rush through a flat tire fix, especially if you’re in a hurry. Skipping steps in the tire repair process can cause big problems later. Every step matters, from cleaning the area to checking the plug after you finish. If you miss a step, your tire repair kit may not seal the hole well. This can lead to slow leaks or even a blowout while driving.
Here’s a quick look at what can happen if you skip steps:
| Consequence | Description |
|---|---|
| Compromised Safety | Missing repairs can weaken the tire, making accidents more likely. |
| Increased Risk of Mechanical Failures | Unfixed damage can put stress on your car and cause breakdowns. |
| Diminished Vehicle Performance | Ignoring repairs can make your ride rough and wear out your tires faster. |
Tip: Always follow each step in your tire repair kit instructions. You keep your car safe and your tires strong.
Using Low-Quality or Incompatible Tire Plug Tools
You want your repairs to last, so using the right tools is important. Low-quality or incompatible tire plug tools can fail when you need them most. Cheap plugs might not seal a tire puncture well. They can pop out or leak, which puts you at risk for another flat tire. Many accidents happen each year because of poor repairs.
- Tire plugs that don’t fit your tire can break or slip out.
- Weak plugs may not handle the stress of driving.
- Using the wrong tire repair kit can make your tire weaker over time.
Alert: Always choose a trusted tire repair kit with strong plugs and sturdy tools. You protect yourself and your passengers.
Overlooking Tire Inspection After Flat Tire Repair
After you fix a flat tire, you need to check your work. Many people forget this step, but it’s key for safety. A good inspection helps you spot hidden damage and make sure your repairs hold up.
Here’s what you should do after every repair:
- Remove the tire from the wheel to look inside.
- Check the size of the tire puncture and see if cords or belts are damaged.
- Clean and buff the rubber surface for a strong seal.
- Apply vulcanizing fluid and let it dry.
- Install the repair unit and stitch it to the inner liner.
- Remount, inflate, and balance the tire before driving.
Note: On-the-wheel repairs can miss internal damage. Always inspect the inside for a safe fix.
You keep your tires safe and your car running smoothly by following these steps. Trained technicians recommend combining a plug and patch for the best results.
Improper Plug Placement or Insertion
You want your flat tire repairs to last. If you place or insert the plug incorrectly, you can run into trouble. Sometimes, the plug sits too shallow or too deep. You might push it in at the wrong angle. These mistakes can cause leaks, damage, or even make your tire unsafe for driving.
Let’s look at what can go wrong and how you can fix it. Here’s a table that shows common risks and smart ways to avoid them:
| Risks | Mitigation Strategies |
|---|---|
| Electrical Shock | Shutter systems only open when you use the right force. |
| Short Circuits | Recessed contacts keep terminals out of reach. |
| Equipment Damage | Asymmetrical pin designs stop misalignment. |
When you use your tire repair kit, you need to push the plug straight into the hole. If you angle the tool, the plug might not seal. You could end up with a slow leak. Always check that the plug sits snug and flush with the tread. If you see it sticking out or sinking in, grab your utility knife and trim it to match the tire surface.
You also want to avoid forcing the plug. If you push too hard, you might damage the tire’s inner layers. Take your time. Twist the insertion tool gently. If you feel resistance, pull back and try again. A good tire repair kit gives you sturdy tools that help you place the plug just right.
After you finish, check your repairs with soapy water. Look for bubbles around the plug. If you spot any, you may need to redo the repair. This step keeps your tire safe and helps you avoid future problems.
Tip: Practice using your tire repair kit at home. You’ll get better at placing plugs and making strong repairs.
Improper plug placement can lead to bigger issues down the road. You stay safer and drive with confidence when you follow these steps.
You now know how the right tire plug tools help you fix a flat tire quickly and safely. SUNSOUL stands out for quality and reliability. Mechanics and drivers in over 60 countries trust these kits. Check out the facts below:
| Aspect | Details |
|---|---|
| User Feedback | 98% positive reviews from professionals and everyday users. |
| Material Quality | High-grade materials last on rough roads and in bad weather. |
Practice using your kit at home. You stay ready for any flat tire emergency.
FAQ
How long can I drive on a plugged tire?
You can drive on a plugged tire for several hundred miles if you repair it correctly. Always check the tire pressure and inspect the plug often. Visit a tire shop soon for a permanent fix.
Can I use a tire plug kit on any type of tire?
Most tire plug kits work on tubeless tires for cars, trucks, and bikes. You should not use plugs on sidewall damage or large holes. Always check your kit’s instructions for compatibility.
What should I do if the plug keeps leaking air?
If your plug leaks, remove it and clean the hole again. Try inserting a new plug. If the leak continues, the damage may be too big. Visit a professional for help.
Do I need rubber cement for every tire plug repair?
Rubber cement helps the plug seal better and last longer. Some plugs work without it, but using cement gives you extra protection. Always keep a small tube in your kit for best results.