Getting stuck with a puncture can ruin your ride fast. Nearly 40 percent of all bike breakdowns happen because of flat tires. You want to keep your ride going, so always pack your must-have tools. These include a rubber tube patch kit, tire levers, a spare tube, a mini pump, and a multi-tool. This kit lets you fix a flat on the go, helps with e-bike tire maintenance, and supports regular maintenance. SUNSOUL stands out for quality, making bike flat tire repair simple and reliable. With the right tools, repairing a flat tire becomes a step-by-step guide you can trust.
Regular checks and the right tools help you avoid crashes and finish your ride strong.
| Tool | Importance |
|---|---|
| Tire levers | Essential for removing and replacing tires; having multiple ensures readiness for tight tires. |
| Repair kit | Allows for quick fixes on the go, minimizing downtime and increasing ride completion rates. |
Essential Tools for Bike Flat Tire Repair
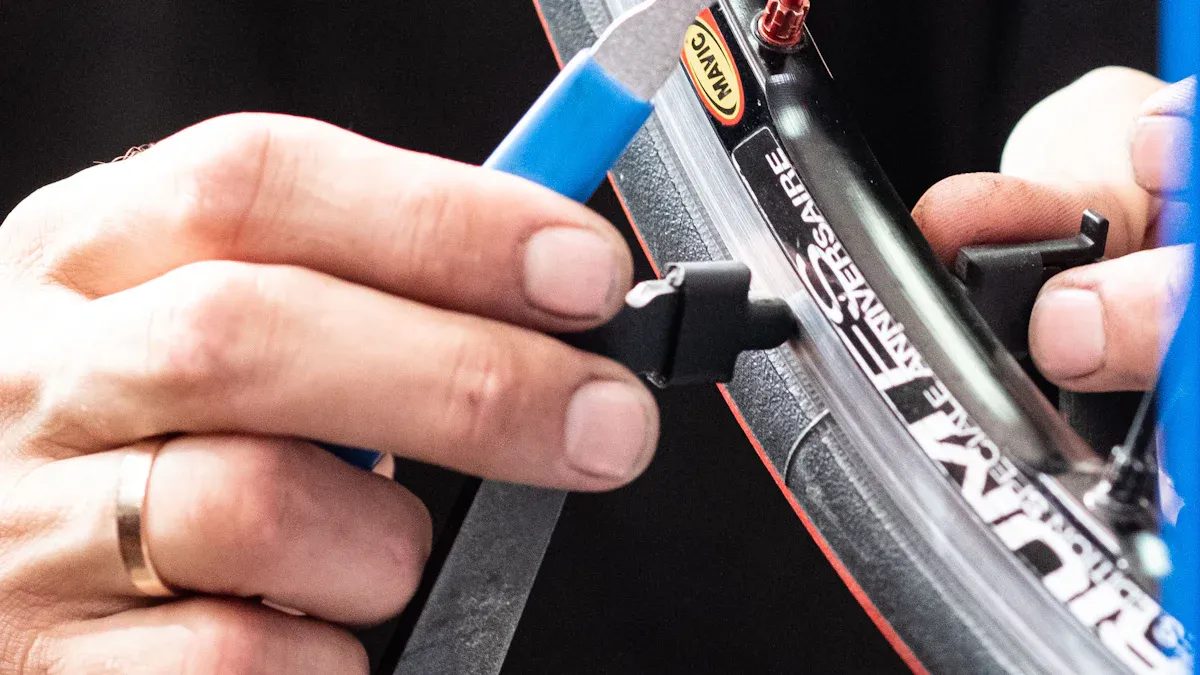
Tire Levers
You can’t fix a flat without tire levers. These handy tools help you remove your tire from the rim when you get a puncture. Most riders carry two or three levers, just in case one snaps or you need extra leverage for a tight tire. Tire levers come in different materials. Some, like the Rotae Tech levers, use a blend of Nylon 6 and glass for extra strength. Others, like the PRO Tire Lever Set, use steel, which means they won’t bend or break easily. Heavy-duty levers, such as the Slider Tire Lever Kit, stand up to tough tire jobs. Choose levers that feel sturdy in your hand and fit easily in your repair kit.
Tip: Keep your levers together with a rubber band so you don’t lose them in your bag.
Patch Kit
A rubber tube patch kit is your best friend when you want to fix a flat quickly and keep riding. This small kit usually includes patches, glue, and a small piece of sandpaper. You use it to cover the hole in your tube and seal it tight. Most patch kits cost just a few dollars, so you don’t have to spend much to stay prepared. For example:
- $4.00 for a bike tire patch kit
- $5.00 for Lunar Levers bike tire repair kit
You can also find tire repair kits at different price points. Here’s a quick look:
| Item Description | Price |
|---|---|
| Basic Bike Tire Repair Kit | $10.95 |
| Affordable Bike Tire Repair Kit | $6.95 |
| Premium Bike Tire Repair Kit | $29.95 |
| High-End Bike Tire Repair Kit | $79.95 |
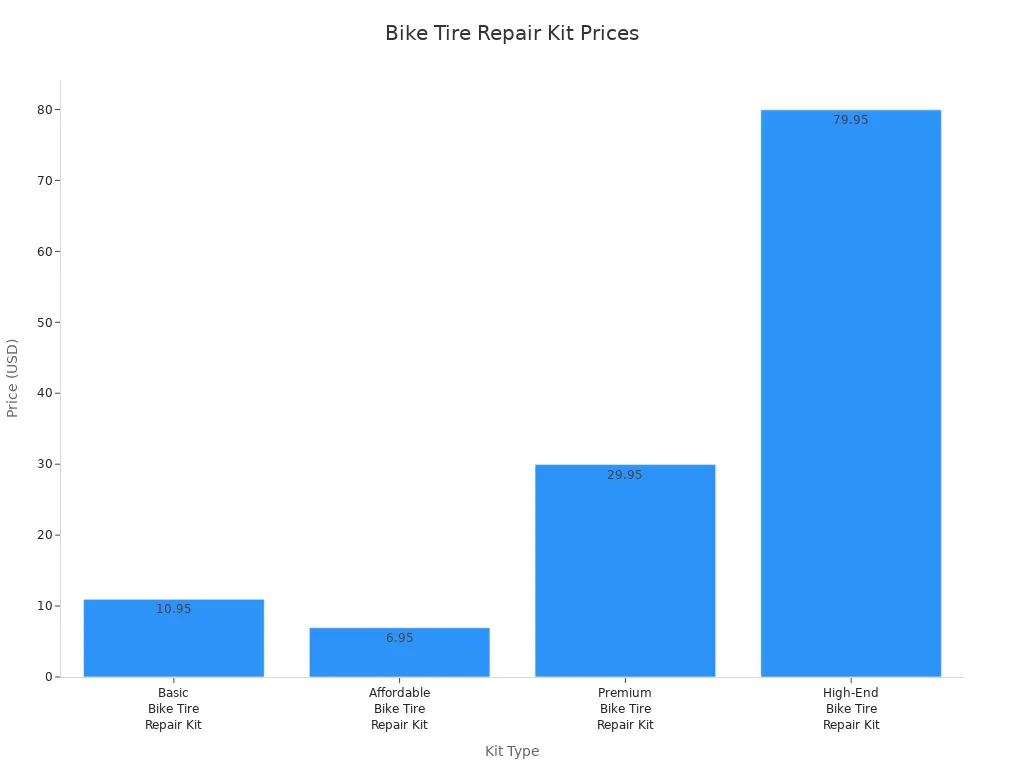
You can see that you have options for every budget.
Spare Tube
Carrying a spare tube saves you time. Instead of patching your old tube on the side of the road, you just swap in a new one and get rolling. Tubes come in different sizes and shapes. You need to match your tube to your bike. Think about:
- The type of bicycle you ride
- The brand and year of your bike
- If you changed your wheels
- The kind of riding you do
- Your weight
Pick a tube that fits your tire and valve type. Pack it in your kit so you’re always ready for a quick fix.
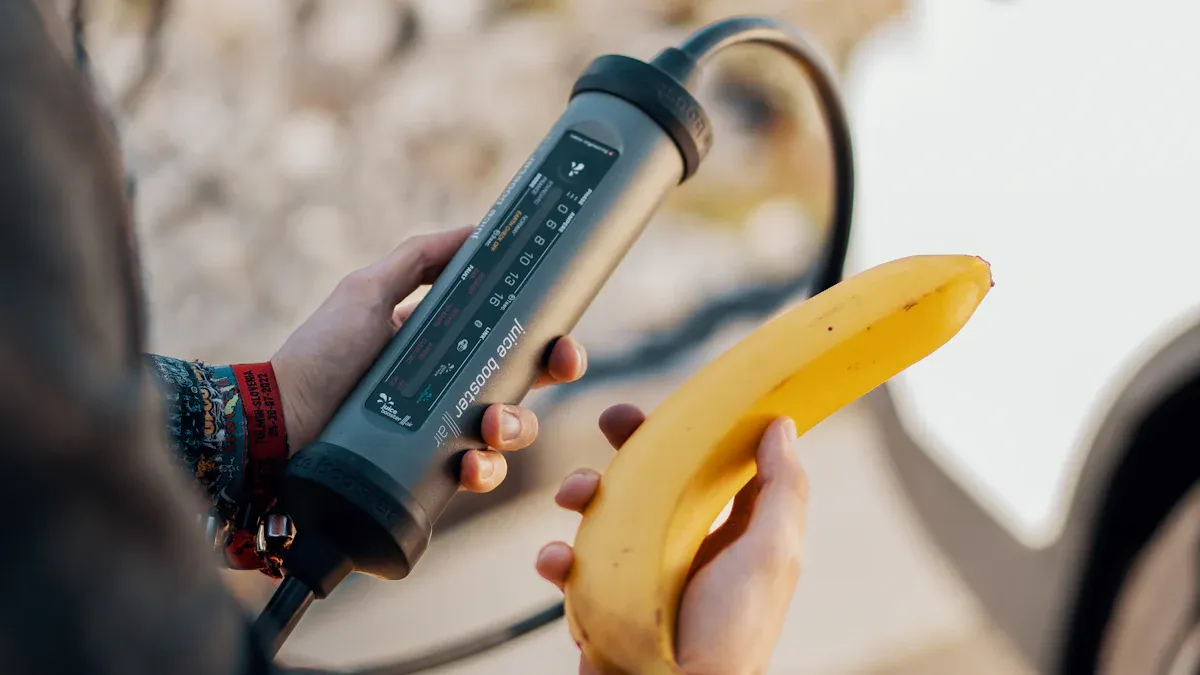
Mini Pump or CO2 Inflator
You never know when you’ll need to pump up your tire fast. That’s why you should always carry a mini pump or a CO2 inflator. Both tools help you get back on the road, but they work a little differently.
A mini pump is small and easy to pack. You use it by hand, so you control the pressure. One rider said it took them about 5 minutes to change a tire and inflate it to 100 psi with a mini pump. That time included washing hands and taking a short break. If you like to take your time or want a tool that never runs out, a mini pump is a great choice.
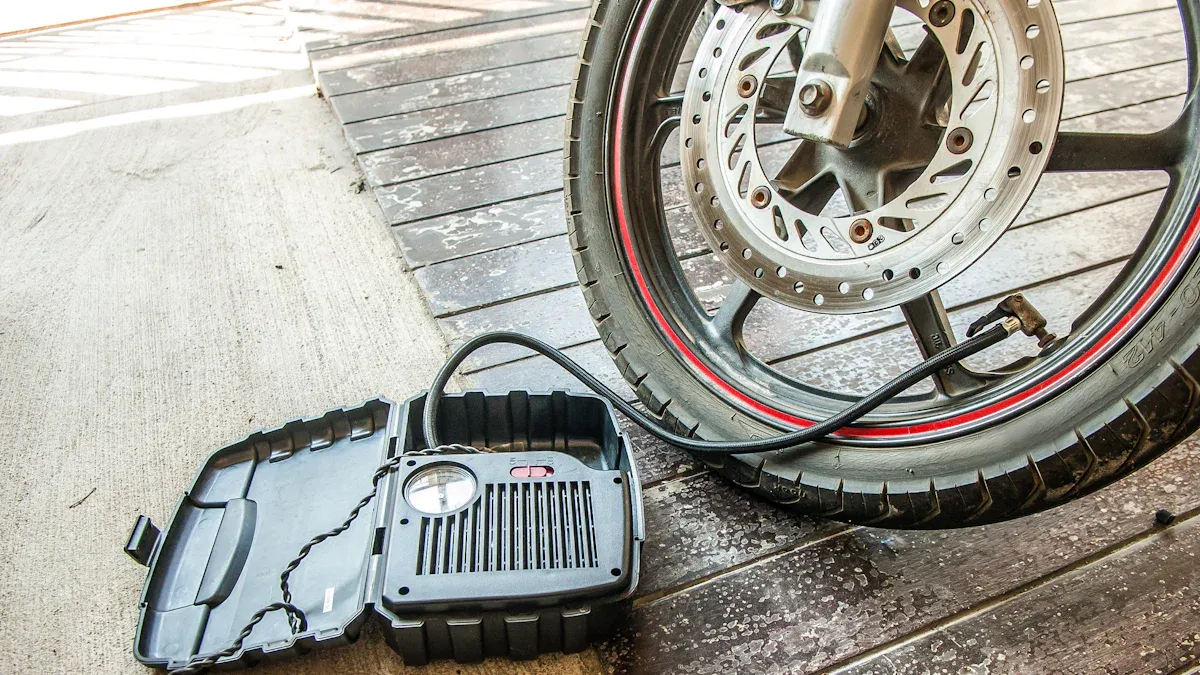
A CO2 inflator works much faster. It uses a small cartridge to blast air into your tire in seconds. Many riders love this tool because it saves time and effort. The main advantage of a CO2 inflator is speed. You can fill your tire in just a few seconds, which is perfect if you’re in a hurry or racing.
Tip: Always carry a spare CO2 cartridge if you use an inflator. If you run out, you’ll need a backup plan.
Some riders even carry both tools. A mini pump is reliable, while a CO2 inflator is quick. Choose the one that fits your style. Just make sure you have a tire pump or air pump in your kit so you’re never stuck with a flat.
Multi-Tool
A bike multi-tool is like a toolbox in your pocket. You’ll use it for more than just flat tires, but it’s a must-have for every ride. When you get a flat, you might need to remove your wheel or adjust your brakes. That’s where your multi-tool comes in handy.
Most bike multi-tools include:
- Tire levers (usually two)
- Hex wrenches (sizes 4, 5, and 6)
- Phillips screwdriver
These tools help you fix loose bolts, adjust your seat, or open up your brakes to get the wheel off. Some multi-tools even have extra features like chain breakers or spoke wrenches.
Note: Pick a multi-tool that feels solid and fits easily in your bag. You want something you can trust when you’re far from home.
A good multi-tool saves you time and stress. You’ll feel ready for anything the road throws at you.
Must-Have Tools Explained
What Are Tire Levers?
You might wonder what tire levers actually do. Tire levers are small, sturdy tools that help you with removing the tire from your bike’s rim. When you get a flat, your hands alone can’t always pry the tire off, especially if it’s tight or stuck. Tire levers slip between the tire and the rim, letting you gently lift the tire bead away. This makes the whole process much easier and faster.
Most tire levers come in sets of two or three. You use one to start the job, then hook it onto a spoke for leverage. The others help you work your way around the rim. Some levers have curved ends or hooks, which make them even more useful. You’ll find tire levers in plastic or metal, each with its own strengths.
Here’s a quick look at how plastic and metal tire levers compare:
| Feature | Plastic Tire Levers | Metal Tire Levers |
|---|---|---|
| Durability | More likely to break and fatigue over time | More durable but can damage rims |
| Flexibility | Tend to flex more | Rigid, can puncture tubes |
| Weight | Lightweight and portable | Heavier, better for frequent use |
| Rim Damage Risk | Low risk of damaging rims | Higher risk of denting rims |
| Best Use Case | Ideal for casual cyclists and emergency kits | Suitable for frequent tire changes in shops |
| Cost | Generally inexpensive | Usually more expensive |
You’ll see that plastic levers are great for quick fixes and emergency kits. Metal levers work best if you change tires often or need extra strength.
Why Tire Levers Matter
Tire levers are must-have tools for every cyclist. You need them for bike flat tire repair because they make removing the tire much easier. If you try to use your hands, you might struggle or even hurt yourself. Tire levers fit perfectly between the tire and rim, letting you pry the tire away with less effort. This saves you time and energy, especially when you’re out on a ride and want to get back on the road fast.
Many riders say that tire levers help them finish repairs quickly. One cyclist shared that plastic levers worked well until they hit a really tight rim. In that case, a metal lever did the trick. Another rider mentioned that plastic levers never punctured their tube, while metal ones sometimes caused damage. Tire levers give you the leverage you need, so you don’t have to fight with your bike. You’ll find that they make maintenance and repairs much smoother.
Tip: Always keep at least two tire levers in your kit. You never know when you’ll need extra help with a stubborn tire.
Tips for Choosing Tire Levers
Picking the right tire levers can make a big difference in your repair experience. You want tools that are strong, easy to use, and safe for your bike. Here are some features to look for:
| Feature | Description |
|---|---|
| Material Strength | Molded box construction and proprietary plastic blend makes these the strongest levers available. |
| Design for Ease of Use | Chisel tip shape is easy to insert beneath the bead and slightly thicker shape prevents slipping. |
| Ability to Handle Tight Tires | Bold shape allows for easy removal of tight tires without bending or breaking. |
- Many tire levers use hard plastic, but some have steel cores for extra strength.
- Curved ends help you slip the lever under the tire lip, making removing the tire easier.
- Some levers include a hook to secure to a spoke, giving you more leverage.
You should choose tire levers that fit your hand and your repair kit. If you ride often or deal with tough tires, consider a set with a steel core. For casual rides, lightweight plastic levers work well. Always check that your levers won’t damage your rims or puncture your tubes. Good tire levers help you keep your bike ready for any ride and make maintenance simple.
What’s in a Patch Kit?
When you open a patch kit, you find everything you need to fix a puncture on the go. Most kits come in a small, easy-to-carry box or pouch. You usually get several tire patches in different sizes, a small tube of rubber cement or glue, and a piece of sandpaper or a metal scuffer. Some kits, like the slime tube patch kit, even include instructions and a small marker to help you spot the hole. If you ride tubeless, you might use a dynaplug pro tubeless tyre patch kit, which has special plugs for sealing bigger holes.
Here’s a quick look at what you’ll find inside most patch kits:
| Item | Purpose |
|---|---|
| Patches (various) | Cover and seal the hole in your tube |
| Rubber cement/glue | Bonds the patch to the tube |
| Sandpaper/scuffer | Prepares the tube for better adhesion |
| Instructions | Guides you through the repair steps |
| Marker (sometimes) | Helps you mark the puncture spot |
You can see that a patch kit packs a lot of value into a small package. It’s one of those must-have tools you should never leave behind.
Why a Patch Kit Is Essential
You never know when you’ll get a flat tire. A patch kit gives you a way to fix a puncture and keep riding. Some cyclists like to carry a spare tube for quick repairs, especially if they’re in a hurry. Swapping out a tube is fast, but it takes up more space in your bag. A patch kit, on the other hand, is small and light. You can use it many times before you need to buy a new one.
Let’s look at how a patch kit compares to a spare tube:
- Patches work well if you apply them correctly, but they take a little more time.
- Many riders grab a spare tube first when they’re on the road and save patching for when they get home.
- Some cyclists don’t trust patches for long-term fixes, but they’re great for getting you back on the road.
If you want to be ready for anything, carry both a spare tube and a patch kit. That way, you have options for every situation. You can use the patch kit for small holes or as a backup when you run out of tubes. It’s a smart move for anyone who cares about bike maintenance and wants to avoid getting stranded.
Tip: Always check your patch kit before you ride. Make sure you have enough patches and that your glue hasn’t dried out.
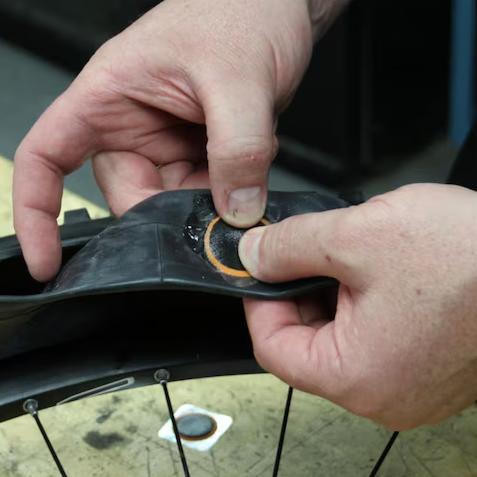
How to Use a Patch Kit Effectively
Fixing a flat with a patch kit is simple if you follow the right steps. You just need a little patience and the right tools. Here’s how you do it:
- Take the wheel off your bike.
- Use tire levers to remove the tire from the rim.
- Pull out the inner tube.
- Find the puncture by inflating the tube and listening for air or feeling for a leak.
- Scuff the area around the hole with sandpaper or a metal square. This helps the patch stick.
- Spread a thin layer of rubber cement around the hole.
- Wait a few seconds for the glue to get tacky, then place the patch over the hole. Press down firmly.
- Wait a minute or two to let the patch set. Applying the patch carefully makes a big difference.
- Put the tube back in the tire, fit the tire onto the rim, and inflate it.
You can use this process with any patch kit, whether it’s a basic one or something like the slime tube patch kit. If you ride tubeless, you might use a dynaplug pro tubeless patch kit, which works a little differently but still gets you rolling again.
Note: Practice using your patch kit at home before you need it on the road. You’ll feel more confident and fix flats faster.
A patch kit is one of the most important tools for bike maintenance. It keeps you moving and helps you handle unexpected flats with ease.
Why Carry a Spare Tube?
You never know when a puncture will happen. Even if you have a patch kit, carrying a spare tube gives you peace of mind. You can swap out your damaged tube and get back on the road in minutes. This means you don’t have to worry about whether your patch will hold or if you’ll get stranded far from home.
Here are some reasons you should always pack a spare inner tube:
- You can fix a flat quickly and keep riding without stress.
- If your patch doesn’t stick or the hole is too big, you have a backup plan.
- Sometimes, you might meet another cyclist who needs help. Having an extra tube lets you lend a hand.
- If your first tube has a valve problem, a second tube keeps you from getting stuck.
Tip: Many riders carry two tubes, especially on long rides or in remote areas. It’s a simple way to stay prepared.
A spare tube is one of those must-have tools that makes every ride safer and more enjoyable.
How to Choose the Right Tube
Picking the right tube for your bike is easy if you know what to look for. You want a tube that fits your tire and works with your bike’s valve. Here’s a simple way to choose:
Measure the Diameter and Width
Look at the side of your tire. You’ll see numbers like “700 x 25c” or “26 x 1.95.” The first number is the diameter, and the second is the width. Match these numbers when you buy a tube.Select the Valve Stem Type
Bikes use two main valve types: Schrader (like car tires) and Presta (narrow and tall). Check your rim to see which one you need. Pick a tube with the right valve so it fits your wheel.Consider Durability
Some tubes are self-sealing, which helps stop small leaks before they become big problems. Others are basic but lighter. Think about your riding style and where you ride most.
Note: Always double-check the packaging before you buy. A tube that’s too big or too small won’t work well.
Choosing the right tube means you’ll spend less time fixing flats and more time enjoying your ride.
SUNSOUL’s Durable Tube Options
When you want a tube that stands up to tough rides, SUNSOUL has you covered. SUNSOUL uses high-temperature resistant synthetic rubber, so their tubes last longer even in extreme heat or cold. Their patches use vulcanized rubber and strong adhesive layers, which means you get a seal that holds tight.
SUNSOUL tubes have reinforced cord layers. This makes them 20% more tear-resistant than many other brands. You won’t have to worry about cracks or splits when you’re removing the tire or riding over rough ground. The eco-friendly, solvent-free adhesives protect your tires and the environment at the same time.
Here’s a quick look at what sets SUNSOUL apart:
| Feature | SUNSOUL Tubes Benefit |
|---|---|
| Synthetic Rubber | Handles high temperatures and tough rides |
| Vulcanized Rubber Patches | Strong, long-lasting seal |
| Reinforced Cord Layers | 20% more tear resistance |
| Eco-Friendly Adhesives | Safe for you and the planet |
| Dual Cure Bonding | Extra-strong seal for reliability |
| Silicone-Based Sealants | Supports recycling and green efforts |
| Safety Certifications | Meets DOT and ECE R109 standards |
You can trust SUNSOUL tubes for every ride. They give you the confidence to tackle any road or trail, knowing your tube can handle the challenge.
Mini Pump vs. CO2 Inflator
When you need to inflate your bike tire after a flat, you have two main choices: a mini pump or a CO2 inflator. Each option has its own strengths and weaknesses. You want to pick the one that fits your riding style and repair kit.
Here’s a quick comparison to help you decide:
| Feature | Mini Electric Pump | CO2 Pump |
|---|---|---|
| Precision | Allows setting a specific pressure for optimal inflation | Generally less precise |
| Multiple Uses | Can be used multiple times on a single charge | Limited to the number of cartridges |
| Ease of Use | Minimal effort required, automatic inflation | Quick but requires manual operation |
| Size and Weight | Larger and heavier than CO2 pumps | More portable and lightweight |
| Charging | Needs to be charged, risk of running out of battery | No charging needed |
| Price | Typically more expensive | Generally cheaper |
A mini pump gives you control over the pressure. You can use it as many times as you want, as long as it’s charged. It’s easy to use, but it takes up more space in your bag and costs more. A CO2 inflator is fast and light. You can inflate your tire in seconds, but you need to carry extra cartridges. If you run out, you can’t use it again until you get more.
Pros of Mini Pump:
- You can set the exact pressure you want.
- You get multiple uses from one charge.
- It’s easy to use with little effort.
Cons of Mini Pump:
- It’s bigger and heavier than a CO2 inflator.
- You need to remember to charge it.
- It costs more.
Pros of CO2 Inflator:
- It inflates your tire super fast.
- It’s small and light, so it fits anywhere.
Cons of CO2 Inflator:
- You can only use it as long as you have cartridges.
- It’s harder to get the exact pressure you want.
You might want to carry both in your kit. That way, you always have the right tools for any situation.
How to Use Each Option
You want to fix your flat quickly and get back on the road. Here’s how you use each inflation tool:
Using a Mini Pump:
- Attach the pump securely to your valve stem.
- Pump in smooth, steady strokes until you reach the right pressure.
- Check the pressure with a gauge if you have one.
- Remove the pump and close the valve tightly.
Using a CO2 Inflator:
- Connect the CO2 inflator to your tire’s valve.
- Release the CO2 to inflate the tire quickly.
- Make sure the tire is seated properly on the rim so it doesn’t blow off.
- Practice at home before your ride so you know how it works.
Tip: Always check your tire pressure after inflating. You want to avoid over-inflating or under-inflating your tire.
Both tools work well if you use them the right way. Practice at home so you feel confident when you need to fix a flat on the road.
Tips for Fast Inflation
You want to get back to riding as soon as possible. Here are some tips to help you inflate your tire quickly and safely:
- Find the recommended PSI on your tire’s sidewall.
- Check your valve type before you start.
- Use a pump or inflator that matches your valve.
- Inflate your tire to the recommended PSI for your bike and riding style.
- Different bikes and tires need different PSI levels.
- Always buy tubes with the right valve style for your wheels.
- A good pump with a clear gauge helps you get the right pressure every time.
Note: If you use a CO2 inflator, carry extra cartridges. If you use a mini pump, make sure it’s charged and ready.
With these must-have tools and tips, you’ll fix flats faster and spend more time enjoying your ride.
What Is a Bike Multi-Tool?
A bike multi-tool is like a Swiss Army knife for cyclists. You carry it in your bag or pocket, and it helps you fix problems on the road. When you get a flat tire, you might need to remove your wheel, adjust your brakes, or tighten a bolt. That’s where a multi-tool comes in handy. It packs many small tools into one compact device, so you’re always ready for surprises.
You’ll find that a good bike multi-tool covers all the basics for flat tire emergencies. Here’s what you should expect from a reliable multi-tool:
- Allen wrenches for adjusting bolts
- Screwdrivers (both flathead and Phillips)
- Torx wrenches for special bolts
- Chain breaker for fixing a broken chain
- Spoke wrench for straightening wheels
- Tire lever for removing tires
- Valve extender for deep rims
- Tire plug kit for quick puncture fixes
You don’t need to carry a whole toolbox. A multi-tool gives you the must-have tools you need in one small package. This makes it easy to handle most repairs, whether you’re on a city street or a mountain trail.
Tip: Practice using your multi-tool at home. You’ll feel more confident when you need it during a ride.
Key Features to Look For
Choosing the right bike multi-tool can make your rides smoother and safer. You want something that fits your hand, lasts a long time, and has all the functions you need. Here’s a table to help you compare the most important features:
| Feature | Description |
|---|---|
| Durability | Hardened steel bits with anti-corrosion technology ensure longevity. |
| Portability | Compact enough to fit in a saddlebag or jersey pocket while packing essentials. |
| Versatility | A range of bits that match your bike’s components is crucial. |
| Ergonomics | Smooth, machined aluminum side plates for easy handling. |
| Weight | Lightweight options available without compromising function. |
When you pick a multi-tool, check if it feels sturdy. Hardened steel bits last longer and don’t rust easily. You want a tool that fits in your pocket or saddlebag, so you can take it everywhere. Look for a tool with all the bits you need for your bike. Some bikes use special bolts, so make sure your tool matches. Smooth side plates make it comfortable to hold, even if your hands are cold or wet. Lightweight tools are easier to carry, but they should still work well.
Note: Don’t forget to check if your multi-tool includes a chain breaker and spoke wrench. These can save your ride if you break a chain or bend a wheel.
SUNSOUL’s Multi-Tool Solutions
SUNSOUL designs multi-tools that stand up to tough rides and rough conditions. You get tools made from natural rubber compounds that meet ISO 3074 standards. This means you get 20% more abrasion resistance than with synthetic blends. If you ride on rough terrain or off-road, you’ll notice the difference. SUNSOUL’s tools can handle heavy-duty use, like fixing flats on motorcycles or light trucks, not just bikes.
Here’s how SUNSOUL’s multi-tool solutions compare:
| Category | Usage Scenarios | Characteristics | Advantages |
|---|---|---|---|
| Material Quality | Heavy-duty vehicles, bikes | Natural Rubber Compound (ISO 3074) | 20% more abrasion resistance |
| Durability | Off-road, rough terrain | Burst Pressure: 100 PSI | Handles extreme pressure changes |
| Puncture Resistance | Frequent off-road use | Puncture Rate: 2/1000km (ISO 1427) | Reinforced layers reduce flats by 60% |
You can trust SUNSOUL’s multi-tools to last longer and work better in tough situations. The reinforced inner layers help prevent flats, so you spend less time fixing your bike and more time riding. SUNSOUL focuses on making tools that are reliable, strong, and easy to use. You get peace of mind knowing your must-have tools are ready for any challenge.
If you want a multi-tool that keeps up with your adventures, SUNSOUL has you covered.
Helpful Extras for Quick Bike Flat Tire Repair
Sometimes you need more than the basics to make bike flat tire repair quick and easy. Packing a few extra items can save you time and keep your hands clean. These extras help you handle unexpected problems and finish your trailside repair without stress. Let’s look at three helpful tools you should consider adding to your kit.
Tire Boot
A tire boot is a lifesaver when your tire gets a big tear or cut. You can use it to patch up the inside of your tire so you can keep riding. The Park Tool TB-2 Emergency Tire Boot works well for this job. It uses a strong, waterproof vinyl membrane with fiber weave for extra strength. The boot sticks inside your tire with a pressure-sensitive adhesive. You just clean the area, peel off the backing, and press the boot over the damaged spot. This quick fix lets you ride home safely.
Here’s how you use a tire boot:
- Clean the area around the tear.
- Remove the protective backing from the boot.
- Place the boot over the damaged section inside the tire.
- Press firmly to make sure it sticks.
If you want to see more extras for fast repairs, check out this table:
| Item | Description | Price |
|---|---|---|
| Dynaplug Pro Tubeless Patch Kit | Quick and compact tool for tubeless tires. | $53.99 |
| Slime Tube Patch Kit | Includes pre-cut patches and rubber cement for tubes. | $4.33 |
| MotoPumps Mini Pro | Mini air compressor for fast tire inflation. | $53.99 |
| Leatherman Wave | Multipurpose tool with 17 functions for trailside repair. | $89.85 |
Valve Core Tool
A valve core tool helps you keep your tire pressure just right. You use it to remove or install the valve core, which is the small part inside your tire valve. This tool lets you fix leaks and replace damaged cores. The forked end removes and installs valve cores. The tapping end cleans and restores the inside threads. The die end cleans and restores the cap threads. With this tool, you can adjust your tire pressure and make sure your patch kit works well every time.
- Remove and install valve cores easily.
- Repair leaks and replace damaged cores.
- Clean and restore threads for a better seal.
Disposable Gloves
You want to keep your hands clean during bike flat tire repair. Disposable gloves protect your skin from dirt, grease, and chemicals. Nitrile gloves work best because they resist hydrocarbon-based solvents and give you better grip than latex gloves. Wearing gloves helps you stay clean, especially if you need to get back to work or school after your ride.
- Protect your hands from dirt and grease.
- Nitrile gloves offer better resistance and dexterity.
- Stay clean and ready for anything after your trailside repair.
Tip: Pack a few pairs of gloves in your kit. You’ll thank yourself when you finish a messy repair and your hands stay spotless.
Small Rag or Wipes
You know how messy fixing a flat tire can get. Dirt, grease, and sticky sealant seem to find their way onto your hands and bike. Packing a small rag or a few wipes makes your trailside repair much easier. You can clean your hands before grabbing a snack or heading home. Wipes also help you clean the tire and rim before you patch a tube, which helps the patch stick better.
Here are some ways a rag or wipes come in handy:
- Wipe away dirt from your hands and tools.
- Clean the tire surface before applying a patch.
- Remove grease from your bike chain if you touch it by accident.
- Tidy up your repair area so you don’t get grime on your clothes.
You can use a reusable cloth or disposable wipes. Some riders pack a microfiber towel because it dries quickly and doesn’t take up much space. Others prefer baby wipes for their convenience. Either way, you’ll be glad you have something to clean up after a trailside repair.
Tip: Store your rag or wipes in a zip-top bag. This keeps them clean and ready for action when you need them most.
Tire Pressure Gauge
Getting your tire pressure right is key for a safe and smooth ride. If you guess the pressure, you might end up with a tire that feels squishy or one that’s too hard. That’s where a tire pressure gauge comes in. This small tool helps you check the exact pressure in your tire, so you know it’s just right.
Let’s look at why a tire pressure gauge matters:
- A reliable tire pressure gauge helps you keep your tires at the correct pressure. This means your bike handles better and you stay safer on the road.
- If your gauge gives the wrong reading, you might ride with a tire that’s too soft or too firm. That can make your repairs less effective and even damage your tire.
You want a gauge that’s easy to read and fits your valve type. Some gauges have digital displays, while others use a simple dial. Make sure your gauge is calibrated so you get accurate results every time.
- Using a reliable tire pressure gauge gives you confidence in your repairs.
- Proper calibration means you get the right pressure, which helps your tires last longer and perform better.
If you’re packing your repair kit, don’t forget this tool. It’s a small addition that makes a big difference. You’ll notice smoother rides and fewer problems after each trailside repair.
Note: Check your tire pressure before every ride. This simple habit helps you avoid flats and keeps your bike rolling strong.
Quick Checklist of Essential Tools
Essential Tools at a Glance
You want to ride with confidence. Packing the right kit makes bike flat tire repair quick and easy. Here’s a simple checklist you can follow before every ride:
- Tire levers
- Patch kit
- Spare tube
- Mini pump or CO2 inflator
- Multi-tool
- Tire boot
- Valve core tool
- Disposable gloves
- Small rag or wipes
- Tire pressure gauge
Take a look at this table for a quick overview:
| Tool | Why You Need It |
|---|---|
| Tire levers | Remove tire from rim |
| Patch kit | Fix punctures on the go |
| Spare tube | Fast replacement |
| Mini pump/CO2 | Inflate tire anywhere |
| Multi-tool | Adjust and repair parts |
| Tire boot | Patch big tire cuts |
| Valve core tool | Fix valve leaks |
| Gloves | Keep hands clean |
| Rag or wipes | Clean up after repairs |
| Pressure gauge | Check tire pressure |
Tip: Check your kit before you leave home. You don’t want to discover you’re missing something when you need it most.
Packing Tips for Your Repair Kit
You want your kit to be light and easy to carry. Start with a small pouch or saddlebag. Place your essential tools inside. Roll your spare tube to save space. Use a zip-top bag for your patch kit and wipes. Keep your mini pump or CO2 inflator in an outside pocket for quick access.
Try this packing order:
- Lay out all your tools.
- Pack the heaviest items at the bottom.
- Put small items like gloves and patches on top.
- Use pockets for things you need fast, like your pump.
You can use a checklist on your phone to double-check your kit before each ride. This habit helps you stay prepared for any flat tire emergency.
Remember: A well-packed kit means less stress and more riding time.
You never know when you’ll need to fix a flat, so carrying essential tools makes every ride smoother. When you build your own kit with SUNSOUL’s trusted tools, you stay ready for any bike flat tire repair. Preparation means you spend more time riding and less time stuck on the side of the road. Stay smart, pack your kit, and enjoy every mile.
FAQ
How often should you check your bike repair kit?
You should check your kit before every ride. Make sure you have all your tools and supplies. Replace anything that looks worn or used up. Staying prepared helps you avoid surprises.
Can you use a car tire patch kit for your bike?
You shouldn’t use a car tire patch kit on your bike. Bike tubes need patches made for thinner rubber. SUNSOUL bike patches stick better and seal leaks faster.
What’s the best way to store your spare tube?
Roll your spare tube tightly. Place it in a zip-top bag. Keep it away from sharp objects. This keeps your tube clean and ready for emergencies.
How do you know which patch size to use?
Pick a patch that covers the hole with extra space around it. Most kits include small and large patches. Use a bigger patch for larger punctures.
Tip: Always read the instructions in your patch kit. This helps you get the best seal every time.
Why choose SUNSOUL tire patches for your bike?
SUNSOUL patches use thick, round designs and strong adhesive. You get a leak-proof seal that lasts. SUNSOUL products work for all bike types and keep you riding longer.
| SUNSOUL Patch Feature | Benefit |
|---|---|
| Thick, round shape | Prevents peeling |
| Vulcanizing gum | Strong adhesion |
| Leak-proof seal | Reliable repair |