A tubeless tire patch offers the quickest method for a permanent puncture repair. You can fix your tubeless tire in under five minutes. This gets you back on the road or trail with minimal delay. A tubeless tire patch provides an unbeatable mix of speed and simplicity. It creates a reliable, long-lasting seal for your tire. This type of repair is essential, as studies show one in three riders has had a ride-ending flat tire in the last three years. Using a tubeless tyre patch ensures your tubeless setup keeps you rolling. This simple fix provides a strong seal, giving you confidence in your tire’s performance.
Why a Tubeless Tyre Patch Is the Fastest Fix
You face a puncture on the road or trail. Your goal is to get moving again quickly. A tubeless tire patch is your best tool for this job. It provides the fastest solution for most common tire damage. This method avoids long delays and complex procedures. You can handle tire emergencies with confidence and speed.
Repair in Minutes, Not Hours
A fast fix is crucial during a ride. You want to spend your time riding, not performing a lengthy repair. A tubeless tire patch lets you achieve quick repairs in under five minutes. This speed is a significant advantage over other methods. An internal vulcanizing patch, for example, requires much more time and effort. You would need to remove the tire completely to apply that kind of fix.
The table below compares the two repair processes. You can see why a tubeless plug is the ideal choice for roadside emergencies.
| Feature | Tubeless Plug Repair (External) | Internal Vulcanizing Patch Repair |
|---|---|---|
| Repair Time | Under 5 minutes | 30+ minutes |
| Process | Insert a plug from the outside | Remove tire, clean, apply patch inside, cure |
| Tools Needed | Simple plug kit | Tire levers, buffer, cement, roller |
| Best Use Case | On-the-road emergencies, quick fixes | Permanent repairs in a workshop |
This speed can make a huge difference, especially in a competitive setting. A quick tubeless repair can save you from a ride-ending delay.
A cyclist in a race shared their experience. They heard the dreaded hissing sound of a flat tire. Their tubeless sealant went to work, but a plug was needed for a full seal. The fast fix saved them an estimated “10-15 minutes.” This prevented a minor emergency from ruining their race day.
This shows how a simple tubeless fix keeps you in the action.
No Wheel Removal Needed
The biggest time-saver is the process itself. You do not need to remove your wheel from the bike. This is a game-changer for roadside repairs. You can fix the tire while it remains on your bike. This simple fact makes the entire repair process faster and cleaner.
Here is the typical workflow for a tubeless tire patch:
- Locate: Find the puncture in your tubeless tire.
- Insert: Use the tool to push the tubeless patch into the hole.
- Inflate: Air up your tire and continue your ride.
This straightforward procedure eliminates many steps. You avoid wrestling with tire levers. You do not have to handle a messy, sealant-covered tire. The tubeless tyre patch provides a direct and efficient fix. This makes it the superior choice for any rider who values their time on the road or trail. Your tubeless setup becomes more reliable with this simple repair option.
The Ultimate Guide to Tubeless Tire Repair
You can master the art of tubeless tire repair with a few simple steps. This guide walks you through the process from start to finish. You will learn how to find the puncture, insert a patch, and get your tire ready for the ride. Following these instructions ensures a successful and durable fix. This knowledge gives you the confidence to handle any flat tire situation on your own.
Find and Prepare the Puncture
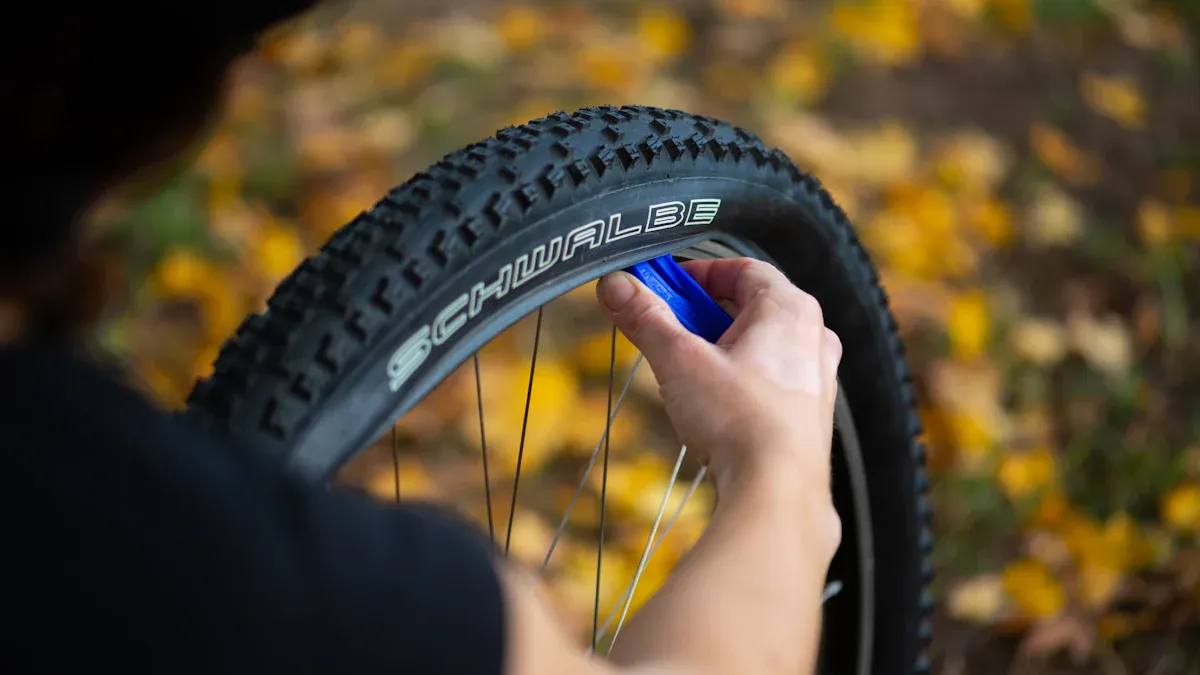
Your first task is to locate the hole in your tubeless tire. Sometimes the sound of escaping air makes this easy. Other times, the puncture is small and quiet. You can use a systematic approach to find it.
- Inflate the tire to its maximum recommended pressure.
- Listen carefully for any hissing sounds. This often leads you directly to the leak.
- If you hear nothing, you can submerge the wheel in water.
- Look for a stream of bubbles. The bubbles will reveal the exact location of the puncture.
Tire manufacturer Schwalbe suggests this method. Inflating the tire to its maximum pressure and listening for hissing is the first step. If that fails, submerging the wheel in water to spot bubbles is a highly effective technique.
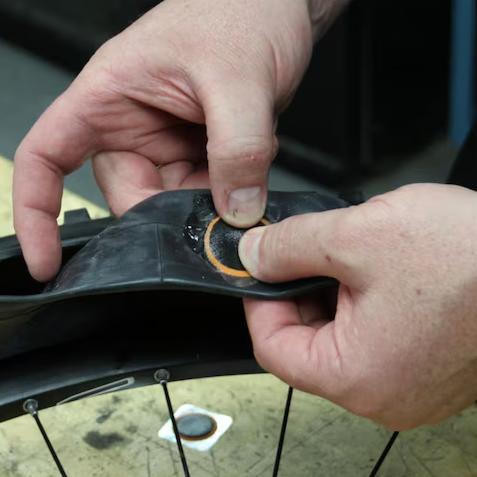
Once you find the hole, you must prepare it for the repair. Your tubeless tire patch kit includes a reamer tool for this job. You use the reamer to clean out the puncture. Insert the tool into the hole and move it in and out. This action clears debris and slightly roughens the opening. This preparation helps the tubeless tire patch create a stronger bond with your tire. A clean hole is essential for a lasting seal.
Insert the Patch for an Instant Seal
Now you are ready to insert the tubeless tire patch. This step creates the instant seal that gets you riding again. Take one sticky patch and thread it through the eye of the insertion tool. You should center the patch in the tool.
Next, you will push the tool and patch into the tire. Firmly insert the tool into the prepared puncture. You need to insert it deep enough so the patch can seal the hole completely. However, you must leave some material sticking out of the tire. This ensures the patch plugs the entire thickness of the tire casing. The sticky, unvulcanized nature of the tubeless tyre patch allows it to chemically bind with the tire rubber. This interaction forms a powerful, airtight seal.
With the patch in place, you can carefully remove the insertion tool. Pull the tool straight out, leaving the tubeless tire patch behind. The two ends of the patch will remain outside the tire. This quick fix provides an immediate and reliable repair for your tubeless setup.
Trim and Inflate to Finish
The final step in your tubeless tire repair is to trim the excess material and inflate the tire. Use the small knife from your kit to trim the ends of the patch. You should leave about 2-3mm of the patch sticking out from the tire surface. This small amount will wear down naturally as you ride. Do not cut it completely flush with the tire.
With the repair complete, it is time to add air. You can use a mini-pump or a CO2 inflator. A CO2 inflator is the fastest way to get your tubeless tire back to pressure. Many riders prefer larger cartridges to ensure they have enough air.
“I use only CO2 and always use 20g tanks. That extra air is nice if needed.”
Using a 20g cartridge for your tubeless tire gives you peace of mind. You know you can achieve the right pressure without running out of air. Once inflated, spin the wheel to help the sealant coat the inside of the tire and reinforce the new seal. Your tubeless tire is now ready for the road or trail.
What Makes a Tubeless Tire Patch So Reliable?
You need a repair that you can trust. A tubeless tire patch offers a dependable fix for your tubeless tire. Its reliability comes from a combination of physical strength, a clean application process, and the quality of the materials used. This ensures your tubeless setup remains secure long after the repair.
A Strong Mechanical Seal
A tubeless tire patch creates a powerful mechanical seal. The patch physically plugs the hole, stopping air from escaping. High-quality patches are made from rubber compounds with impressive tensile strength. This strength is crucial for a durable repair that can withstand the forces of riding. The material must be strong enough to restore the tire’s integrity after tire damage.
The table below shows the tensile strength for various rubber types, measured in megapascals (MPa). A higher number means the material is stronger.
| Type of Rubber | Tensile Strength (MPa) |
|---|---|
| Natural Rubber | 20 – 35 |
| Nitrile Rubber | 10 – 30 |
| General Rubber (ASTM D412) | 10 – 30 |
This strong material ensures your tubeless tire repair holds up. The patch flexes with your tire, creating a lasting fix that keeps your tubeless system airtight.
Cleaner Than Sealant Alone
While tubeless sealant is great for small punctures, larger holes can be messy. Sealant can spray out, coating your bike and clothes. A tubeless tire patch provides a much cleaner solution. You insert the patch directly into the puncture, which helps contain the sealant inside the tire. This method creates an immediate seal, minimizing mess and fluid loss. Your tubeless tire gets a quick fix without the cleanup. This makes the entire repair process faster and more pleasant, getting you back on your tubeless setup with less hassle.
The SUNSOUL Quality Difference
The quality of your tubeless tyre patch matters for safety and performance. SUNSOUL provides superior repair solutions that create a permanent bond. The difference lies in the materials.
SUNSOUL’s vulcanizing fluid is designed for quick drying and uses high-quality rubber cement. This ensures an exceptionally strong and durable bond, making the patch a permanent part of the tire. Generic patches may not offer the same level of safety or durability and can fail under stress.
Choosing a quality kit ensures your tubeless tire repair is reliable. SUNSOUL’s commitment to high standards means you get a dependable seal every time, giving you confidence on any ride.
Choosing Your Essential Repair Kit
You need the right tools to handle a flat tubeless tire. Selecting the correct tire repair kit ensures you are prepared for any puncture. Your choice depends on your riding style and the type of tire you use. A good kit provides reliable repair solutions for quick roadside fixes.
Compact Kits for Road & Gravel
You want a small and light tire repair kit for road and gravel cycling. These kits must fit easily into a jersey pocket or saddlebag. Look for a tire repair kit with a sleek, machined aluminum body. This makes it durable yet two to three times lighter than other options. A quality compact kit for your tubeless tire should include:
- A combined reamer and insertion tool.
- Multiple thin plugs, often called ‘bacon strips’, designed for a road tire.
- The ability to twist multiple plugs together for a larger puncture.
This type of kit gives you everything needed for a fast tubeless tire repair without adding weight.
Heavy-Duty Kits for MTB
Mountain biking demands a more robust approach to tire repair. The rough terrain can cause larger, more aggressive punctures in your tubeless tire. A heavy-duty tire repair kit is essential for these situations. These kits typically feature thicker, more substantial plugs. This ensures a strong seal on a high-volume MTB tire. The tools may also be larger to provide better leverage when you repair a tough tire casing. Having the right kit gives you confidence on the trail, knowing you can handle serious tire damage.
Key Tools in a SUNSOUL Kit
A quality tubeless tire patch kit contains specific tools for a successful repair. In a SUNSOUL kit, the main tool often serves two purposes. This tool is an insertion fork or needle. You use it to prepare the puncture and insert the plug.
The tool’s functions are simple but critical:
- It cleans debris from the puncture hole.
- It helps you insert the tubeless plug for a secure seal.
This dual-function design makes the process efficient, which is vital during roadside emergencies. A reliable tool is the foundation of a fast and effective tubeless repair. Your tubeless setup is only as dependable as the tools you carry to fix it.
A tubeless tire patch tire repair kit is your essential tool. You can perform a fast fix for any tubeless tire puncture. A quality tire repair kit from a trusted manufacturer like SUNSOUL ensures your safety. It turns a tubeless tire emergency into a minor roadside interruption. Your tubeless tire repair becomes simple.
Equip yourself with a
tubeless tyre patchtire repair kit. You can handleroadside emergencieswith confidence. Thistubeless tire patchrepairgives you a reliablefixfor yourtubelesstire. Ride yourtubelesstireknowing you are prepared for anyroadsidepuncture.
FAQ
How long does a tubeless patch repair last?
You can expect a high-quality patch to last for the life of the tire. The patch vulcanizes to the rubber, creating a permanent, airtight seal. This durable fix gives you long-term confidence in your tire’s performance without needing further attention.
Can I reuse a tubeless tire patch?
You should not reuse a tubeless tire patch. Each patch is designed for a single use to ensure a safe and reliable repair. Always use a new patch from your kit for every puncture to guarantee the strongest possible bond.
What is the largest puncture a patch can fix?
Most standard plugs in a tire repair kit can fix punctures up to 6mm in diameter. For larger holes, you can twist two plugs together. This technique provides a secure fix for more significant tire damage you might encounter on the trail.
Note: Always check the specifications of your specific tire repair kit, as plug sizes can vary between manufacturers.
Do I still need sealant if I use a patch?
Yes, you should keep sealant in your tire. The sealant helps the patch create a better initial seal and plugs any tiny gaps. Your sealant remains ready to fix future small punctures, while your tire repair kit handles the bigger ones.