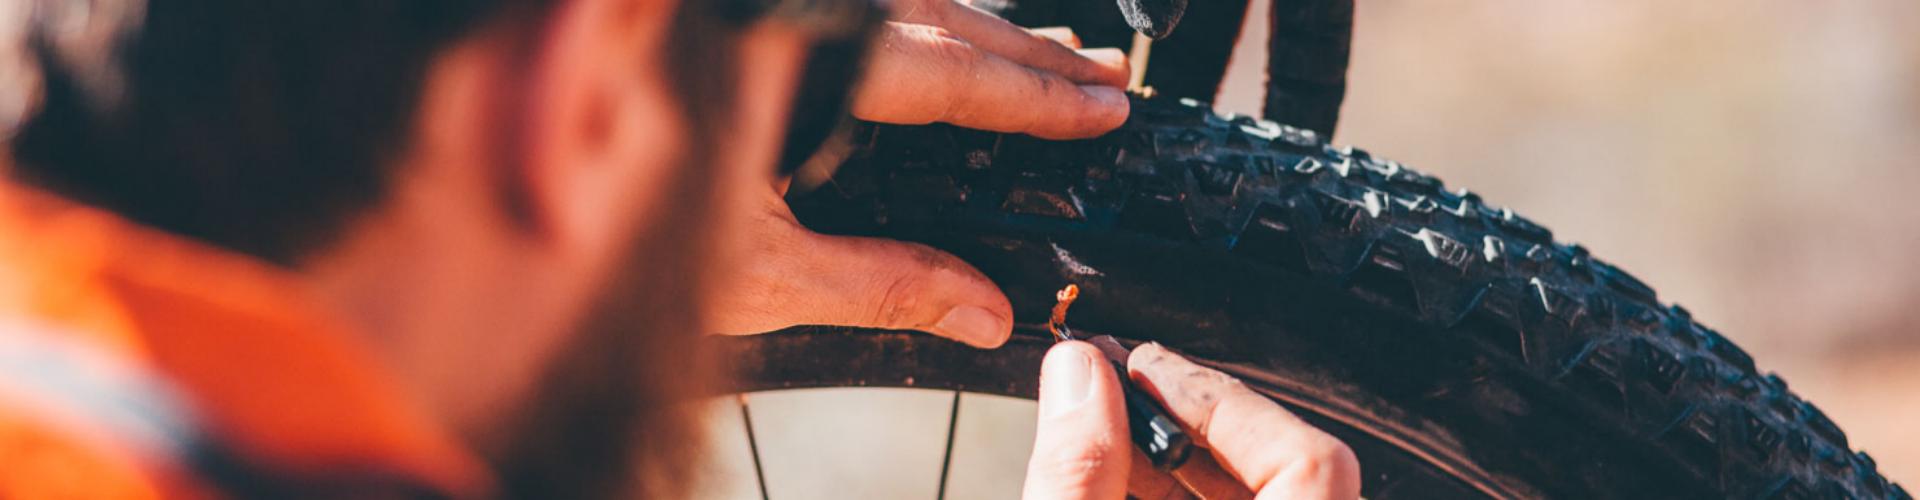
You know that flat tires are a frustrating reality for cyclists. Daily commuters often face frequent punctures from road debris.
- One rider reported 10 punctures over 6,000 km, mostly from small pieces of glass.
- The rear tire is more prone to flats because it carries more of your weight.
This is where tube repair patches offer a reliable fix. They create a permanent repair through a chemical process called vulcanization. Special cement chemically fuses the patch to your inner tube. This action creates a single, seamless piece of rubber. The repaired area becomes as strong and airtight as the original tube itself.
The Science of the Seal: How Vulcanization Works
When you use a patch kit, you are not just gluing a piece of rubber onto your tube. You are starting a chemical reaction called vulcanization. This process creates a bond so strong that the patch becomes a permanent part of the tube. Let’s explore the science that makes this powerful seal possible.
The Role of Vulcanizing Cement
The process begins with the special cement included in your kit. This is not ordinary glue. It is a chemical vulcanizing fluid designed to prepare the tube’s surface for bonding. When you apply it, the solvents in the cement clean the rubber and cause it to swell slightly. This action opens up the rubber’s molecular structure. It creates the perfect surface for the patch to chemically fuse with the tube.
A quality kit contains several key materials to achieve this reaction:
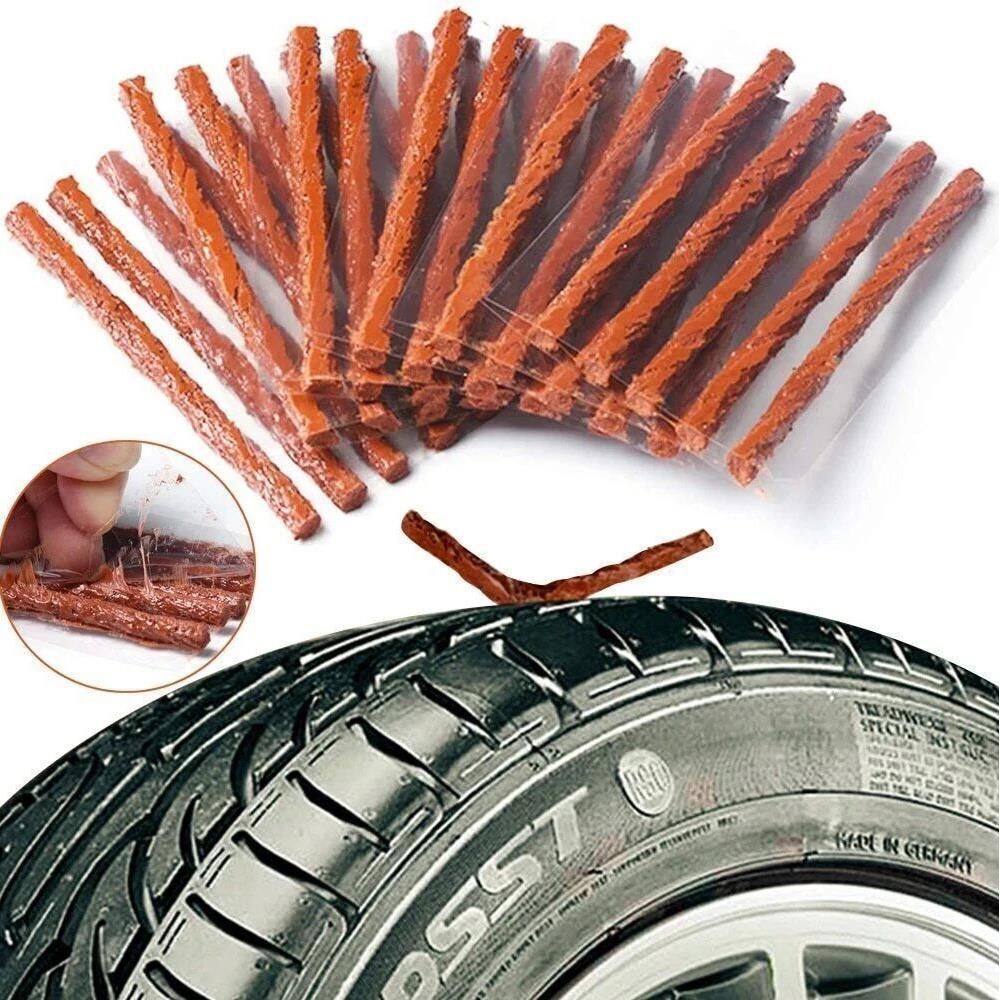
- Chemical Cure Tube Patches: These patches have a layer of uncured rubber and chemical agents.
- Cements for tube repair: This fluid contains accelerators that kickstart the vulcanization process.
- Dual Cure Tube Patches: Some advanced patches can be cured with or without heat, offering more versatility.
The Patch and the Chemical Bond
The real magic happens when the patch meets the cement. The patch itself is made of uncured rubber. It contains dormant chemical agents. The vulcanizing cement activates these agents, starting a powerful reaction. Two key components drive this process:
| Component | Function |
|---|---|
| Sulfur | This is the main cross-linking agent. It builds strong sulfur atom chains that connect the rubber polymers of the tube and the patch. |
| Accelerators | These chemicals speed up the reaction. They allow vulcanization to happen quickly and at room temperature. |
The accelerators in the cement prepare the tube, while the sulfur in the patch gets ready to build bridges. When you press the patch onto the cement-coated area, these components work together. They form strong cross-links between the rubber molecules of the tube and the patch. This reaction erases the boundary between the two pieces, fusing them into one seamless unit.
Why It’s a Permanent Fix
A vulcanized seal is a permanent repair because it creates a true chemical bond. Unlike a simple sticker, a vulcanized patch becomes an integral part of the inner tube. This chemical fusion provides incredible resilience. The repaired area can handle heat, pressure, and stretching just like the rest of the tube.
Glueless patches use a sticky adhesive for a temporary fix. They can peel away when exposed to heat or moisture. A vulcanized repair, however, is different. It is as reliable and durable as the tube itself.
Note: A properly applied vulcanized patch can withstand extreme temperatures, from a freezing -40°F to a scorching 250°F, without failing.
This table shows why vulcanization offers a superior, long-term solution.
| Feature | Vulcanized Patch | Glueless Patch |
|---|---|---|
| Bond Type | Permanent Chemical Bond | Temporary Adhesive |
| Durability | High (Resists heat, pressure, stretching) | Low (Can peel or fail in heat) |
| Best Use | Lasting, reliable repair | Quick, temporary fix on the road |
By understanding this science, you can trust that your repair will hold up mile after mile.
Why You Need Tube Repair Patches in Your Kit
A flat tire can ruin a ride, but having the right tools turns a major problem into a minor delay. A good puncture repair kit is more than just a convenience; it is an essential part of smart cycling. It offers reliability, saves you money, and helps protect the environment.
Reliability: A Lasting Repair
You need a repair that you can trust. A vulcanized patch provides a permanent bond, unlike a simple temporary fix. When you apply it correctly, the patch can last for the entire life of the inner tube. The chemical bond is incredibly resilient. It resists heat, pressure, and abrasion, ensuring the seal holds up on rough roads and at high speeds. This makes a bicycle inner tube repair kit a dependable solution.
I’m still using patches (the kind that require vulcanizing solvent) from a kit that’s 20 years old. As long as they still have the foil on one side and cellophane on the other sealing out air, they may last a lifetime and beyond.
Cost-Effectiveness: Repair, Don’t Replace
Consistent cycling can lead to occasional punctures, and the cost of new tubes adds up. A puncture repair kit offers a much cheaper solution. You can fix a tube for a fraction of the cost of buying a new one. A standard bicycle inner tube repair kit contains enough material for several repairs, making it an excellent investment.
| Item | Average Cost |
|---|---|
| Total cost to patch a tube | $3.17 |
| New inner tube | $8.00 |
| Savings by patching | $4.83 |
Environmental Impact: Reducing Waste
Choosing to repair your tube also benefits the planet. In the United States alone, people discard an estimated 10 million inner tubes every year, sending a massive amount of rubber to landfills. By using tube repair patches, you extend the life of your tubes and reduce waste. Each repair you make with your puncture repair kit is one less tube in a landfill. This simple act makes your cycling habit more sustainable. A quality bicycle inner tube repair kit empowers you to be a more responsible rider.
Preparedness: The Essential On-the-Go Solution
A flat tire can strike at any moment during your ride. Your preparedness makes all the difference between a ruined day and a quick roadside stop. Carrying a compact puncture repair kit in your saddlebag or jersey pocket means you are always ready. This small investment in gear provides immense peace of mind, ensuring you can handle a flat without calling for help. Your cycling journey becomes more confident when you are self-reliant.
A quality bicycle inner tube repair kit gives you the power to make a permanent repair, not just a temporary fix that might fail miles down the road. You can patch your tube, reinflate your tire, and continue your adventure with confidence. This level of preparedness is a hallmark of a smart cyclist. Having a puncture repair kit transforms a potential disaster into a minor, manageable inconvenience.
While tube repair patches are the star of the show, a truly comprehensive bicycle inner tube repair kit contains a few extra items for unexpected situations. You can build the ultimate on-the-go solution to handle almost anything the road throws at you.
Pro Tip: Enhance your basic puncture repair kit with these useful items to create a complete emergency toolkit.
- A small, pocket-sized repair guide for quick reference.
- Basic first aid supplies like bandages and alcohol pads.
- A keychain LED flashlight for repairs in low light.
- A disposable poncho for sudden rain showers.
- A small tube of liquid lip balm, which can serve as a lubricant for a squeaky chain.
Being prepared empowers you to fully enjoy your cycling experience without worrying about getting stranded. A well-stocked bicycle inner tube repair kit is the most important accessory you can carry.
How to Achieve a Perfect Patch Every Time

The science of vulcanization is powerful, but a successful repair depends on your technique. Following the correct steps ensures you create a permanent, airtight seal. Mastering this process will help you confidently fix a puncture and get back on your ride. Let’s walk through the process for achieving a perfect patch.
Step 1: Preparation is Everything
A great repair starts long before you open the cement. Proper preparation creates the ideal foundation for the chemical bond to form. Rushing this stage is the most common reason for a patch to fail.
First, you need to find the leak. If the hole is not obvious, inflate the tube slightly and listen for hissing air. You can also submerge the tube in water and watch for bubbles. Once you locate the puncture, mark its location clearly with a pen or chalk.
Next, you must prepare the surface. A clean, roughened area is essential for the patch to stick properly.
- Make sure the area around the puncture is completely clean and dry. Any dirt, oil, or moisture will prevent a good seal.
- Use the small metal scuffer from your puncture repair kit to roughen the rubber. You can also use a small piece of sandpaper. Scuff an area slightly larger than the patch you plan to use. This creates a textured surface that helps the vulcanizing cement grip the tube.
Pro Tip: When scuffing, your goal is to dull the shiny surface of the rubber. You want to create a uniform, gray, and slightly fuzzy texture. Avoid pressing so hard that you create deep grooves or damage the tube.
Step 2: Applying the Vulcanizing Cement
With the tube prepared, you are ready for the vulcanizing fluid. This step is where the chemical magic begins, so proper application is critical.
Apply a thin, even layer of the cement over the entire scuffed area. Spread it smoothly, ensuring there are no thick blobs or empty spots. The area covered by the cement should be larger than your patch. Many people make the mistake of applying the patch immediately, but this will not work.
You must wait for the cement to dry completely. This can take 3 to 5 minutes, depending on the temperature and humidity.
- A wet, shiny appearance means the cement is not ready.
- The cement is ready when it has a uniform, matte, or dull look.
- If you gently touch it with a clean knuckle, it should feel tacky but not transfer any liquid to your skin.
Patience is key here. Applying the patch to wet cement will trap solvents underneath, preventing the vulcanization reaction and causing the patch to fail. A successful effort to fix a puncture depends on this drying time.
Step 3: Applying the Patch and Pressure
Once the cement is perfectly tacky, it is time to apply the patch. This final step fuses the patch to the tube, completing the repair.
Peel the foil backing from the patch, being careful not to touch the uncured rubber surface with your fingers. Oils from your skin can interfere with the chemical bond. Center the patch over the puncture and press it down firmly.
Pressure is essential to create a strong, seamless bond.
- Start by pressing down firmly in the center of the patch.
- Work your way to the edges, pushing out any trapped air bubbles.
- Use your thumb or a smooth, blunt tool to rub the entire patch, especially the edges. This ensures full contact between the patch and the tube.
After applying pressure for a minute or two, you can carefully peel off the clear plastic film from the top of the patch. The patch is now a permanent part of the tube. Your ability to fix a puncture now rivals a brand-new tube’s integrity. A good puncture repair kit makes this professional-level repair possible for any cyclist.
Choosing the Right Bicycle Tire Tube Repair Kit

Not all repair kits are created equal. Selecting the right bicycle tire tube repair kit ensures you have reliable tools when you need them most. A great kit gives you confidence on every ride.
What Makes a Quality Patch Kit?
The best bicycle tire tube repair kit goes beyond just patches and glue. It provides a complete solution for roadside repairs. A quality puncture repair kit should contain several key items.
- Durable Patches and Cement: The core of any
bicycle inner tube repair kit. - A Metal Scuffer: A stainless steel scuffer is much better than sandpaper. It will not wear out and creates the perfect textured surface for a strong bond.
- Tire Levers: These help you remove the tire from the rim easily.
- An Inflator: A mini pump or CO₂ inflator gets you back on the road quickly.
Having these tools makes your bicycle tire tube repair kit a truly dependable companion.
Why SUNSOUL Kits Deliver a Perfect Patch
SUNSOUL designs its bicycle tire tube repair kit for maximum reliability. The patches use high-quality materials to create a permanent seal.
SUNSOUL patches feature a corrugated texture. This special design improves adhesion by 40% compared to flat patches, ensuring a secure, airtight seal.
The patches are made with natural rubber and special polymers for excellent heat resistance. They also contain a layer of vulcanizing gum that helps create a permanent, leak-proof bond. Plus, all materials are RoHS-certified, meaning they are non-toxic and safe for you and the environment. This attention to detail makes it the best bicycle tire tube repair kit for a lasting repair.
Solutions for Every Vehicle
Your repair needs may go beyond your bicycle. SUNSOUL understands this and provides solutions for many vehicles. The company produces over two million patches a month for bikes, cars, trucks, and even agricultural vehicles. Whether you need a bicycle inner tube repair kit or a heavy-duty puncture repair kit for an ATV, quality materials are essential. Specialized kits for motorcycles and ATVs often include mushroom-shaped plugs and CO₂ inflators for tubeless tires. This expertise shows that a reliable bicycle tire tube repair kit comes from a company that truly understands tire repair science. A good puncture repair kit is a smart investment for any rider, and a quality bicycle inner tube repair kit from a trusted brand like SUNSOUL ensures you are always prepared.
You now understand tube repair patches create a permanent chemical bond through vulcanization. This process makes the repaired area as strong, flexible, and airtight as the rest of the tube.
Your Takeaway: Cyclist Keeping a quality puncture repair kit in your bag ensures you are always prepared. A dependable puncture repair kit helps you handle flats with confidence. This simple puncture repair kit saves you money and reduces landfill waste on every ride.
FAQ
How long should I wait before inflating the tube?
You should wait at least 5 minutes after applying the patch. This short period allows the vulcanization process to create a strong, permanent bond. Inflating the tube too soon can cause the repair to fail. You ensure a reliable seal by waiting.
Can I reuse a patch?
You cannot reuse a patch. The vulcanization process creates a permanent, one-time chemical bond. Once you use a patch, its chemical agents are spent. Always use a new patch for each repair to guarantee a secure and airtight seal.
What is the shelf life of a patch kit?
A quality patch kit can last for many years. You should store it in a cool, dry place away from direct sunlight. The patches and cement remain effective as long as they are sealed. This ensures your kit is ready when you need it.
Why did my patch fail?
A patch usually fails from improper preparation. You might not have scuffed the area enough. You may have applied the patch to wet cement.
Remember: A clean surface and fully dry cement are essential for a perfect chemical bond. Patience is the key to a lasting repair.