inner tube patches
Inner tube patches are materials used to repair punctures or damage to inner tubes. They are usually made of rubber or other synthetic materials and have an adhesive that can effectively seal the leak.
Function of inner tire patch
Repair puncture
The main function of the inner tube patch is to repair punctures caused by sharp objects and prevent gas leakage.
Extended service life
Through timely repairs, the service life of the inner tube can be extended, avoiding the cost of replacing the entire inner tube.
Improve safety
Ensure your tires maintain proper air pressure, making your riding or driving safer.
types of inner tube patch
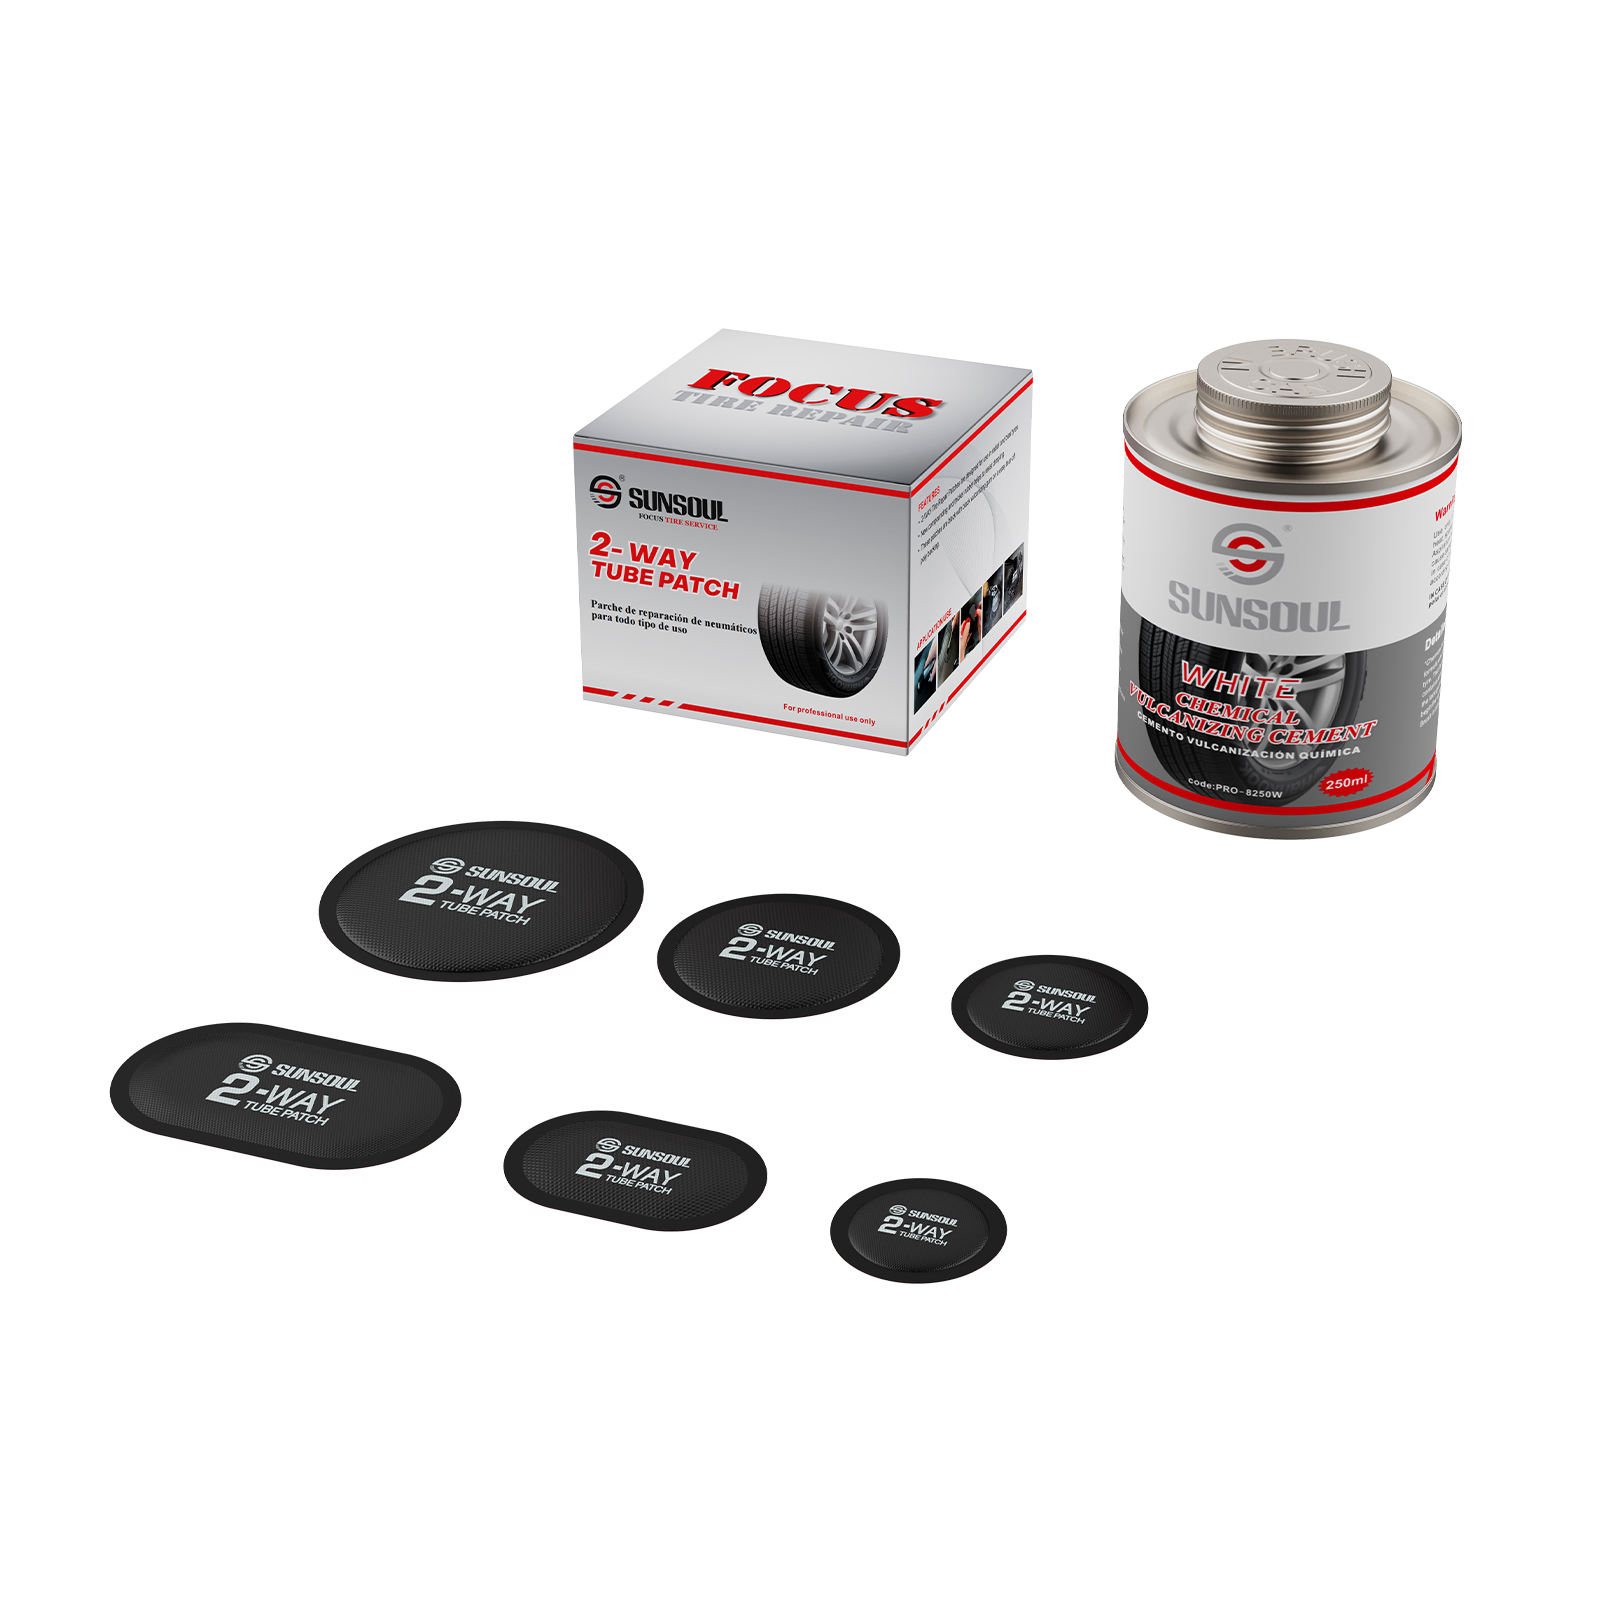
To create a permanent bond with inner tube rubber through a chemical reaction, it must be utilized with rubber glue that contains vulcanizing agent.
Qualities:
Permanent repair: The strongest and most appropriate for extended use.
Situations: Routine inner tube repairs for trucks, motorcycles, and bicycles.
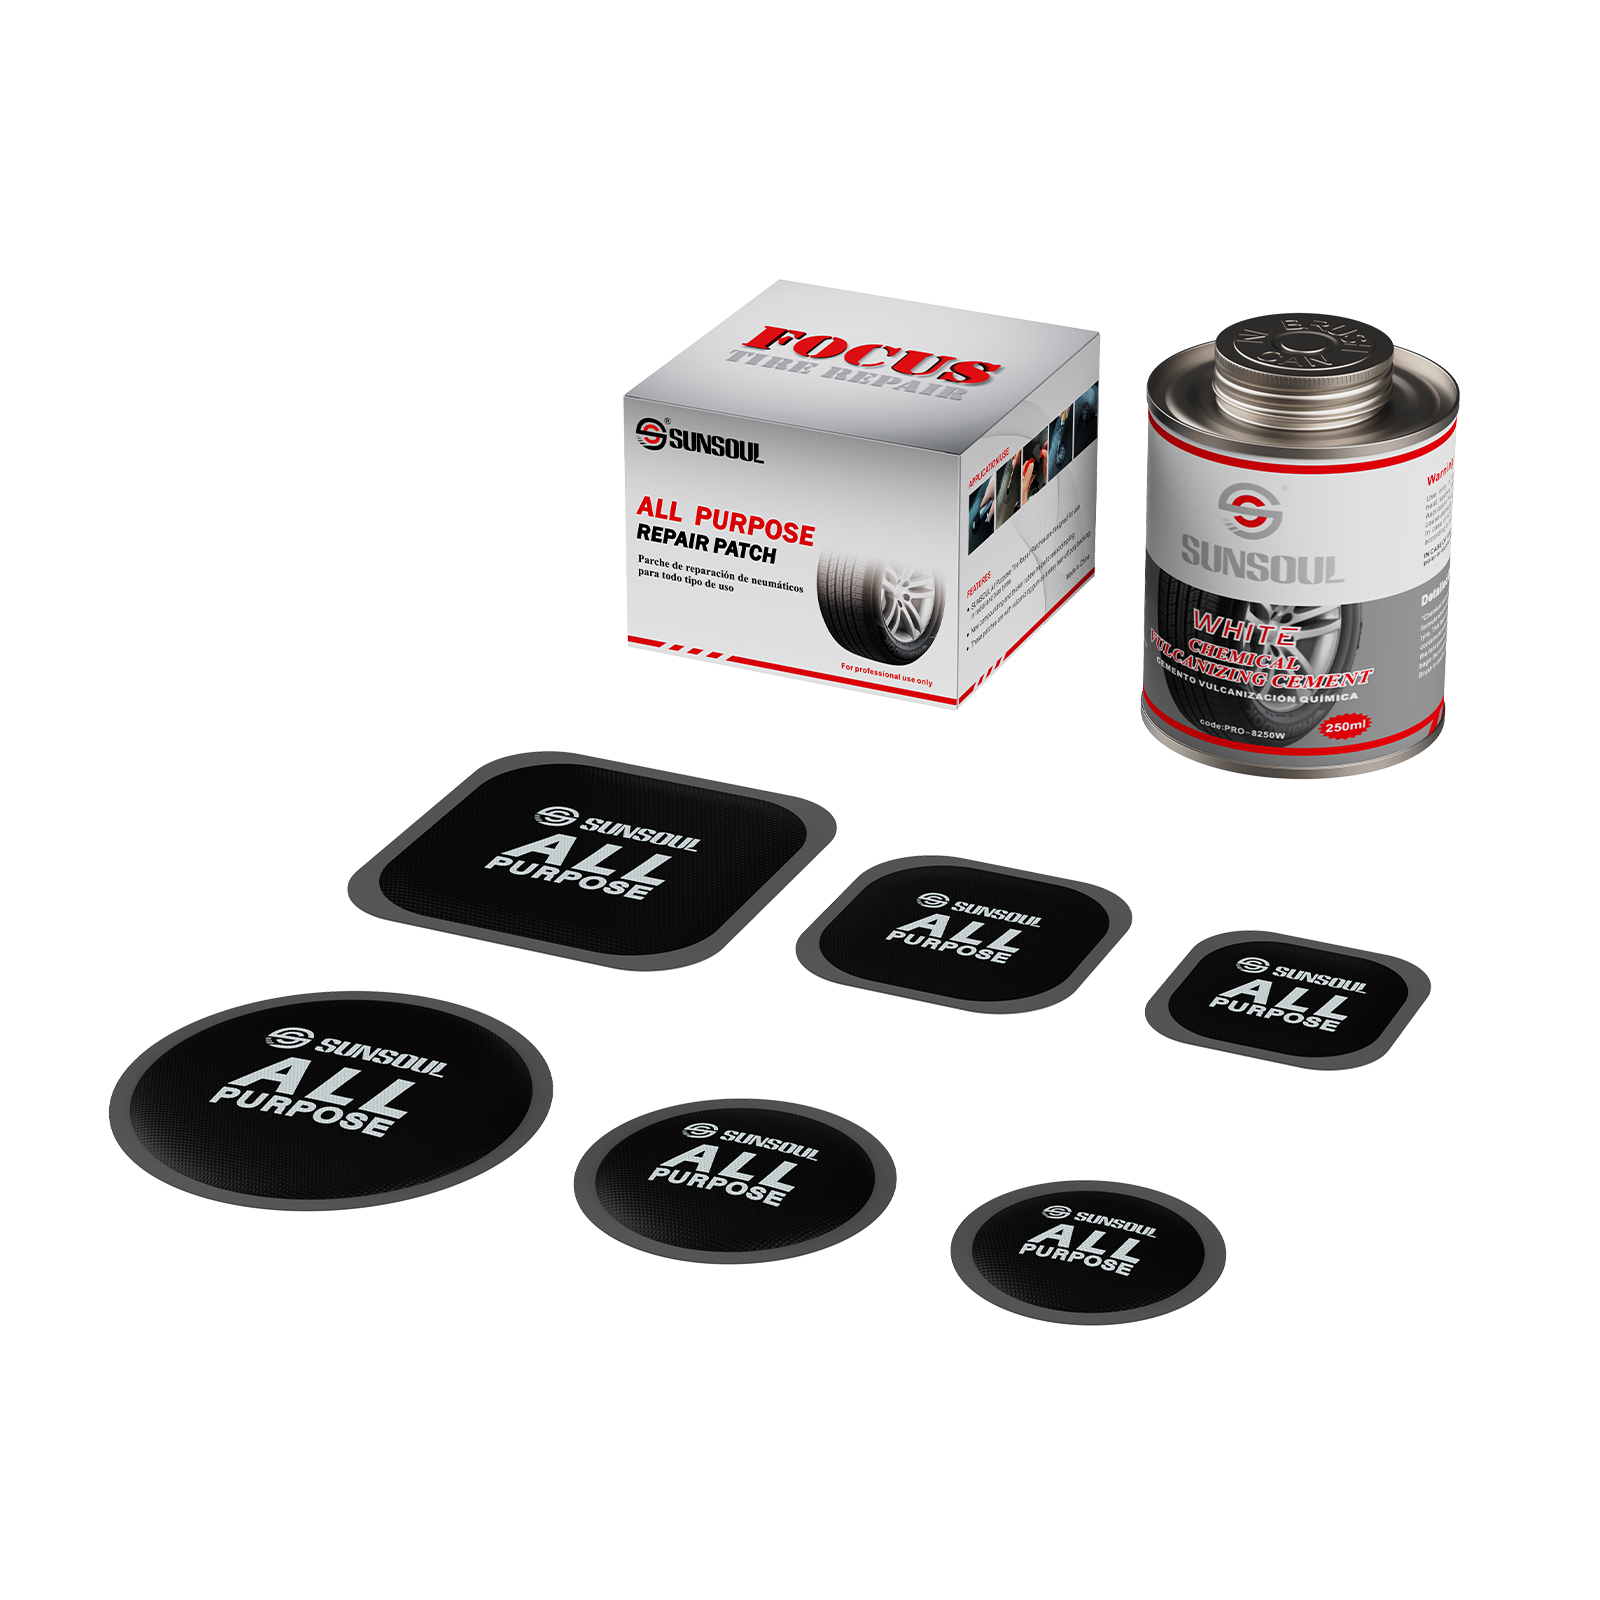
Adhesive Self-Staples
After applying adhesive to the patch’s back beforehand, the protective film is taken off and pressed immediately to create a bond.
Qualities:
Fast operation, ideal for last-minute repairs, no glue needed.
Temporary: Needs to be reinforced or replaced after falling off in the presence of high pressure or temperature.
Situations: cycling outside and brief emergencies.
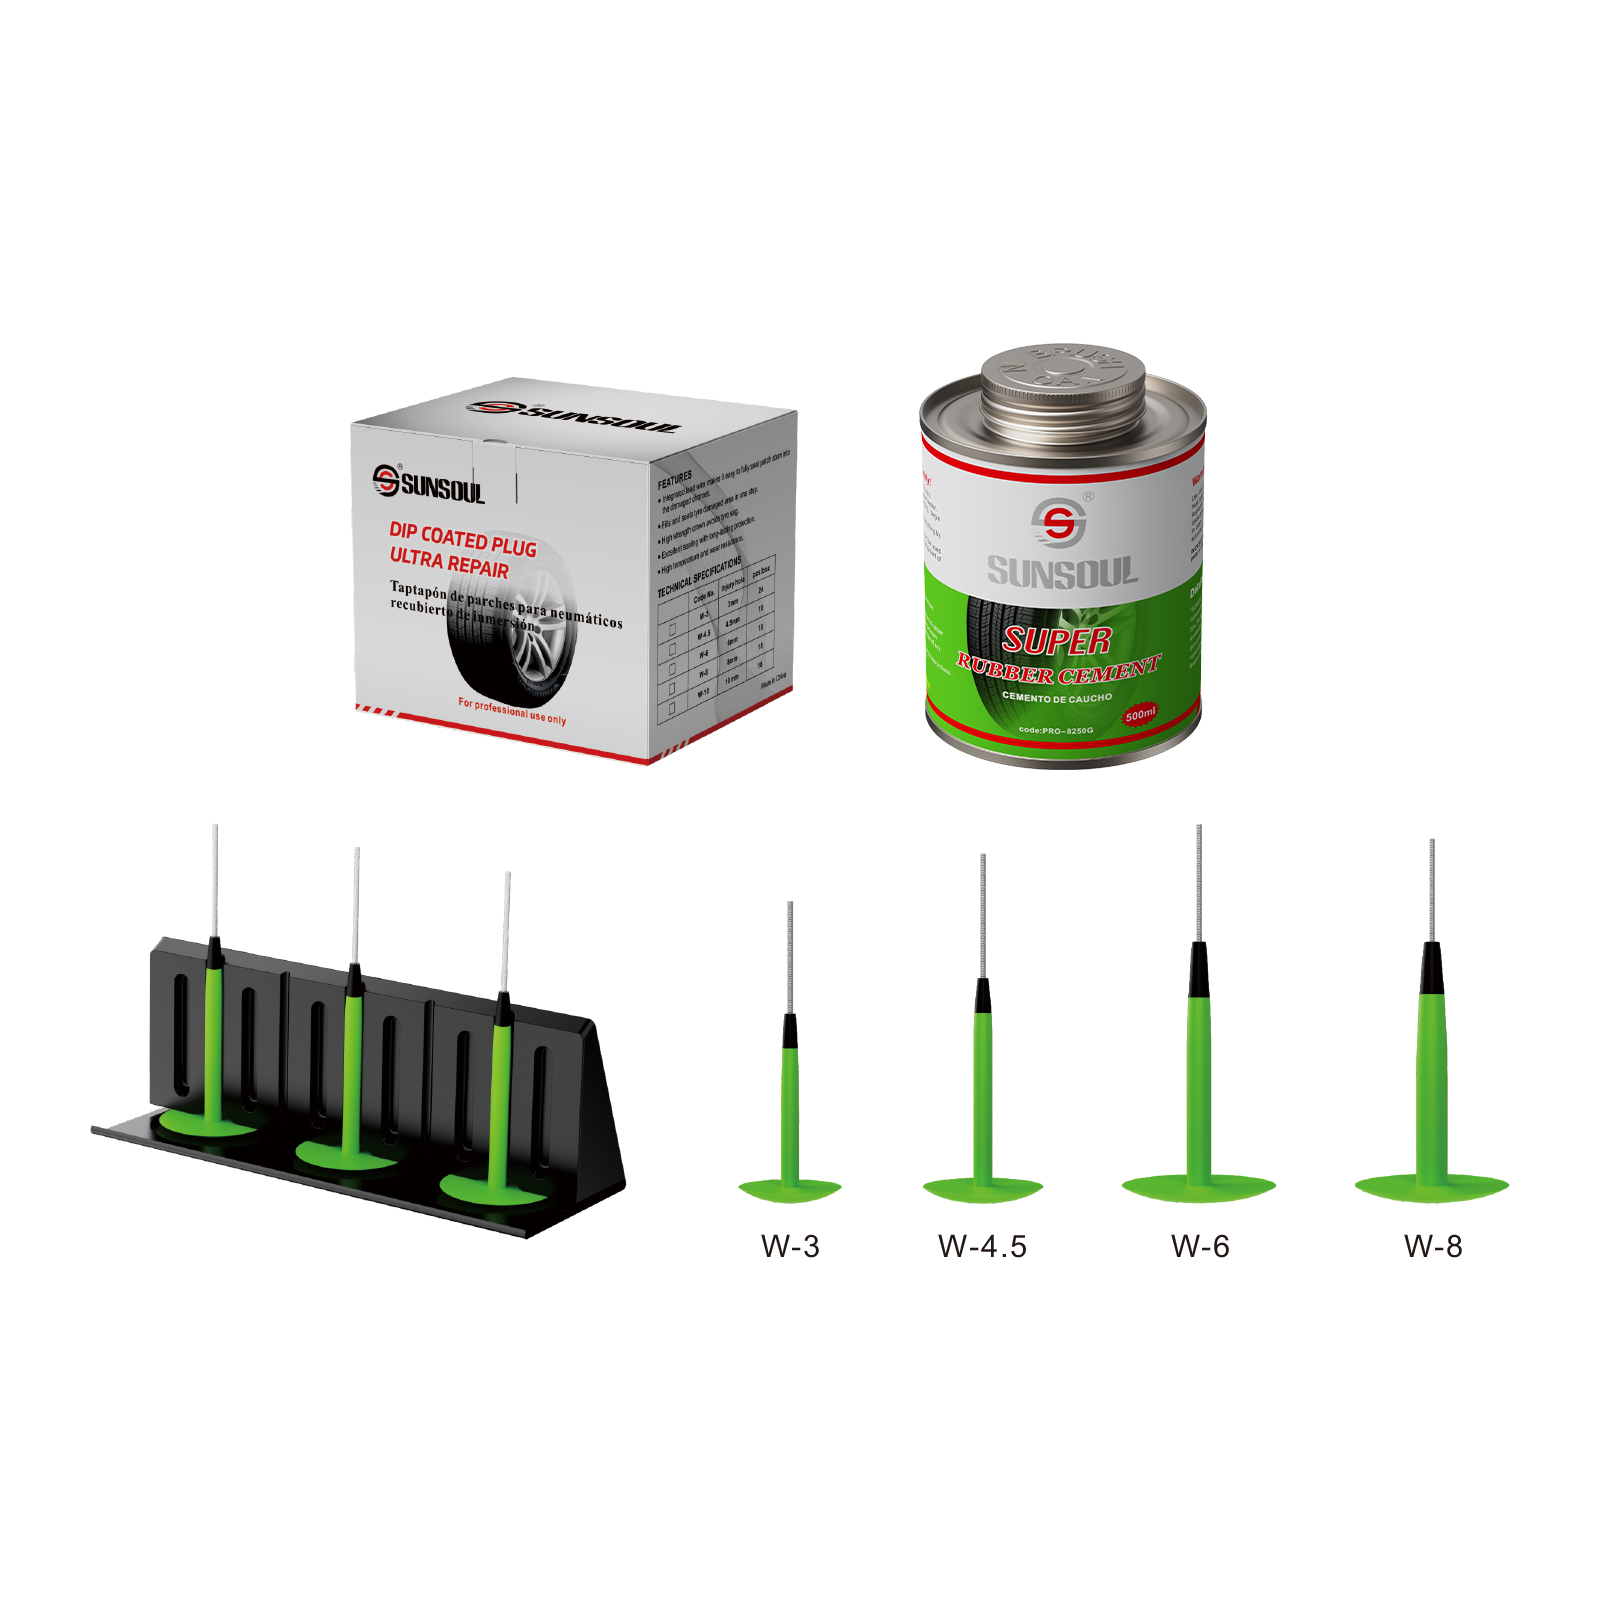
Patches for Mushroom Plugs
The patch resembles a mushroom. The external portion closes the wound after the internal umbrella-shaped structure is placed into the inner tube’s puncture and fits the inner wall.
Qualities:
For larger punctures (like nail punctures), good sealing is appropriate.
Needs specialized equipment: must enter the inner tube from the inside and be secured.
Situations: fixing more extensive damage to the inner tubes of trucks and motorcycles.

Adhesive patches
After pressing, the uncured glue layer on the patch is activated by air.
Qualities:
Simplified process: It must be firmly pushed to guarantee adhesion, but no extra adhesive is needed.
In the middle of self-adhesive and vulcanized patches is medium durability.
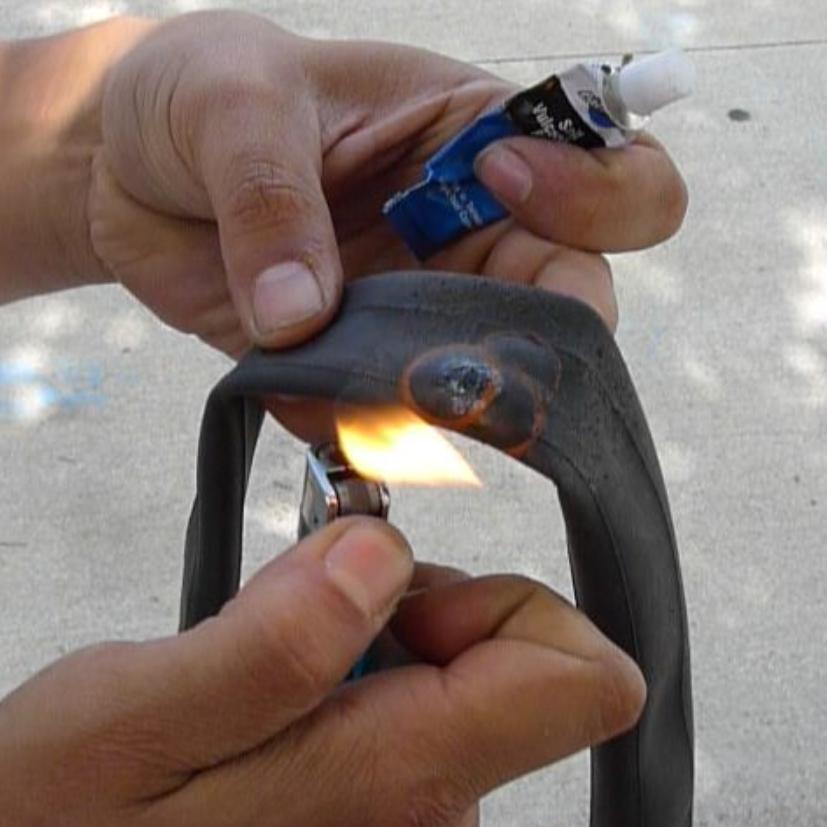
hot patches for inner tubes
Features: Fast curing: Bonds quickly after heating, although operation calls for caution;
Situations: Alternative solution when vulcanized glue is not available; Heat (such as a lighter) is needed to activate the heat-sensitive glue layer on the back of the patch.
DIY patch made of rubber sheet and adhesive
Using vulcanized glue, physically fix the old inner tube or rubber sheet after cutting it.
Qualities:
Low cost: Ideal for those with a lot of hands-on experience.
inner tube patches solutions
bicycle inner tube repair
bicycle inner tube repair kit
A bicycle inner tube repair kit is a tool kit used to repair bicycle inner tubes. It usually contains a series of necessary tools and materials to quickly repair the inner tube when it is flat or damaged. The core tools include tire patch, glue, tire lever, grinding disc, valve core tool, etc.
repair techniques for various situations
1. Riding a low-intensity bike every day
The suggested remedy is vulcanizing inner tube patches plus a backup self-adhesive patch.
Advice: To avoid friction with the outer tube after repair, apply a tiny piece of electrical tape to the inner tube’s exterior.
2. Riding and competing over long distances (emergency treatment)
Self-adhesive patch plus CO₂ cylinder for quick inflation is the suggested remedy.
Note: To prevent the self-adhesive patch from slipping off, it must be changed with a vulcanized patch within 24 hours.
3. The lightweight race tire’s latex inner tube
Ultra-thin latex patch is a special patch.
Taboo: Steer clear of regular patches as they may result in imbalance or local hardness.
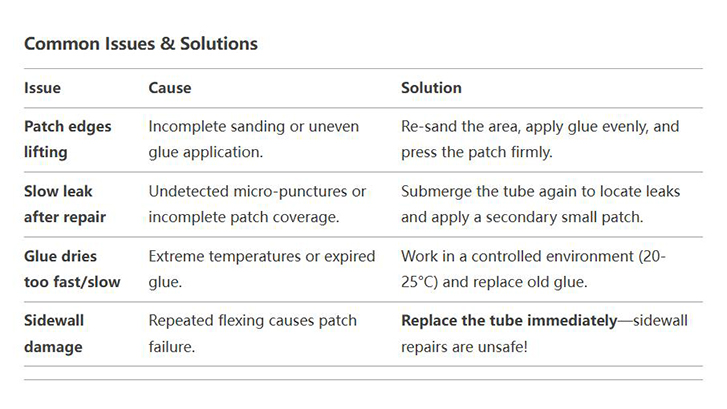
common problems and solutions
A motorcycle inner tube repair kit is a tool kit specifically designed to repair motorcycle inner tubes, similar to a bike inner tube patch kit, but different in some ways. The patches and glue used in a motorcycle inner tube repair kit are stronger and more durable than those used in a bike inner tube repair kit, and the pry bar is more rugged and may be longer.
motorcycle inner tube repair
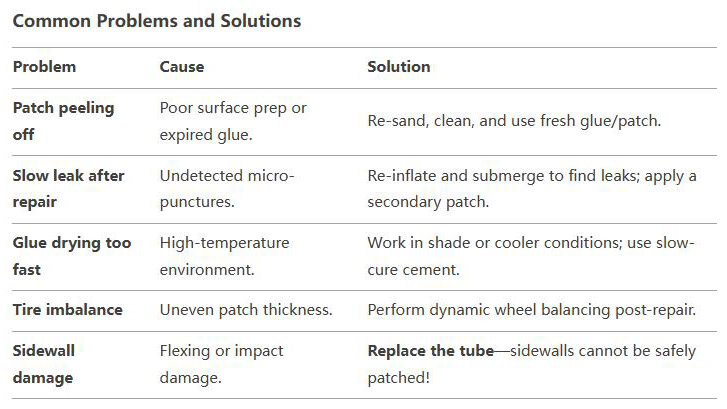
common problems and solutions
repair techniques for various situations
1. Small Punctures (≤3 mm)
Patch Type: Vulcanizing patches or high-quality self-adhesive patches.
Steps:
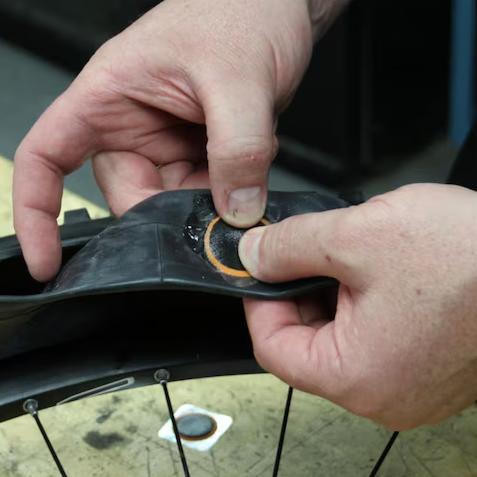
Locate the puncture using soapy water.
Sand the area (5 cm diameter) and clean with acetone.
Apply vulcanizing cement, wait 1–2 minutes, then press the patch firmly.
Cure for 24 hours before reinflating.
Pro Tip: For tubeless-converted tubes, add a tire liner to prevent future punctures.
2. Large Holes (4–6 mm)
Patch Type: Mushroom plug patches.
Steps:
Enlarge the hole slightly with a reaming tool.
Insert the mushroom plug from the inside of the tube.
Pull the stem outward until the “mushroom head” seals the inner liner.
Trim the excess plug stem to 2–3 mm.
Warning: Never repair holes >6 mm—replace the tube!
3. Multiple Punctures
Rule: If punctures are <5 cm apart, the tube is unsafe to repair.
Action: Replace the tube to avoid weak spots and blowout risks.
4. Off-Road Tire Repairs (Mud/Sand Exposure)
Extra Steps:
Clean the tube thoroughly to remove abrasive debris.
Apply a second patch overlapping the first for added security.
Use a tire liner to protect against future damage.
car inner tube repair
Car inner tube repair kit may contain more specialized tools, such as tire removal tools, air pressure gauges, etc., to cope with the unique structure and needs of the car. It is usually larger in size and may not be as convenient to carry as motorcycle and bicycle repair kits, and is usually placed in the trunk of the car.
tractor inner tube repair
Tractor inner tube patch kit uses larger pry bars and stronger valve wrenches. Tractor inner tubes are typically subjected to greater pressure and weight than cars, motorcycles, and bicycles, so the strength and durability of the patches and glues must be higher.
inner tube patches Q&A
What's the secret to using inner tube patch?
1. The importance of surface treatment in determining success or failure
The grinding range should be large:
The oxide layer and grease should be totally removed, and the grinding area surrounding the leak should have a diameter of at least 2-3 cm—much greater than the patch.
2. Glue application: exact control
Make sure the glue is “semi-dry”:
After applying the adhesive, wait 30 to 60 seconds for the vulcanization reaction to start, or until the glue turns from milky white to translucent.
3. Patch fitting: static and pressurization
Rolling pressure: To squeeze out the bubbles after applying the patch, roll and press firmly using a coin or the handle of the tire lever (this is more effective than just pressing).
4. Adaptation to the environment: severe scene reaction
Days with rain:
Dry the inner tube with a towel, then apply a glue-free patch for temporary repair or sprinkle moisture-proof talcum powder around the patch.
Dust environment: After grinding, remove any remaining sand with tape before applying glue.
5.Expert Pointers
The double-layer patch technique
To improve the seal, cover larger holes (3-5mm) with a large patch
after first covering the hole with a tiny patch.
Mark the leak point: To prevent losing the target while polishing, mark the leak site with a crayon or sticker.
Storage tips for glue: To prolong the life of an unused glue container, coat its mouth with vaseline, shut it, and place it in the refrigerator.
Inner tube patches: round or rectangular?
1. Round Patches
Advantages:
Even pressure distribution: round and without edges, the edge is not easy to lift up when fitting the inner tube surface, suitable for high-pressure environment (such as road bikes 100+ PSI).
High tolerance for operation: no need to align the angle, more friendly to novices.
Suitable for small hole repair: round patches with a diameter of 5-30mm can cover most punctures.
Disadvantages:
Limited coverage: easy to leak when repairing long cracks or irregular damage on the edges.
Applicable scenarios:
Small holes in bicycle/motorcycle inner tubes (≤5mm).
High-pressure tires (road bikes, racing motorcycles).
2. Rectangular Patches
Advantages:
Wide coverage: can be cut into any shape, repair long cracks or combined damage (such as inner tubes pierced by multiple thorns).
Strong economy: a single square patch can be cut and used multiple times, suitable for batch repairs.
Disadvantages:
Edges are easy to peel off: stress is concentrated at right angles, and debonding may start from the corners after long-term use.
High operating requirements: precise cutting and polishing of the fitting area are required.
Applicable scenarios:
Low-speed and low-pressure tires (such as baby carriages and electric scooters).
Cracks or multiple adjacent small holes caused by aging of the inner tube.