
A properly patched bicycle inner tube can last anywhere from 2 to 7 years, and in many cases it rides as well as a new one. The difference between a repair that lasts and one that fails early comes down to four things: the type and quality of the rubber patch, the condition of the tube, how carefully the repair is done, and the conditions the bike is ridden and stored in. This guide walks through each of those factors, compares the patch types available, and shows the exact steps to make a repair that holds for years. It applies whether your patch comes from SUNSOUL or any other reputable kit. The foundation is a high-quality tire patch from a reliable tire patch kit; everything else is technique.
Key Takeaways
- A properly repaired inner tube typically lasts 2–7 years, comparable to a new tube.
- Vulcanized patches form a permanent chemical bond and are the most reliable choice.
- Repair technique matters most: sand, clean, glue, wait, and press correctly.
- Replace the tube when patches overlap, when it has more than three patches, or when the rubber shows cracks or bulges.
Patched Inner Tube Lifespan
What Affects Patch Longevity
How long a repaired inner tube lasts depends on many factors. The material is crucial. Latex inner tubes are softer and roll more smoothly, but their lifespan is only 6-12 months. Most people use butyl rubber inner tubes because they are more durable. Sharp objects such as glass, metal, or thorns can puncture an inner tube. If the tire pressure is too low, it can cause the tire to pinch. Good maintenance and understanding of the environment can help extend the lifespan of a repaired inner tube.
Weather also affects the durability of a repair. Both hot, humid and hot, and hot, dry weather can cause repairs to fail more quickly. The table below shows how weather affects the failure of a repair:
| Environmental Condition | Frequency of Occurrence | Coupling Intensity | Trend |
|---|---|---|---|
| Wet-hot days | 36% of hot days | 0.15 | No clear trend change |
| Dry-hot days | 4% of hot days | 0.08 | Significant upward trend |
| Arid temperate cities | Higher dry-hot extremes | Lower wet-hot extremes | Severe dry-hot extremes likely |
People in dry, warm cities see more dry-hot days. This can make patched tubes wear out faster. Checking your tire, fixing it right, and picking a good patch help it last longer.
Tip: Riders should check tire pressure often. Look for sharp things after every ride. This keeps your patched tire safe and helps it last longer.
Patch Types and Durability
Different patches suit different jobs. The table below compares the options you will typically find in a repair kit or at a bike shop.
Table 1 — Patch types compared
| Patch Type | Best For | Typical Lifespan | Notes |
| Vulcanized (glue-on) | Standard tube punctures | Years — often as long as the tube | Chemical bond; needs 5–10 minutes of tack time before pressing |
| Glueless / self-adhesive | Quick roadside fixes | Months, not years | Fast to apply; treat as temporary until a proper repair |
| Mushroom-shaped | Larger or irregular holes | Years when sized correctly | Fills the hole from the inside; must match puncture size |
| Hot-melt (heat-cured) | Shop-grade repairs | Years | Bonds quickly with heat; commonly used by professionals |
| DIY cut-and-glue | Custom shapes from sheet rubber | Depends on glue and edge quality | Only for experienced riders; cut edges can lift |
Vulcanized patches are the safest choice for a repair you plan to keep for years. Keep a glueless patch as an emergency option, and redo the repair properly when you get home.
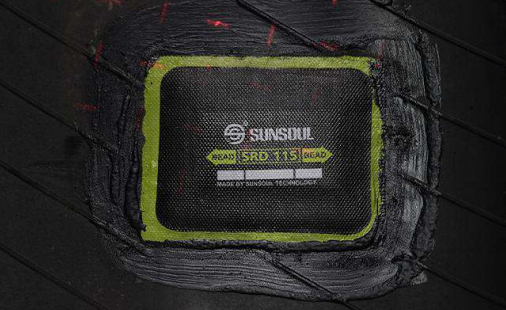
Quality patches are tested, not just packaged. As an example, one manufacturer’s published data sheet for its hot-vulcanizing patches lists the following:
Table 2 — Example specification for hot-vulcanizing patches
| Metric | Value |
| Peel strength | Minimum 40 N/cm |
| Cure time | Under 15 minutes at 150°C |
| Aging resistance | 700+ hours in ozone tests |
| Adhesion failure rate | Below 0.8% in abrasion tests |
Numbers like these matter because they measure the two failure modes that actually end a repair: the patch peeling off, and the adhesive aging out. If a patch cannot pass basic peel and aging tests, no installation technique will save it.
How Many Patches Is Too Many
One or two well-spaced patches barely change how a tube behaves. The limits start when patches touch, when they cover a large area, or when the tube simply has too much history.
- Two or three separate punctures, patched so the patches don’t overlap — fine to keep riding.
- Patches that overlap — the tube loses strength at the overlap, and edges can lift.
- More than three patches on one tube — replace it; the rubber has been stressed too many times.
- A cluster of small holes — often a sign the tube is perishing or the tire casing is embedding debris; replace the tube and inspect the tire.
Use a new tube if:
- It already has more than three patches.
- Patches overlap or cover a large area.
- The rubber looks cracked, perished, or has bulges.
- The puncture is within about 1 inch (2.5 cm) of the valve or a mold seam.
This is where honesty pays. A tube costs a few dollars and a patch is cheaper, but a roadside flat in bad weather costs far more than either. When in doubt, replace.
How Long Can You Ride a Bike on a Patched Bike Tire
Patched Bike Tire Reliability
If repaired properly, bicycle tires can last for several years. Many cyclists report riding their repaired tires for 3 to 7 years. The type of patch and the quality of the repair are crucial. Cyclists often ask, “How long will a bicycle tire patch last?” The answer depends on the patch used. Vulcanized patches, such as those from SunSoul, are as reliable as new inner tubes. Some cyclists have ridden thousands of miles on repaired tires without any problems. Various types of patches are available on the market, including tubeless patches and truck patches, to meet different needs. These patches help seal punctures and maintain the strength of the inner tube.
- If repaired properly, bicycle tires can last 3 to 7 years.
- Some inner tubes, even after numerous repairs, can last over 5,000 miles.
- Good patches can keep inner tubes as reliable as new.
Patched vs. New Inner Tube
Comparing a patched bicycle tire and a new inner tube, both can effectively prevent punctures if the patching method is correct. Butyl inner tubes retain air better, but a well-patched inner tube can also remain secure for a long time. Cyclists often ask, “How long will a bicycle tire patch last?” The answer is yes, as long as the right patch is used. SunSoul’s car tire patching and tire repair products give cyclists confidence on every ride.
When to Replace a Patched Tube
Knowing when to replace a patched bike tire is important. Look for these warning signs:
| Warning Sign | What It Means |
|---|---|
| Tube keeps going flat | Internal damage or worn rubber |
| Big cuts or cracks | Not safe to patch |
| Multiple patches in one area | Tube is too weak |
| Bald or thin tread | Time for a new tube |
| Bulges or dry rot | Rubber has lost strength |
Tip: If a tube has more than three patches in one spot or shows cracks, it is time for a new one.
Cyclists often ask, “How many times can a bicycle inner tube be patched?” Most experts recommend patching the same area a maximum of three times. If multiple small holes are found clustered together, the inner tube should be replaced. SunSoul tire patching pads can help cyclists deal with flat tires and ensure riding safety.
How to Patch an Inner Tube for Maximum Life
Step-by-Step Patch Tips
Follow these ten steps and a patch will hold for years rather than weeks. The three that most people skip — finding the leak first, inspecting the tire casing, and testing before reinstalling — are exactly the ones that prevent repeat flats.
- Find the leak first. Inflate the tube and run it past your ear, feel for air with wet fingers, or submerge it in water. Mark the spot with chalk or a pen before letting the air out.
- Remove the tube without pinching it. Work the tire bead off with tire levers and lift the tube out gently — don’t yank it past the rim.
- Inspect the tire casing. Pull out any embedded glass, thorns, or wire, and check the inside of the tire. If the object is still there, it will puncture the new patch on the first ride.
- Roughen the area. Use fine sandpaper (320–600 grit) in a circular motion over an area slightly larger than the patch.
- Clean the surface. Wipe with isopropyl alcohol or the kit’s cleaner and let it dry completely. Oil, dust, and old glue are the enemies of adhesion.
- Apply a thin, even layer of vulcanizing glue, spread just past the patch’s edges, and wait until it is tacky — usually 5–10 minutes. Waiting 30–60 minutes, or overnight, gives the strongest bond.
- Press the patch on from the center outward, and hold it for 30–60 seconds. Once it touches the glue, don’t slide it sideways.
- Let the repair cure before installing the tube — at least 30 minutes for glue-on patches, and overnight for the strongest result.
- Test before you ride. Inflate the tube slightly, submerge it, and confirm no bubbles form around the patch edge.
- Reinstall carefully, dust the tube lightly with talcum powder so it seats without pinching, and inflate to the pressure printed on the tire sidewall.
Tip: Time is your friend. The two most common causes of failed patches are glue that was still wet when the patch went on, and riding before the bond cured. If you can patch in the evening and ride in the morning, your repair will be dramatically stronger.
Common Mistakes to Avoid
Most failed patches fail for the same few reasons. Avoid these and your repair will outlast the tube:
- Skipping the sanding or cleaning step.
- Using too much glue or spreading it unevenly.
- Peeling the protective film off before the glue is tacky.
- Patching over an old patch instead of removing it or replacing the tube.
- Installing the tube so it is pinched between the tire bead and the rim.
- Inflating to full pressure immediately after patching — the bond needs time to cure.
- Patching near the valve or over a mold seam and expecting a lasting seal.
None of these mistakes are hard to avoid, and all of them are the difference between a repair that lasts years and one that fails on the next ride.
Maintenance After You Patch
A good patch deserves good upkeep. These habits — plus the right inner tube repair products — keep both tube and patch working for years:
- Check tire pressure weekly with a reliable gauge, at the PSI printed on the tire sidewall. Low pressure is the most common cause of new punctures and pinch flats.
- Inspect tires monthly for cuts, bulges, and embedded debris, and remove sharp objects before they work through the casing.
- After rides on trails or through construction areas, glance at both tires for thorns and glass.
- Keep the tube lightly dusted with talcum powder so it doesn’t stick to the inside of the tire.
- Store the bike out of direct sunlight; UV and heat age rubber faster than any ride does.
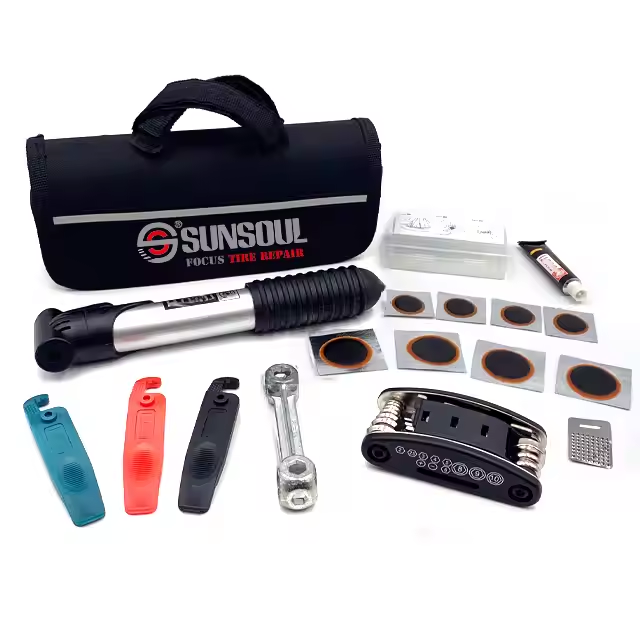
- Carry a small patch kit, so a roadside puncture stays a five-minute inconvenience instead of ending the ride.
FAQ
How long does a tire repair patch last?
A tire repair patch can last up to 7 years. Riders report strong performance with SunSoul patches, including Car patch, tubeless repair patch, and truck repair patch.
Can a patched tube handle high pressure?
Yes. A properly patched tube holds high pressure. SunSoul tire repair patch and tubeless repair patch support safe rides for bikes, cars, and trucks.
How many times can someone patch the same tube?
Most experts recommend patching a tube up to three times. If patches overlap or the tube weakens, replace it for safety.