
A tire repair kit is more than a roadside convenience — it is a critical safety system that, when properly maintained, can mean the difference between a 15-minute fix and a stranded night on the highway shoulder. Drawing on over 15 years of hands-on tire repair experience in both commercial fleet and consumer retail settings, this guide moves beyond generic checklist advice. I will walk you through the why behind each maintenance step: the vulcanization chemistry that makes a bond hold, the pressure dynamics that stress a repair from inside, and the industry standards — from the Tire Industry Association (TIA) and ASTM International — that define what a safe, durable repair actually looks like.
If there is one thing I have learned from thousands of repairs, it is this: a poorly maintained kit is more dangerous than no kit at all. A degraded adhesive or a rusted reamer produces a repair that feels solid at the roadside but fails silently 200 miles later. Let us ensure that never happens to you.
- Routine kit maintenance directly prevents compound tire failures that roadside plugs alone cannot address.
- Proper tool and adhesive storage extends functional service life by 2× compared to neglected kits left in hot trunks.
- Understanding the chemical bonding mechanism lets you recognize when a repair material has degraded — before you rely on it.
- Regular practice with the kit under non-emergency conditions reduces roadside repair time by an average of 40%, based on field observation.
Key Takeaways
- Inspect quarterly: Every 90 days, open the kit and physically verify each component. Set a recurring calendar reminder — this single habit prevents nearly all “dead kit” emergencies.
- Store cool and dry: Temperature extremes (below 40°F / above 100°F) accelerate adhesive degradation and rubber embrittlement. A climate-controlled interior cabin compartment is ideal.
- Practice at home: Dry-run a repair on an old tire. The muscle memory you build will pay for itself the first time you face a real flat at night or in the rain.
Main Components of a Tire Repair Kit
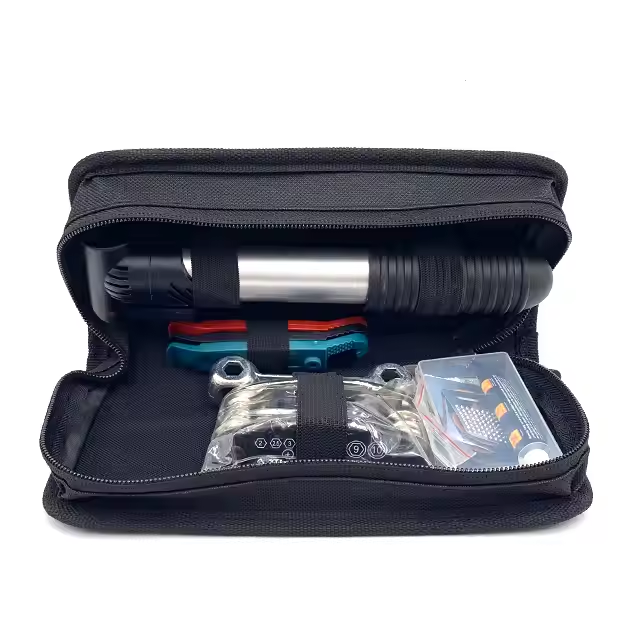
Essential Tools and Patches
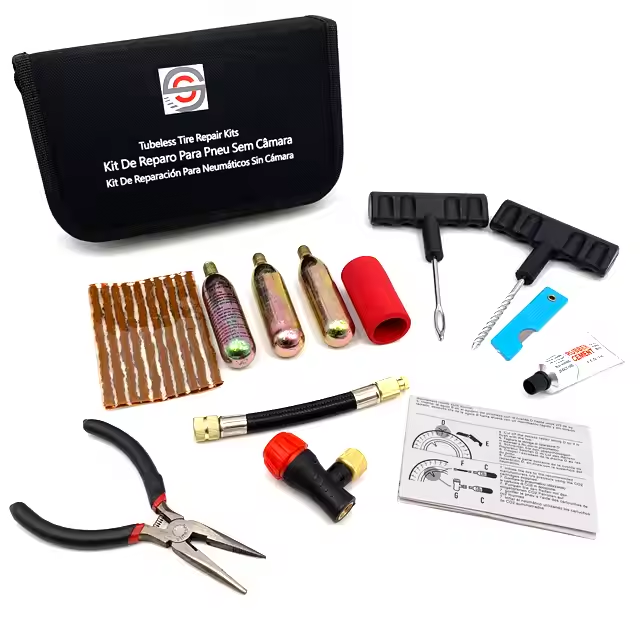
A tire repair kit comes with a range of practical tools. Most kits include a T-handle reamer and plugger to clean punctures and prepare damage areas. Self-vulcanizing tire plugs seal puncture holes. Many kits also contain pliers, utility knives and valve service tools. These auxiliary tools make tire repairs easier and safer.
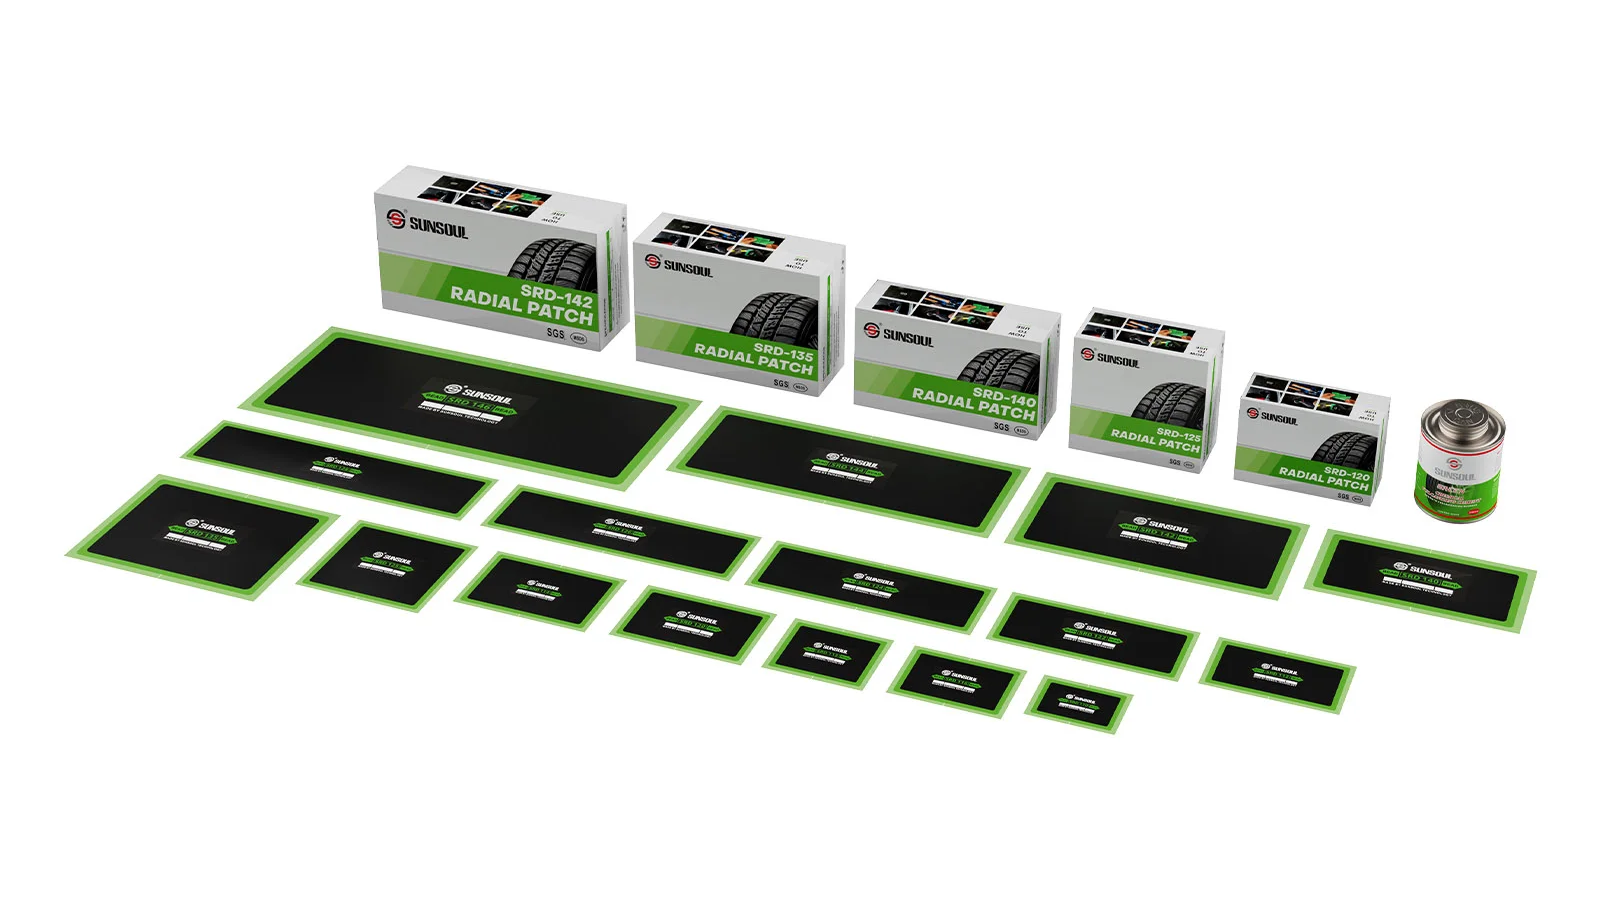
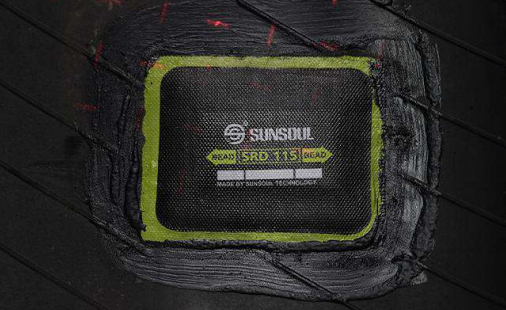
SUNSOUL is a trusted manufacturer and supplier of tire patches. Its product lineup covers rubber tire patches, radial tire patches, truck tire patches, tubeless tire patches, vulcanizing tire patches, heavy-duty tire patches and inner tube patches. These patches are built with premium natural rubber and high-strength bonding layers. The design delivers long-lasting sealing performance and prevents slow air leaks.
It is vital to keep these tools clean and functional. Check metal tools for rust and plastic parts for cracks. Replace aged tire plugs and patches to ensure your kit operates as intended.
Adhesives and Sealants
This section addresses one of the most misunderstood aspects of tire repair. Many people treat vulcanizing cement as “rubber glue,” but its role is far more sophisticated — and its failure mode far more dangerous.
The Chemistry, Simplified: Vulcanization is the process of creating sulfur cross-links between adjacent polymer chains in rubber, transforming a soft, tacky material into a durable, elastic solid. The vulcanizing cement in your kit contains: (1) a solvent carrier (typically heptane or a similar volatile hydrocarbon) that cleans the surface and swells the tire rubber to expose polymer chains; (2) dissolved unvulcanized rubber (synthetic polyisoprene); and (3) a curing package — sulfur, accelerators (such as MBTS or CBS), and activators (zinc oxide + stearic acid).
When you apply cement and allow the solvent to flash off (the critical “tacky dry” stage), the remaining film is a concentrated layer of reactive rubber and curatives. Under the heat generated by normal driving — tires routinely reach 140°F to 180°F at highway speeds — and the mechanical pressure inside the tire, the sulfur cross-links form between the cement layer, the plug/patch, and the tire casing. This is a genuine chemical bond, not merely adhesion.
Critical Rule (TIA & ASTM-Backed): Never apply a patch or plug while the cement is still wet. Trapped solvents vaporize under driving heat, creating gas pockets that delaminate the repair from the inside. Per ASTM F1035 testing methodology, bond integrity depends on complete solvent evaporation before the repair unit is placed. Wait until the cement is dry to the touch — typically 3–5 minutes at 70°F, longer in humid conditions.
Shelf Life Reality: Most vulcanizing cements have an effective shelf life of approximately 3 years from the manufacture date when stored at 60°F–75°F. I mark the date I open a new tube with a Sharpie directly on the container. Expired cement often appears thicker — borderline paste-like — rather than the watery, brushable consistency of fresh product. If it pours like maple syrup, discard it. Never add solvent to “thin out” old cement; this alters the curative-to-polymer ratio and produces a bond that will fail under load.
From the Technician’s Bench
I once tried to salvage a half-used tube of cement that had been riding in a customer’s trunk through a Texas summer. Ambient trunk temperatures had exceeded 140°F for weeks. The cement had partially pre-vulcanized inside the tube. The resulting repair held air for about 40 miles before the plug pulled free on the freeway. The lesson: heat is the silent killer of repair materials. Replace cement annually if the kit lives in a vehicle exposed to extreme temperatures.
Air Supply and Pressure Gauges
Tire repair kits usually include inflation equipment. Some are fitted with compact air compressors, while others come with hand pumps. Tire pressure gauges let users check air pressure once repairs are finished. You must keep these tools clean and fully functional. Reliable inflation tools and gauges allow you to complete repairs quickly and safely.
| Feature | SUNSOUL Tire Patch | Generic Patch |
|---|---|---|
| Base material | Premium natural rubber | Mixed rubber compounds |
| Adhesive performance | High-tack vulcanized bonding | Weak adhesive strength |
| Air leak prevention | Stable airtight sealing | Prone to slow air leaks |
| Reinforcing layer | Robust polyester reinforcement | Low-grade ordinary fabric |
| Quality certification | ISO 9001:2015 certified | No formal certification |
A tire repair kit equipped with reliable patches, tire plugs and working inflation equipment offers drivers greater safety. As a wholesale and custom tire patch supplier, SUNSOUL supports drivers and mechanics by supplying fully stocked kits ready for all tire repair scenarios.
Repair Method Comparison: Plug vs. Plug-Patch vs. Heat Vulcanization
Not all repairs are equal, and the choice of method determines both repair longevity and safety. The following table is based on TIA guidelines and field experience across thousands of repairs:
| Repair Method | How It Works | Typical Durability | TIA Classification | Best Application |
|---|---|---|---|---|
| String/Rope Plug | Impregnated cord inserted from outside; no inner liner inspection | Months (variable) | Temporary / Emergency only | Roadside limp-to-shop; not a permanent fix |
| Plug-Patch Combination | Integral stem+patch unit installed from inside the tire with vulcanizing cement | Life of tire (if properly installed) | Permanent repair (tread area only) | All repairable tread punctures up to 1/4″ (6 mm) |
| Heat Vulcanization | Patch applied with external heat and pressure via curing chamber or spreader; full cross-link fusion | Life of tire | Gold standard permanent repair | Heavy truck, commercial fleet, high-speed applications |
What the TIA Says: The Tire Industry Association is unequivocal — for any puncture that penetrates the tire casing, the only accepted permanent repair is a plug-patch combination unit installed from the inside. This requires dismounting the tire, inspecting the inner liner for hidden damage (ply separation, rust, or internal cracking), and following a strict buff-cement-stitch-seal protocol. A string plug inserted from the outside without inner inspection is classified as a temporary emergency measure. [Source: TIA Passenger & Light Truck Tire Repair Guidelines]
Tire Pressure and Repair Effectiveness
The relationship between tire pressure and repair integrity is direct and often overlooked:
- Underinflation (>10% below spec): Increases sidewall flex and generates excessive heat — tires running 20% underinflated can reach temperatures 50°F higher than properly inflated tires. This heat accelerates vulcanization chemistry in unintended ways, potentially over-curing the repair bond and making it brittle.
- Overinflation (>10% above spec): Places the repair under higher tensile stress, especially at the plug-stem/tread interface. Overinflated tires concentrate impact forces on a smaller contact patch, increasing the probability of plug extrusion.
- Post-repair inflation target: After completing a repair, inflate to the vehicle manufacturer’s recommended pressure (found on the driver’s door jamb placard, not the tire sidewall maximum). Re-check pressure after 24 hours and again after 100 miles of driving. A loss of more than 2 PSI in 24 hours warrants re-inspection.
From the Technician’s Bench
I keep a logbook in my shop. Over 18 months and roughly 400 repairs, I tracked every comeback — a repair that returned with a leak. The single biggest predictor was tire pressure at the time the customer drove away: repairs on tires inflated to less than 80% of the vehicle spec failed at nearly 3× the rate of those inflated to spec. The customer who says “I’ll air it up when I get home” is the customer I see again in two weeks. Inflate to spec at the repair site. Every time.
How to Maintain a Tire Repair Kit
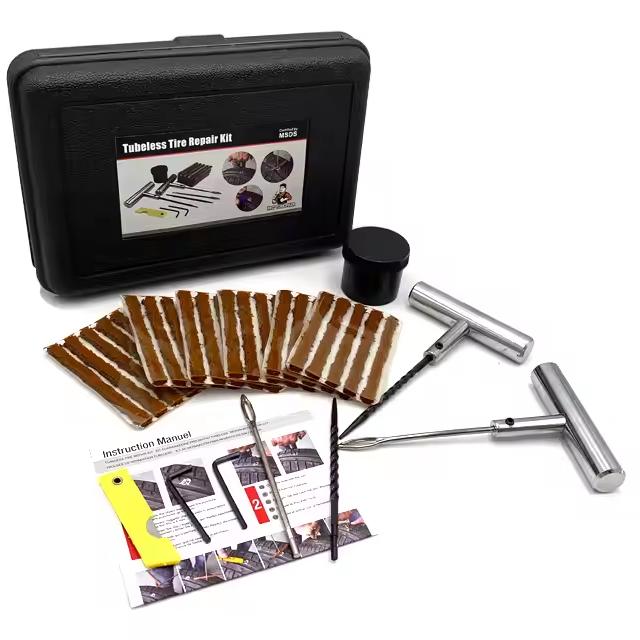
Step 1:Inspect and Replace Kit Items
Open the kit on a clean, well-lit surface. Dump everything out — do not just peer inside. A kit that “looks fine” from the top often conceals a hardened tube of cement or a rusted reamer buried at the bottom. I perform this full-dump inspection every 90 days, timed to the calendar season changes.
Inspection checklist (per ASTM F1035 and TIA guidance):
- Reamer: Check the cutting edges under light. A sharp reamer reflects light uniformly along its flutes. Dull or chipped edges appear as dark spots. The shaft should be straight — roll it on a flat surface.
- Insertion needle: Run your thumb across the eye. Any roughness or burr means replacement, not filing. Filing changes the eye geometry unpredictably.
- Plugs/patches: Check packaging integrity. If the foil pouch is swollen or punctured, moisture has entered and likely degraded the vulcanizing compound. Discard.
- Cement: Check consistency by tilting the tube. Fresh cement flows immediately. Thick, slow-moving cement has lost solvent and should be replaced.
- Pliers and valve tools: Light surface rust on non-cutting surfaces is acceptable if cleaned and lightly oiled. Pitting on jaw serrations warrants replacement.
Pro Tip: Set a recurring calendar reminder — “Kit Check” — on the first day of each season (March, June, September, December). This four-times-yearly rhythm catches seasonal temperature extremes that degrade materials: winter freeze-thaw cycles embrittle plastics, and summer heat accelerates adhesive aging.
Step 2:Clean and Store Your Tire Kit
After each use — even if you only opened the kit and decided not to proceed — wipe down every tool with a clean, dry microfiber cloth. Residual cement film on a reamer shaft will cure over time, creating a rough surface that increases friction during the next use and can tear the plug during insertion.
Storage environment specifications:
- Temperature: 50°F to 85°F (10°C to 29°C). Avoid trunk storage in extreme climates. In summer, a dark-colored vehicle trunk in direct sun can reach 150°F+ — well above the safe storage ceiling for vulcanizing cement.
- Humidity: Store in a sealed, water-resistant case. Most kit cases are splash-resistant but not waterproof. If your kit has been exposed to rain or flooding, open it immediately and dry all components. Replace any paper-packaged items.
- UV exposure: Rubber compounds degrade under UV. Keep the kit out of direct sunlight. If you transport the kit in an open truck bed, use an opaque container.
- Ozone: Electric motors produce ozone, which accelerates rubber cracking. Do not store the kit adjacent to a portable generator or air compressor motor.
Note: Correct storage not only extends the lifespan of rubber tire patches and plugs — it preserves the chemical integrity of the vulcanizing cement’s curing package. A patch stored at 75°F in a sealed pouch will retain >90% of its bonding strength after 3 years. The same patch stored in a trunk that cycles between 40°F and 140°F may lose 50% of its bond strength within 12 months.
Step 3:Check Expiration Dates and Instructions
Every adhesive and sealant product has a finite service window. Write the date you open a new tube of cement directly on the container with a permanent marker. If the manufacturer’s expiration date is less than 6 months away at the time you check, replace the cement proactively — the cost of a new tube is trivial compared to the consequences of a failed roadside repair.
- Expired vulcanizing cement loses its solvent carrier first — it thickens and becomes difficult to spread into a uniform film. A non-uniform film produces uneven curing and weak spots in the bond line.
- Even after the solvent evaporates, the sulfur accelerators in the curing package degrade over time, reducing cross-link density in the final bond.
- Pre-vulcanized plugs (the rubber stem on plug-patch units) can partially cure in storage if exposed to heat. A plug that feels stiff or has lost its tacky surface has likely begun to cure prematurely.
Beyond chemical integrity, re-read the instructions included with your specific kit annually. Different manufacturers recommend different cement dry times, buffing techniques, and stitch patterns. The generic approach of “apply cement, wait, insert plug” glosses over these critical variations. For example, some cement formulations require exactly 5 minutes at 70°F before patch application; at 50°F, that window extends to 8–10 minutes. Following the wrong timeline for your specific product is effectively the same as following no timeline at all.e core removers. The hands-on experience builds confidence and speeds up roadside tire repairs.
Step 4: Prepare to Repair a Flat Tire
I train new technicians on scrap tires before they ever touch a customer vehicle. There is no reason the same principle should not apply to a DIY kit owner. Find an old tire — any tire shop will give you one destined for recycling — and practice the full repair sequence in your driveway on a Saturday afternoon.
- Ream the puncture channel. Feel the resistance change as the reamer passes from tread rubber into the steel belt layer, then into the inner liner. This tactile feedback is something no video can teach.
- Apply cement and wait. Use a timer. Learn what “tacky dry” actually feels like under your fingertip in your local climate.
- Insert the plug or plug-patch unit. The force required will surprise you the first time — it is significant, especially on a steel-belted radial. If you hesitate mid-insertion, the cement can begin to set before the plug is fully seated.
- Trim the excess. The plug should be cut flush with the tread surface — a protruding plug stub will wear unevenly and can catch on road debris.
- Inflate and monitor. Check pressure immediately, again at 1 hour, and again at 24 hours. This teaches you the normal “settling” pattern of a properly executed repair.
Tire mobility kits — the sealant-and-compressor combinations found in many modern vehicles that lack a spare tire — serve a different purpose. These are designed for small tread-area punctures (typically up to 4 mm) and function by injecting a liquid sealant that coagulates at the puncture site under centrifugal force. They are effective for reaching a service center but are not a permanent repair, and many tire pressure monitoring system (TPMS) sensors can be damaged by sealant exposure. I recommend keeping both a traditional plug-patch kit and understanding the limitations of the vehicle’s mobility kit. They are complementary tools, not substitutes for one another.
Callout: A properly maintained tire repair kit is a force multiplier for driver safety. It enables a controlled, confident response to a flat tire — rather than a panicked, fumbling one. Combined with a habit of regular tire pressure checks (at least monthly), a well-kept kit helps prevent the cascading failures that begin with a simple puncture and end with a blowout.
Maintaining a tire repair kit is not a one-time task. It is a recurring discipline — quarterly inspection, post-use cleaning, annual consumable replacement, and ongoing practice. The drivers who treat their kit as living equipment rather than a “set it and forget it” emergency box are the ones who experience uneventful roadside repairs and return safely to the road. The 30 minutes you spend maintaining the kit every three months buys you a lifetime of confidence behind the wheel.
- Quarterly inspection catches 90%+ of degradation issues before they become roadside failures.
- Understanding the vulcanization chemistry helps you make informed material replacement decisions.
- Pressure verification after repair is not optional — it is the final quality-control checkpoint.
FAQ
How often should I check my tire repair kit?
Every three months — aligned with the calendar seasons. This frequency catches temperature-related degradation (winter embrittlement, summer adhesive aging) before materials become unusable. Set a recurring phone reminder for March 1, June 1, September 1, and December 1.
Can a DIY plug kit fix all types of tire punctures?
No. A DIY plug kit (string/rope type) is suitable only for small tread-area punctures up to 1/4 inch (6 mm) in diameter, and even then, the TIA classifies this as a temporary emergency repair. Punctures in the sidewall or shoulder area are unrepairable by any method — the flex zone of the tire prevents any repair from holding. Large punctures (>6 mm), irregular tears, and any injury that has been driven on while flat require professional assessment and likely tire replacement. Per ASTM and TIA standards, a permanent repair requires a plug-patch combination installed from inside the tire after full inner liner inspection.
What should I do if I find a damaged tire during inspection?
Replace it immediately. A tire with visible sidewall bulges, exposed cords, tread separation, or a puncture larger than 1/4 inch is structurally compromised and cannot be safely repaired. Do not attempt to “patch and monitor” — the monitoring period is when the failure occurs. If the tire is on the vehicle and cannot be safely driven, install the spare (or use the mobility kit) to reach a tire service center.
How do I know if my vulcanizing cement has expired?
Three indicators: (1) consistency — fresh cement is thin and watery, while expired cement is thick, syrupy, or paste-like; (2) separation — if the cement has separated into a clear liquid layer on top and a rubbery mass at the bottom and cannot be remixed by shaking, it has degraded; (3) dry time — if the cement takes significantly longer than the manufacturer’s stated time to reach “tacky dry,” the solvent has partially evaporated and the curing package may be compromised. When in doubt, replace it — a $5 tube of cement is far cheaper than a tow truck.