Most cyclists agree that patching inner tubes is a wise choice if you want to save money and avoid waste. Some worry about the reliability of patching, but a patching kit is usually sufficient for everyday use. Cyclists prefer quick repairs, while others opt for a new inner tube for peace of mind. Ultimately, it comes down to individual needs.
Key Takeaways
- Patching inner tubes can save money and help extend your cycling budget. Patching kits are affordable and can repair multiple punctures.
- Choosing to patch inner tubes instead of replacing them reduces waste and helps protect the environment. Every inner tube repaired reduces rubber waste sent to landfills.
- Patching is a quick way to fix small punctures. Carry a patching kit with you so you can patch punctures anytime and get back on the road faster.
Pros of Patching a Bike Tube
Save Money
Many cyclists are looking for ways to reduce cycling costs. Patching inner tubes helps save money because it’s much cheaper to buy a new inner tube for every small puncture. Patching kits are usually inexpensive and can repair multiple punctures. Cyclists who regularly repair inner tubes often find they can use their cycling budget more effectively. These savings accumulate over time, especially for frequent riders or those who ride on rough terrain.
Eco-Friendly Choice
Today, people are increasingly concerned about environmental issues. Repairing inner tubes reduces the likelihood of old ones ending up in landfills. Repairing inner tubes instead of discarding them helps reduce waste. Every inner tube repaired means less rubber and plastic in the trash. This small act has a huge impact on a daily basis. Cyclists who choose to repair rather than replace their inner tubes demonstrate their care for the planet.
Quick Fixes
Nobody likes a flat tire. Repairing inner tubes is quick and easy, especially when using products like inner tube patch pads and quality repair kits. Many cyclists carry repair kits with them. They can repair a flat tire on the spot and be back on the road in minutes. This convenience means less waiting time and more riding time. For many, being able to quickly repair a flat tire is a huge advantage.
Tip: Practice tire repair at home to avoid fumbling on the road. This helps boost confidence and saves time in actual riding.
Cons of Patching a Bike Tube
Durability Concerns
Some riders wonder if a patched tube will last as long as a new one. The answer depends on the quality of the patch and the tube itself. Many patched tubes hold up well and can last for months or even years. Riders often share stories about tubes with several patches that still work fine. If the patch job is good and the tube has no other problems, it can last almost as long as a new tube. Still, a new tube usually offers the most peace of mind for long rides or races.
Patch Limits
There are limits to how many times someone can patch a tube. Most cyclists do not count the patches, but they stop when patches start to overlap or when the valve wears out. Some people keep patching until the tube just cannot hold air anymore. Here are some common patching habits:
- Riders stop patching if a new patch would cover an old one.
- Some keep patching until the valve stem shows signs of wear.
- Others replace the tube when it becomes too crowded with patches.
Note: Too many patches can make the tube weak and hard to fit back into the tire.
When Not to Patch
Not all punctures in bicycle inner tubes are suitable for repair. Damage near the valve can be tricky. Most cyclists avoid repairing near the valve because it may compromise the seal. If the inner tube has a large tear or a damaged valve, replacing it is safer. Cyclists also typically avoid repairing inner tubes with many small holes or if the rubber feels thin and old.
When to Patch a Bike Tube
Suitable Punctures
Not all punctures require a new inner tube. Some punctures are ideal for repair. Cyclists often find that small holes or slow leaks are the best option. A single, clean puncture from a thorn or nail can usually be repaired quickly. Holes no larger than 6 mm in diameter, especially in the tread area, work well with a patch. Slow leaks caused by small holes can also be easily fixed with a tire repair kit.
Here’s a quick guide to help spot the right kind of damage for patching:
| Type of Damage | Description |
|---|---|
| Small punctures in the tread area | These are ideal for repair. |
| Punctures no larger than 6 mm | Especially those in the crown can usually be safely repaired. |
| Slow leaks from small holes | These can be easily fixed with a tire repair kit. |
| Single, clean punctures | Caused by nails or thorns, great for inner tube repair. |
Tip: If the hole is too close to the valve or the tube feels thin and worn, it’s better to replace the tube.
Best Situations to Patch
Cyclists often wonder when is the best time to repair their bicycle inner tubes. The answer depends on where they are riding and the tools they have. Many people choose to repair their inner tubes while riding, especially when they want to get home and don’t want to seek help. Commuters and recreational cyclists appreciate the convenience of quick repairs. Mountain bikers and touring cyclists also carry tire repair kits in case of emergencies while away from home.
Repairing tires reduces the use of new materials, helping to reduce waste. By repairing inner tubes, cyclists contribute to protecting the environment and extending the life of their equipment.
Different patch types work best in different situations:
| Patch Type | Advantages | Limitations |
|---|---|---|
| Vulcanizing Patch | Creates a strong, permanent bond. Great for long-term repair. | Needs glue and a bit more time to apply. |
| Adhesive Patch | Fast and easy to use. No extra glue needed. | Best for small holes and quick fixes. |
| Mushroom Plug | Seals larger punctures well. Stays airtight under pressure. | Works best with professional tools. |
| Hot Patch | Bonds quickly with heat. Good when glue is not available. | Needs a heat source and some practice to apply. |
Vulcanized patches use a chemical process to harden the rubber, making the repair strong and durable. For cyclists looking to quickly fix a problem on the road, adhesive patches are ideal. Mushroom plugs can handle larger holes and maintain a seal on the inner tube even under stress. Hot-melt patches, on the other hand, can be applied quickly without glue.
Note: For best results, cyclists should choose the appropriate patch type based on the size and location of the puncture.
Repairing bicycle inner tubes is best suited for smaller, simpler holes, and for situations where cyclists want to save money, reduce waste, or quickly get back on the go.
When to Replace Instead Bike Tube of Patch
Damage Not for Patching
Some damage cannot be repaired with patches. Cyclists often encounter problems more serious than simple punctures. When the inner tube has a large tear or a cut larger than a quarter inch (about 6 mm), a patch will not hold it effectively. Larger holes can cause significant air leakage. If the damage is near the valve stem, most patches will not seal well. Inner tubes with cracks, bulges, or dry cracks also need to be replaced. These signs indicate that the rubber has aged.
Many cyclists notice problems with their inner tubes when they see the following:
- Large cracks in the tread, especially cracks wider than a pencil.
- Cracks or holes appear on the inner tube sidewalls.
- Multiple old holes are closely spaced.
- Bulges or exposed threads.
- The rubber is dry, brittle, hard to the touch, or easily peels off.
If the inner tube has been repaired multiple times, it may not fit back into the tire. Overlapping repair patches can cause leaks. If the inner tube is still leaking even after using tire repair tools, it usually means there is hidden damage inside. Cyclists should not risk using an inflatable inner tube.
Tip: If a tube looks worn out or has more than three patches in one spot, it is time for a new one.
Signs to Replace Tube
Riders can determine when an inner tube has reached the end of its lifespan. They don’t need special tools; they just need to observe and feel some warning signs. Here are some signs that an inner tube needs replacing:
- The tire still leaks air even after patching.
- Some holes or cracks cannot be sealed no matter how many times you try.
- The inner tube tread is severely worn or thinned. Riders can use a coin to test or observe the tread wear.
- The sidewall is cracked or damaged. These may appear as bulges, wear, or deep cracks.
- Insufficient grip when cornering or braking. The bicycle may feel unstable or require a longer braking distance.
- Repeated leaks in a short period of time. This means the inner tube is old.
The following table can help riders remember what to check:
| Warning Sign | What It Means |
|---|---|
| Tube keeps going flat | Internal damage or worn-out rubber |
| Big cuts or cracks | Not safe to patch |
| Multiple patches in one area | Tube is too weak |
| Bald or thin tread | Time for a new tube |
| Bulges or dry rot | Rubber has lost strength |
When riders see these signs, they know it is safer to replace the tube. A new tube gives peace of mind and helps prevent sudden flats on the road.
Note: Safety always comes first. If a tube shows any of these signs, riders should swap it out before their next ride.
How to Patch a Bike Tube Successfully
Steps to Patch a Bike Tube
Patching a bike tube is a skill every rider can learn. Here’s a simple guide to help anyone fix a flat bike tire and get back on the road:
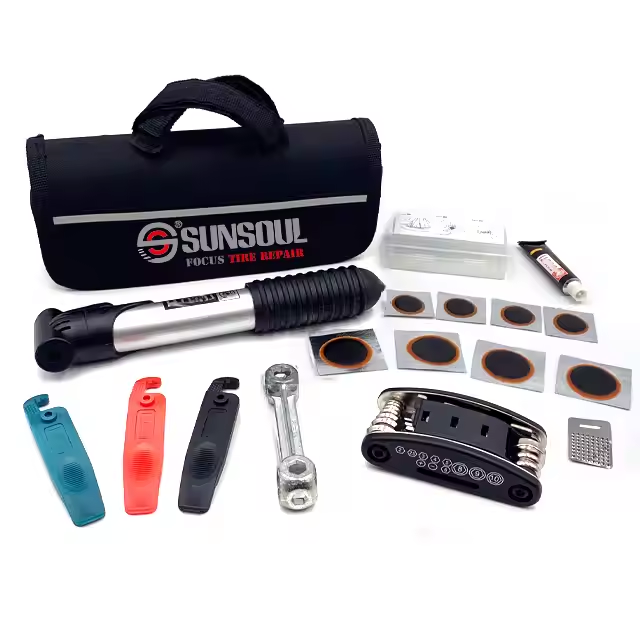
- Gather supplies. Riders need a patch kit, tire levers, and a pump.
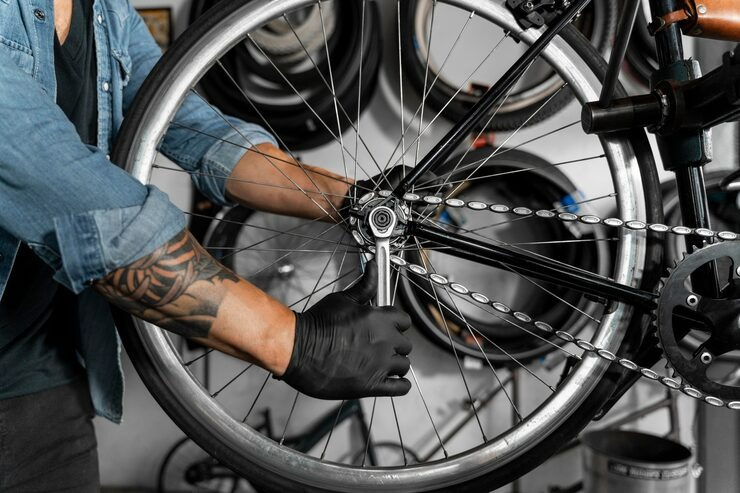
- Remove the wheel from the bike. Use tire levers to take the tire off the rim.
- Take out the inner tube. Inflate it slightly to find the leak. Hold the tube near the lips or ear to feel or hear escaping air. For tiny holes, submerge the tube in water and look for bubbles.
- Mark the spot with chalk or a marker.
- Clean and dry the area around the hole. Lightly roughen it with sandpaper from the kit. This helps the patch stick.
- Apply glue if using a vulcanizing patch. Wait until it feels tacky.
- Peel the patch and center it over the hole. Press down firmly. Roll the tube between fingers to seal it.
- Wait a few minutes for the patch to set.
- Reinstall the tube and tire. Inflate the tire and check for leaks.
Tip: Inner Tube Patches work well for most small punctures and help riders patch a bicycle tube quickly.
Avoiding Common Mistakes
Many cyclists make some simple mistakes when patching a tire. Here are some tips to avoid trouble:
- Clean and dry the puncture area before patching.
- Don’t use too much glue. A thin layer works best.
- Make sure the patch completely covers the puncture.
- Squeeze out any air bubbles under the patch.
- Never inflate the inner tube from the outside of the tire to test the patch’s strength.
Using the right tools and working carefully can help cyclists repair a flat tire and extend their riding time.
Riders need to look at the damage before fixing a flat tire. Small holes can be patched. If the valve is broken, the tube needs to be replaced. Remember these important things:
- Patching saves money and is better for the earth.
- Replacing is best for big rips or old tubes.
| Aspect | Patching | Replacing |
|---|---|---|
| Cost | Costs less | Costs more at first |
| Environmental Impact | Better for the planet | Makes more trash |
| Safety | Good for small holes | Safer for big damage |
Each rider can pick what works for their bike and wallet.
FAQ
How many times can a bicycle inner tube be patched?
Most cyclists patch their inner tubes two to three times. Too many patchings weaken the inner tube, making it difficult to reinstall.
Are tire patches as effective as new inner tubes?
Tire patches work well for repairing small punctures, and cyclists rely on them for everyday riding. However, for long-distance touring or racing, many people choose to replace the inner tube for peace of mind.
What tools do cyclists need to repair inner tubes?
Cyclists need a tire repair kit, tire pry bars, and an air pump. Some kits include all the tools for convenient repairs during rides.