


A quality inner tube patch is the foundation of a permanent repair. But the patch itself is only half the equation. The other half is technique. A patch applied incorrectly will leak again within days, no matter how good the rubber is. The best way to patch an inner tube combines the right materials with a clean, patient process — and knowing when to stop patching and replace the tube instead.
Key Takeaways
- Use a cold vulcanizing patch with rubber cement, not a self-adhesive patch, for a permanent repair.
- Clean and roughen the area around the puncture before applying cement.
- Let the vulcanizing fluid dry completely — usually 3–5 minutes — before pressing the patch on.
- A patch that is too small will fail under pressure. Match patch size to the hole.
- After three patches on the same tube, replace the tube. Multiple patches compromise reliability.
- Always find and remove the object that caused the puncture, or the new tube will fail too.
Tools and Materials for Patching an Inner Tube
Essential Tools and Patch Kit
You need a few basic items: tire levers, a hand pump or CO₂ inflator, and a patch kit. Tire levers make it possible to remove the tire without damaging the rim. A pump lets you inflate the tube slightly to find the leak and to refill after repair. The patch kit should contain patches, vulcanizing fluid (rubber cement), and a small piece of sandpaper or a metal scuffer. Some kits include a crayon or chalk to mark the hole.
Choosing the Right Inner Tube Patch
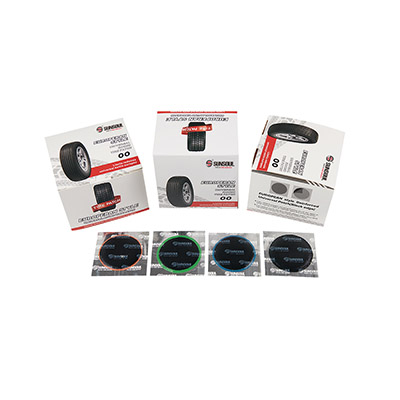
Patches come in two main types: self-adhesive and cold vulcanizing. Self-adhesive patches are convenient for roadside repairs, but they are temporary. They rely on pressure-sensitive glue that degrades with heat and flexing. Cold vulcanizing patches, used with rubber cement, create a chemical bond with the butyl rubber of the inner tube. That bond is permanent. For a repair that lasts, choose a cold vulcanizing patch. Rubber tire patches made from natural rubber with reinforcement layers offer the best balance of flexibility and durability for inner tube applications. Size matters too. A patch that barely covers the hole will peel at the edges. Choose a patch that extends at least 1 cm beyond the puncture on all sides.
Step-by-Step: How to Patch an Inner Tube
Remove the Inner Tube and Locate the Puncture
Start by removing the wheel from the bike. Deflate the tube completely. Use tire levers to pry one bead of the tire off the rim, then pull the inner tube out. Inflate the tube slightly — just enough to make it round — and listen for escaping air. If you cannot hear the leak, submerge the tube in water and look for bubbles. Dry the tube completely before proceeding. Mark the hole with a crayon so you can find it again.
Clean, Apply Vulcanizing Fluid, and Patch
This is the step where most repairs succeed or fail. Roughen the area around the puncture with sandpaper or a metal scuffer. The goal is to remove the glossy surface and create a texture that the cement can grip. Wipe away any dust. Apply a thin, even layer of vulcanizing fluid to an area slightly larger than the patch. Let it dry completely. This usually takes 3–5 minutes. The cement should look dull, not wet or shiny. Once dry, peel the backing from the patch and press it firmly onto the cemented area. Work from the center outward to push out trapped air. Hold pressure for at least 30 seconds. If the patch has a plastic film on top, peel it off after pressing. Do not inflate the tube immediately. Give the bond a few minutes to set before reinstalling.
Reinstall the Inner Tube and Inflate
Before putting the tube back, run your fingers along the inside of the tire to check for the object that caused the puncture — a thorn, glass, or wire. If you skip this step, the new patch or tube will fail again. Insert the tube into the tire, seating it evenly. Push the tire bead back onto the rim by hand, using tire levers only for the final section. Be careful not to pinch the tube between the tire and the rim. Inflate the tube slowly, checking that the tire seats properly on the rim. Once inflated to the recommended pressure, reinstall the wheel on the bike.
Common Mistakes and When to Replace an Inner Tube
Mistakes That Cause Patch Failure
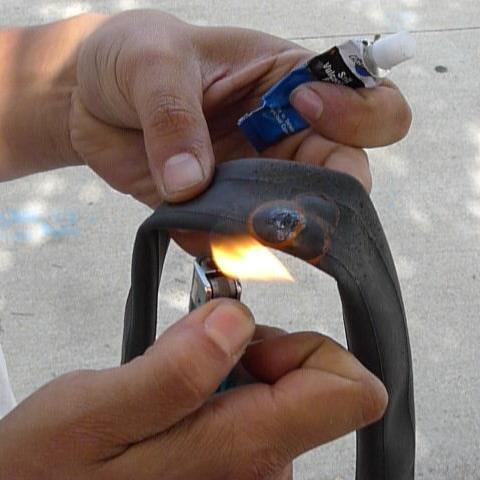
The most common mistake is not letting the vulcanizing fluid dry. If you press the patch onto wet cement, it will not bond chemically. Another error is using too much cement. A thick layer traps solvent and weakens the bond. Roughening the surface is also essential. A smooth tube will not hold a patch. Finally, using a patch that is too small or pressing it unevenly leaves edges that lift under pressure. Avoid these mistakes and your patch will last.
When to Replace Instead of Patch
Patching is a temporary solution that can be repeated, but not indefinitely. After three patches on the same tube, replace it. Multiple patches reduce the tube’s ability to hold air reliably, and old rubber becomes brittle over time. Replace the tube immediately if the puncture is on the valve stem or the base of the valve. Valve damage cannot be patched safely. Also replace the tube if the puncture is larger than 6 mm or if the tube shows signs of cracking or dry rot. A new tube costs little and eliminates the risk of a sudden flat.
FAQ
What is the best patch for an inner tube?
Cold vulcanizing patches with rubber cement. They form a chemical bond with the butyl rubber and last far longer than self-adhesive patches. Look for patches made from natural rubber with reinforcement layers.
Can I patch an inner tube without removing the wheel?
It is not recommended. You need to remove the tube to clean and roughen the puncture area properly. A patch applied through the tire will not bond correctly and will fail.
Does SUNSOUL supply inner tube patches?
Yes. SUNSOUL offers vulcanizing inner tube patches in a range of sizes for bicycle, motorcycle, and automotive inner tubes. The patches are made from natural rubber with textile reinforcement for flexibility and durability.
What should repair shops look for in an inner tube patch supplier?
Repair shops should prioritize bond strength, material quality, and size range. A supplier with a broad catalog covering bicycle, motorcycle, and automotive applications reduces inventory complexity. An 18-month warranty and a proven track record in cold vulcanizing systems are also good indicators of reliability.