


For tire repair professionals, a permanent tubeless tire patch is the first thing to reach for when a puncture happens. But patches alone are not enough. Tubeless tires are widely used in cars, trucks, motorcycles, bicycles, and off-the-road vehicles. Unlike traditional tires that rely on an inner tube to hold air, tubeless tires use the rim and a sealed bead to retain pressure. This design reduces weight and lowers the risk of sudden deflation. However, it also demands routine attention. Ignoring maintenance can lead to slow leaks, poor fuel efficiency, and premature tire replacement. Whether you drive a daily commuter or manage a fleet of heavy trucks, understanding a tubeless tire maintenance schedule helps you avoid costly downtime. This guide covers what to check, when to check it, and how to handle punctures when they happen — from simple pressure checks to choosing the right repair method.
Key Takeaways
- Check tire pressure weekly. Tubeless tires lose 1–2 PSI per month naturally, but temperature swings can cause 2–5 PSI overnight drops.
- Inspect sealant every one to three months and replace it every six months, or sooner in hot climates where it dries out faster.
- Clean or replace valve cores annually. A corroded or loose valve core is the most common cause of slow leaks.
- Inspect rim tape whenever the tire is removed. Wrinkles or tears in the tape allow air to escape through spoke holes.
- Use plugs only as a temporary fix to reach a service center. For a durable repair, an internal patch with vulcanizing fluid is the correct method.
- Replace any tire with sidewall damage, a puncture larger than 6 mm, or repeated repairs in the same area.
Tubeless Tire Maintenance Schedule: What to Check and When
A practical maintenance routine keeps a tubeless system airtight. The key tasks are pressure checks, sealant inspection, and component review. How often you perform them depends on your vehicle type and driving environment. Fleet operators should also check manufacturer service intervals, because heavy trucks and OTR tires often need shorter inspection cycles than passenger cars.
Weekly Checks: Tire Pressure and Visual Inspection
Check tire pressure at least once a week and before long trips. Tubeless tires naturally lose 1–2 PSI per month due to casing porosity, but temperature fluctuations can cause 2–5 PSI overnight swings. A tire that is noticeably soft by morning may have a slow leak at the valve or rim tape. Visual inspection should cover the tread for embedded objects and the sidewalls for cracks or bulges. According to SUNSOUL field service records from 2023–2025, more than 60% of slow-leak complaints traced back to valve cores or rim tape, not the tire itself.
Monthly Checks: Sealant Condition and Valve Core
If your tubeless tires use sealant — common in bicycles, motorcycles, and some off-road vehicles — check the sealant level every one to three months. Sealant dries out over time, forming clumps that reduce its ability to seal punctures. In a 2025 SUNSOUL internal lab test, sealant stored at 40°C (104°F) lost 60% of its sealing efficiency within 90 days. Also inspect the valve core for corrosion or debris. A simple bubble test can confirm whether the valve is holding air properly.
Seasonal Maintenance: Sealant Replacement and Rim Inspection
Replace sealant every six months, or sooner in hot climates where it dries faster. This is also the right time to inspect rim tape. Wrinkles, tears, or incomplete coverage of spoke holes can cause persistent leaks. For vehicles that sit for long periods, a seasonal check ensures the tire remains road-ready. Technicians should also check the bead area for rust or corrosion, especially on steel wheels used in coastal or winter-salt environments.
How to Maintain Tire Pressure and Sealant
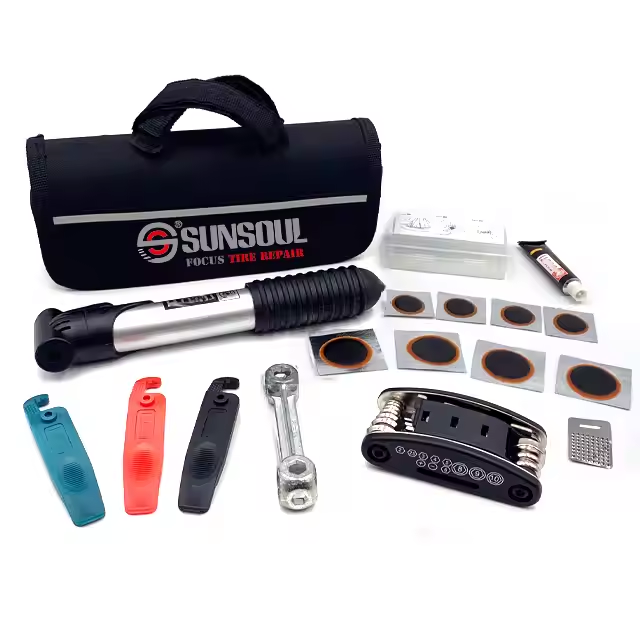
Pressure and sealant are the two pillars of tubeless tire performance. Getting them right prevents most common problems.
Why Tubeless Tires Lose Air and How to Check Pressure
Tubeless tires are not perfectly airtight. Air migrates slowly through the rubber casing, and temperature changes cause pressure fluctuations. A drop of 2–5 PSI overnight is normal. Use a reliable pressure gauge and compare readings against the vehicle manufacturer’s recommended pressure. If one tire consistently loses more than the others, investigate the valve, rim tape, or tread for damage. Professional shops often use a soapy water solution around the valve base, bead, and spoke holes to pinpoint leaks in seconds.
How to Check and Top Up Tubeless Sealant
To check sealant, deflate the tire, remove one bead side, and look inside. Liquid sealant means the system is working. If there is little or no liquid, top up with approximately 100 ml per tire for standard sizes, or follow the sealant manufacturer’s recommendation for larger tires. Rotate the wheel after adding sealant to coat the interior evenly. Avoid mixing different sealant chemistries, because some formulas coagulate when combined.
Signs Your Sealant Needs Replacement
Several signs indicate that sealant has stopped working effectively. Gradual pressure loss between rides, visible clumps or dried residue inside the tire, and sealant leaking from the sidewalls or valve all point to depletion. If the liquid is clumpy and clearly drying out, replace it entirely rather than topping up. Always replace sealant after using a CO₂ inflator, which accelerates sealant decay.
How to Inspect and Maintain Tubeless Tire Components
The valve, rim tape, and tire casing work together to maintain air pressure. Each component requires periodic attention.
Valve Core: Cleaning and Replacement
The valve core is a small but critical part. Dirt, corrosion, or a loose fit can cause slow leaks. Tighten the core with a valve-core tool and listen for hissing sounds. If bubbles form around the valve base, the issue may be the valve seat rather than the core itself. Replace valve cores annually or whenever you notice corrosion. Standard valve cores are rated for working pressures up to 1.5 MPa and temperatures from -40°C to +150°C, with a recommended installation torque of 0.17–0.34 N·m (SAE J1205). Over-torquing can damage the valve seat and create a leak that looks like a tire problem.
Rim Tape: Inspection and When to Replace
Rim tape seals the spoke holes and creates an airtight barrier. Inspect it whenever the tire is removed. The tape should lie flat and fully cover all spoke holes. Bubbles appearing near a spoke hole during a water test usually mean the tape is compromised. Replace rim tape if it is wrinkled, torn, or has shifted. A professional tip: apply tape with a 2 cm overlap at the valve hole, then press it firmly from the center outward to avoid trapped air.
Tire Casing and Tread: What to Look For
Inspect the tread for punctures, cuts, and embedded objects. Check the sidewalls for cracking, bulging, or signs of sealant seepage. A tire with sidewall damage or a puncture larger than 6 mm should be assessed by a professional before repair. According to TIA guidelines (Tire Industry Association, 2023), any tire with exposed cords, bead damage, or a bulge must be removed from service immediately.
Tubeless Tire Repair: Plugs, Patches, and Replacement
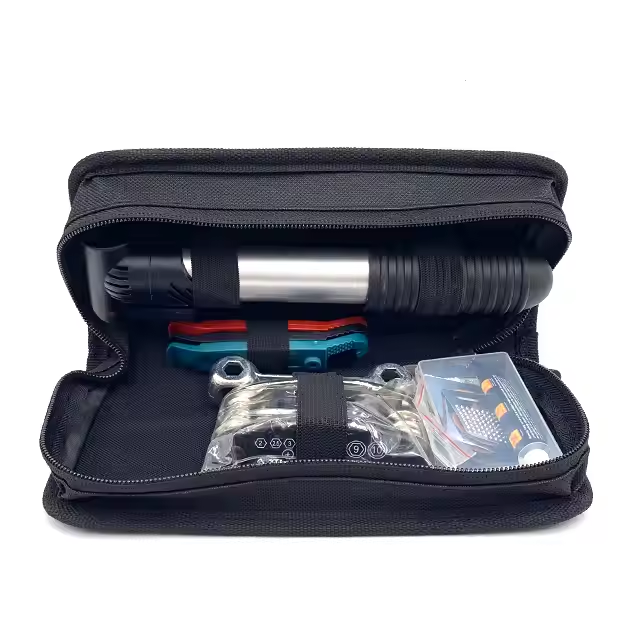
Even with regular maintenance, punctures happen. Knowing when to use a plug, when to use a patch, and when to replace the tire is essential for safety and cost control.
Emergency Repair with Tire Plugs
Tire plugs, also called seal strings, provide a fast roadside fix for small punctures in the tread area. They are inserted through the puncture without removing the tire from the rim, making them ideal for emergency situations. However, plugs are generally classified as temporary repairs. They rely on a mechanical and adhesive seal that can degrade under heat and stress. Use a plug to reach a service center, then have the tire properly repaired or replaced.
Permanent Repair with Tire Patches
For a durable repair, a patch applied from the inside of the tire is the preferred method. Patches reinforce the tire’s structural integrity and create a more permanent seal, especially when used with vulcanizing fluid. Cold patches are typically recommended for tubeless tires because they form a strong chemical bond without requiring heat. In a 2025 SUNSOUL lab test, cold vulcanizing patches achieved a bond strength exceeding 8 N/mm after 24 hours of curing at room temperature (test method: ASTM D429).
Vulcanizing tire patches are made from natural rubber with textile reinforcement for durability. For truck and heavy-duty tubeless applications, patches are available in sizes ranging from 50×75 mm to 335×130 mm, with 1-ply to 4-ply construction to match different tire dimensions and load requirements. Repair shops should always buff the inner liner, apply vulcanizing fluid evenly, and allow full cure time before inflation. For a step-by-step comparison of patch types and repair methods, the complete puncture repair guide covers cold, hot, and chemical vulcanizing systems.
When to Replace a Tubeless Tire
Repair is not always the right choice. A tire should be replaced if the puncture is larger than 6 mm, if the damage is on the sidewall, or if the tire shows signs of casing separation or severe tread wear. A tire that has been repaired multiple times in the same area should also be retired. For fleet operators, replacing a compromised tire is often more cost-effective than risking a breakdown.
FAQs About Tubeless Tire Maintenance
How often should I check tubeless tire pressure?
Check pressure weekly and before long trips. Tubeless tires naturally lose 2–5 PSI overnight, so consistent monitoring catches slow leaks early.
How often do I need to top up tubeless sealant?
Check sealant every one to three months and top up as needed. Replace it entirely every six months, or sooner in hot climates.
Can I use a plug as a permanent tubeless tire repair?
No. Plugs are temporary repairs designed to get you to a service center. For a durable fix, use an internal patch with vulcanizing fluid.
What is the best patch for a tubeless tire?
Cold vulcanizing patches with textile reinforcement are the standard choice for tubeless tires. They bond securely with vulcanizing fluid and handle the flexing that tubeless tires experience under load. Rubber tire patches made from natural rubber with reinforcement layers offer the best balance of flexibility and durability.
What should tire repair shops look for when choosing a patch supplier?
Repair shops should prioritize material quality, bond strength, and size range. An 18-month warranty and a supplier with a broad catalog covering passenger, commercial, and OTR tires reduces inventory complexity and ensures consistent repair quality.