The adhesive side of a tire patch should be flush against the inner tube. Many tire patches have a forked side or clear markings on the back to distinguish the adhesive side. Properly applying the patch helps it adhere firmly and seal the puncture. Incorrect application may render the repair ineffective.
Key Takeaways
- Always keep the adhesive side of the tire patch flush against the inner tube. This ensures a secure seal and prevents leaks.
- Clean and roughen the surface of the inner tube. A clean, rough surface helps the patch adhere better.
- When applying the tire patch, carefully follow each step. Rushing can lead to mistakes and a failed repair.
Identify the Correct Side of a Puncture Repair Patch
Spotting the Adhesive Side
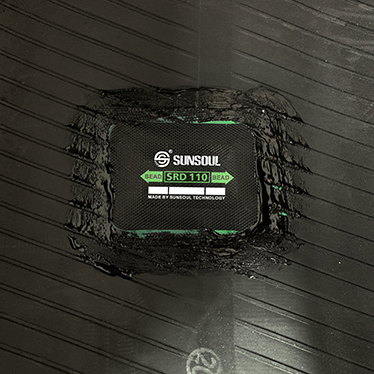
Every tire patch has an adhesive side. The adhesive side must be flush against the inner tube. This helps cover the puncture and prevent leaks. SUNSOUL tire repair products make this process easy. Their patches have a forked design on the back. A split backing covers the adhesive side and can be torn into two pieces. After peeling off the backing, you’ll see the adhesive side. The adhesive side usually looks shiny or feels slightly sticky. The other side is smooth and dry. Always check both sides before using the patch.
Tip: Hold the patch by the edges. Do not touch the sticky part. This keeps the glue clean and helps it stick well.
Using Backings and Markings
Many patch kits include clearly marked or colored patches. These markings or colored patches can help you quickly find the correct side. Some patches have text or logos printed on the non-adhesive side. Some patches come with a colored film that, when peeled off, reveals the adhesive side. SUNSOUL tire patch products use high-quality materials and have a clear, separate backing. This makes peeling and applying the patch very easy and foolproof.
Quick Checklist for Finding the Adhesive Side:
- Check for a separate or peelable backing.
- Check for text or logos.
- Touch both sides; the adhesive side feels slightly sticky.
Patch Types and Features
Tire patches come in various types. They are mainly divided into two categories: chemically cured tire patch and dual-curing tire patch. Each type uses a special adhesive and curing method. The table below lists the main differences:
| Patch Type | Adhesive Type | Curing Process | Bond Strength |
|---|---|---|---|
| Chemical Cure | Chemical adhesive | Bonds with heat or pressure | Strong adhesion |
| Dual Cure | Chemical and heat | Uses both chemical and heat curing | Creates a stronger bond |
- Chemically cured tire patches use chemical adhesive. This adhesive bonds under pressure or heat. This type of patch is suitable for most repair situations.
- Dual-curing tire patches use both chemical adhesive and heating. This results in better and faster adhesion.
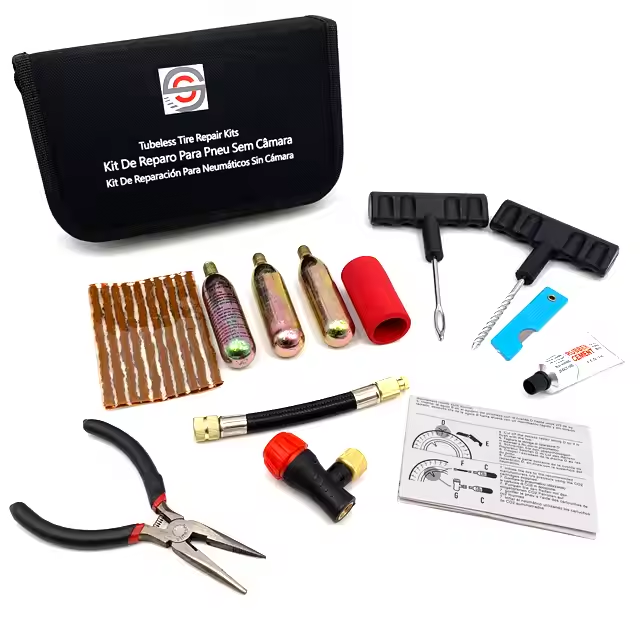
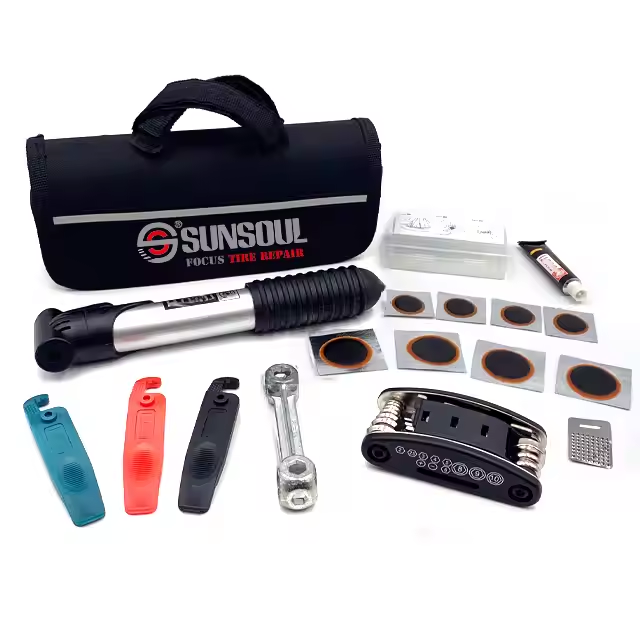
SUNSOUL tire repair products include both types. Their high-quality materials help the patches adhere firmly and last longer. For larger holes or bevel repairs, tire patches are better than plugs. Professionals use tire patches for repairs requiring long-term use. Tire repair kits typically contain tire patches of different sizes, glue, and tools to help you repair tires.
Note: Keep patches in a cool, dry place. Store them flat and away from sunlight to protect the sticky part.
How to Patch a Tire: Application Steps
Prepare the Tube Surface
To patch a tire, they should start by deflating the tube completely. This step makes the repair easier and safer. They need to find the puncture and mark it with chalk or a marker. Cleaning the area is important. They can use a clean rag and a little alcohol to remove dirt and grease. The area must dry fully before moving on. Next, they should rough up the surface around the hole with sandpaper or a tube-scuffer. This helps the glue stick better. A clean and rough surface gives the patch a strong hold.
Tip: Moisture can weaken the bond. Always make sure the tube is dry before adding glue.
Apply Glue and Wait
Apply a thin, even layer of glue to the prepared area. The glue should cover slightly more than the patch. Wait for the glue to dry until it has a matte, not shiny, finish. This may take several minutes. In some cases, the adhesive may require up to 24 hours to fully cure for optimal adhesion. Temperature and humidity affect drying time, so a warm, dry environment is best.
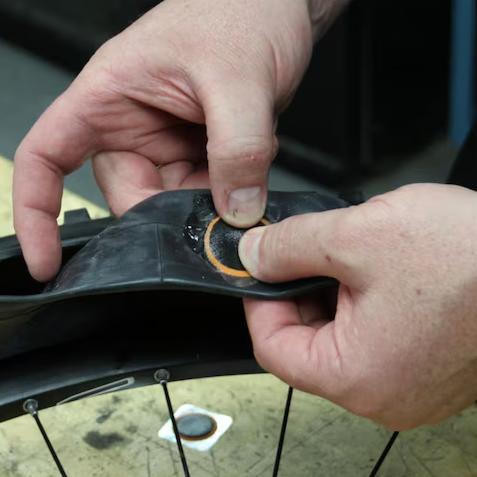
Place and Press the Patch
Now you can peel off the release paper from the back of the SUNSOUL patch. Align the patch with the center of the puncture and apply it. Press firmly from the center outwards to help remove air bubbles. Some people use rollers or hard objects to press the patch firmly. SUNSOUL patches are thick and round, easy to work with, and reliable and durable even on rough terrain.
“I fixed my tubeless tire with SUNSOUL and rode for weeks without a single leak. The patch held up in rain and mud. I’m impressed!” — Bike commuter from Germany
Seal and Check the Repair
After applying the patch, inflate the inner tube to the correct pressure. You can check for leaks by spraying soapy water on the repair area and observing for bubbles. If there are no bubbles, the seal is good. For added safety, you can immerse the inner tube in water and observe for bubbles. If the tire pressure remains stable for 24-48 hours, the repair is successful.
Note: SUNSOUL kits come with clear instructions and support, so even beginners can patch a tire with confidence.
Tips to Patch a Bike Tube Successfully
Avoid Common Mistakes
Many people want to repair a flat tire quickly, but rushing can lead to problems. When repairing a bicycle inner tube, each step should be carefully followed. Here are some of the most common mistakes and how to avoid them:
- Rushing. When repairing a bicycle inner tube, slow down and proceed step by step.
- Forgetting to sand the surface. Sandpaper or a sanding tool must be used to treat the area around the puncture. This helps the patch adhere better.
- Applying the patch to undried glue. The glue must be completely dry until the surface is matte before applying the patch. Undried glue will cause the patch to peel off.
Other mistakes include under-inflating or over-inflating the tube after the repair. Under-inflation can cause pinch flats and make the ride harder. Over-inflation can lead to a harsh ride and may even cause a blowout. They should always check the recommended pressure for their bicycle.
Tip: Reading the instructions in the patch kit helps avoid these mistakes and makes it easier to fix a flat.
Troubleshooting Patch Placement
Sometimes, the patch does not seal well or sits in the wrong spot. If this happens, they can try these steps:
- If the patch does not stick, they should check if the surface was clean and rough. They can remove the patch, clean the area again, and repeat the process.
- If air leaks after the repair, they should press the patch more firmly or use a roller to remove bubbles.
- If the patch is off-center, they can remove it and start over with a new patch.
SUNSOUL offers strong after-sales support. Their team responds quickly and helps customers solve problems, often within 72 hours. Many users feel confident knowing SUNSOUL stands behind their products. This support makes it easier for anyone to fix a flat and get back on the road.
The sticky side of a puncture repair patch should touch the tube. It is important to follow every step for a good repair. SUNSOUL patches stick well and work every time. People say they are happy with the results and the repairs last long. Checking the patch again helps stop leaks and keeps tires safe.
- Patches seal holes for a long time and can last years.
- SUNSOUL patches make tires stronger and help stop more flats.
FAQ
How to tell if a tire patch is firmly attached?
Press the tire patch firmly. If no air bubbles form and the patch feels secure, the repair is successful.
Can tire patches repair large holes in bicycle inner tubes?
Tire patches are best suited for repairing small holes. For larger holes, a larger patch should be used or the inner tube should be replaced.
What should someone do if the patch keeps peeling off?
- Clean the area again.
- Roughen the surface more.
- Use a new patch.
- Follow instructions closely for better results.